 All Posts (dstaley)
Re: Taming the beast- cooling system |
||
|---|---|---|
|
Guru
 
Joined:
2009/2/12 16:18 From Peoria, IL
Posts:
67
 |
Minor update- I was able to get this to the track in October. I drove it there- about 100 miles each way, she ran a 12.99 without modifications of any kind- and drove nicely home. I ran over a half dozen passes plus the round trip on a tank of gas. It was great!
Next year, I'm hoping to do a roller cam conversion and EFI. It should be good for another 75hp easily. Tuning the quadrajet has been great, but EFI won't be held back by an intake manifold that has to fit under my hood along with the quadrajet and stock single snorkel air cleaner assembly.
Posted on: 2010/11/28 0:50
|
|
 Transfer Transfer
|
||
Re: Taming the beast- cooling system |
||
|---|---|---|
|
Guru
 
Joined:
2009/2/12 16:18 From Peoria, IL
Posts:
67
 |
OK, pictures are fixed. I'm sorry for the mixup!
Test drive report: Night-and-day difference. I drove it to work today, and the temperatures were consistently under control in town. When I drove it around town after work, the ambient temperature was about 90 degrees F and engine temp was considerably lower than with the old radiator. I drove it on the highway long enough at 75 MPH to be confident that engine temperature would remain under control, and it was. Highway temperatures were steady at 184 degrees. I did notice some light detonation at heavy throttle. In town, engine temperature rose to a maximum of 195 degrees. I let it sit in the driveway and cool until after dinner with the hood up. After dinner I tinkered with the hood latch a bit (the left one had been releasing while driving) and took 4 degrees of timing out of it and made the following measurements: Baseline: 34* BTDC @ 3000 RPM W/O vacuum advance 14* at idle (825 RPM) W/O vacuum advance 29* at idle with vacuum advance (therefore I'm getting 15 degrees from the vacuum advance) 16" Hg vacuum at idle in PARK After adjustment: 10* at idle W/O vacuum advance 25* at idle with vacuum advance I took it for another drive. Detonation seemed to be gone, throttle response was FUN, and there was still no sign of overheating on the highway. In fact, temperatures DROPPED on the highway to 183*F. I noted that at 75 MPH the engine was humming along happily at 3500 RPM and wanted to go faster. Speed control was not easy as throttle response was immediate, so it was hard to avoid speeding up or letting off a little too far and dropping speed. I'm a little tempted to see how much MPG I can get out of it by tuning the carb, but EFI is calling my name. Now that I have the overheating under control, I think I have a sufficiently robust foundation to consider the jump. I'm also pulling together the bits for a roller cam conversion, which I'll probably try to do at the same time as the EFI conversion. Now that it's finally keeping cool enough, this is getting fun again!
Posted on: 2010/7/17 2:47
|
|
 Transfer Transfer
|
||
Re: Taming the beast- cooling system |
||
|---|---|---|
|
Guru
 
Joined:
2009/2/12 16:18 From Peoria, IL
Posts:
67
 |
Yes I did. I consulted my transmission guy and he told me that the radiator tank "cooler" is really more intended as a transmission heater to get it up to temp quicker in cold weather. I figured it didn't hurt anything and it didn't cost a penny more. He recommended I do it this way- plumb in the radiator and put the external cooler in series with (but downstream of) the radiator heat exchanger.
Posted on: 2010/7/16 14:58
|
|
 Transfer Transfer
|
||
Re: Taming the beast- cooling system |
||
|---|---|---|
|
Guru
 
Joined:
2009/2/12 16:18 From Peoria, IL
Posts:
67
 |
The new radiator arrived on Monday, and I took yesterday off to get it installed. DeWitts makes some quality stuff. The only real fitment problems I had was that the petcock interfered with the radiator support a little bit (a little love from a bench grinder took care of that), and the radiator filler neck position was correct for the overflow tube but the cap isn't in the correct position when it's fully locked into place. Pretty minor gripes really, and I'm not building a Bloomington Gold piece here, so all-in-all I'm satisfied. Delivery was 2 weeks instead of the quoted 2 days, so don't believe DeWitts when they tell you when it will ship. I had to make it up to the wife when the car was broken down in the garage for a week and a half after I told her it would be running.
Here's the finished transmission cooler mount on the newly powder coated core support: 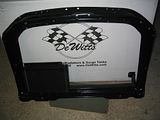 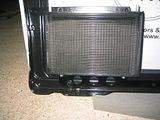 The new radiator: 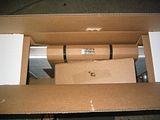 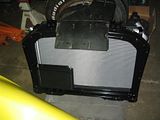 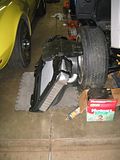 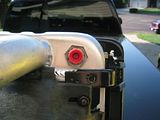 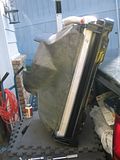 Putting it in the car: 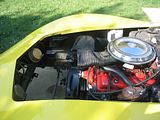 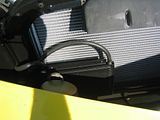 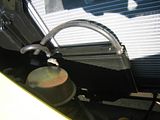 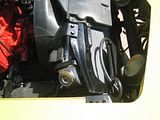 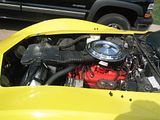 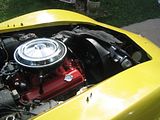 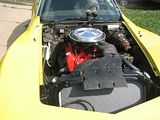 Ready to take a drive: 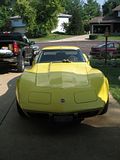 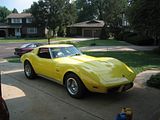 Hopefully tomorrow (Friday) night I can get some highway tests done to see if I've licked this problem or not.
Posted on: 2010/7/15 18:42
|
|
 Transfer Transfer
|
||
Re: Taming the beast- cooling system |
||
|---|---|---|
|
Guru
 
Joined:
2009/2/12 16:18 From Peoria, IL
Posts:
67
 |
Thank you, guys! I'm looking forward to another get together too, Matt. I don't know when I can make that happen, but it needs to happen sometime. Maybe we can try again to meet up with Curt.
Posted on: 2010/7/3 15:11
|
|
 Transfer Transfer
|
||
Taming the beast- cooling system |
||
|---|---|---|
|
Guru
 
Joined:
2009/2/12 16:18 From Peoria, IL
Posts:
67
 |
Hey guys,
In case anyone is interested, I thought I'd post up my work trying to address my overheating issues. Maybe it will help someone out there somehow. I haven't posted much of anything lately because my family has been on a debt payoff blitz, and we haven't budgeted anything towards car projects or hobbies. Lately I've been able to sell a bunch of stuff around the house and decided to use some of the proceeds to attack my overheating problem. Background I put this 409 SBC in the car in late 2008. I only had a couple weeks to do quick tuning & basic debugging before putting it up for the winter. In the spring and summer of 2009 I rebuilt the front & rear suspension & differential and TIG welded a new exhaust system (starting with a Magnaflow kit for the raw materials) and resumed tuning in earnest. In-town tuning went fine, and when I was feeling comfortable I took it on a road trip to Kansas City from central Illinois. On the road trip, it became evident that I had a cooling problem that didn't show up in town. That's right, at slow speeds/idle/in town it didn't overheat at all. I had done all the right things that had always worked for me before- new engine, new GM water pump, new hoses (yes the lower hose has the spring), flushed radiator, new H/D fan clutch, original pulleys, 50/50 water/antifreeze mix, new 180* thermostat (brass high-flow), iron water neck, original shroud, original air dam in place & serviceable, etc etc etc. I experimented with timing and watched the fuel mixture on the laptop (using an Innovate wideband A/F gauge) although I didn't have a timing light with me- AutoZone was kind enough to let me use one in their parking lot once. When I got to KC I borrowed Dad's timing light and bought a vacuum gauge to monitor about everything there was to monitor, but nothing helped. At 60 MPH, the temperature was steady. Below 60 MPH, all was good. Above 60, the temperature rose without bounds- I couldn't stand to run it over 235* so I usually slowed down when it crept up to 225-230*. Anyway, after going through the carb (working with Cliff Ruggles), it is now running sufficiently rich that the mixture is ruled out as a root cause, and it's still getting hot at highway speeds. Digging for root cause I've been digging through tons of old CorvetteForum.com and DigitalCorvettes.com posts trying to figure out what to do. I'm convinced that the aluminum heads are conducting enough extra heat into the coolant that the stock radiator's heat dissipation capacity has been exceeded. 60MPH must be the tipping point beyond which the engine's heat generation is beyond what the radiator can handle. I think I've pretty much eliminated any other variable. Time to get to work I just pulled the car out of storage in early June. I had to fix the rear window first (it was actually falling out!) so I upgraded it to a removable one. I finished this (other than getting some new or used halo panels) last week. Now that the window is done, I can get to work on the cooling. This week I ordered a new DeWitts radiator. I also swapped the H/D fan clutch for a Hayden Severe Duty one (as came on the '73-74 big blocks). While the original radiator is out of the car and the new one is on order, I took the time to do a little engine compartment cleanup. I powder coated the hinges, radiator/shroud brackets, core support bracing rod, the lower 90 degree brackets, and some misc. bolts in semigloss black. I had the core support powder coated semigloss black at a local shop. I also made some brackets for a new transmission cooler out of aluminum tonight and plan to powder coat them semigloss black tomorrow. I bought some new blackened stainless bolts to mount all this stuff from Totally Stainless and ordered new core support/shroud seals, radiator cushions, and a replacement air dam from Dr. Rebuild. I also washed out the engine compartment with soap & water, painted the frame crossmember with semigloss black RustOleum and painted the inner wheelhouse walls with Eastwood underhood black using my airbrush. Here are some pictures of all that: 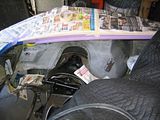 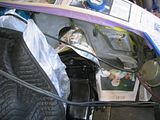 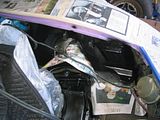 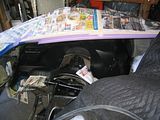 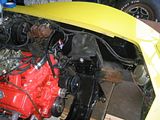 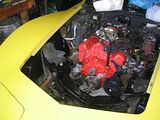 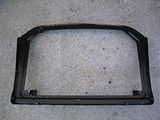 This weekend I need to drain the block, powder coat the transmission cooler brackets, make up some steel lines to plumb as much of the new cooler lines as possible with hard lines, and maybe start mounting the amplifiers (I never got around to it before we decided to get out of debt, I already had them) in the jack/storage compartment if I have time. I can't do a lot more until the radiator shows up.
Posted on: 2010/7/3 6:25
|
|
 Transfer Transfer
|
||
Re: Engine Work on the 405. |
||
|---|---|---|
|
Guru
 
Joined:
2009/2/12 16:18 From Peoria, IL
Posts:
67
 |
Wow, I'm so sorry to hear about your grandmother. We'll add your family to our prayer list. It's getting really long these days.
We would love to see the pictures whenever life finally slows down and you can breathe & resume your hobby again. I hope your weekend goes well!
Posted on: 2010/7/3 5:16
|
|
 Transfer Transfer
|
||
Re: Removable Rear Window Conversion |
||
|---|---|---|
|
Guru
 
Joined:
2009/2/12 16:18 From Peoria, IL
Posts:
67
 |
Quote:
Nawww, I don't mind at all. The seller was joecola19. I think he was just an individual selling stuff he didn't end up using. He had a pair of the '68 halo panels that I passed up since they pretty much require the bezels to look right, but the '70-72 ones look OK right out of the box (don't require the bezels that aren't being reproduced). Quote:
If I came across a pair of bezels for a fair price, I'd jump on a deal like that if I didn't decide to just trim my own!
Posted on: 2010/7/3 5:12
|
|
 Transfer Transfer
|
||
Re: What is the best C3 year to buy? |
||
|---|---|---|
|
Guru
 
Joined:
2009/2/12 16:18 From Peoria, IL
Posts:
67
 |
What did you end up getting?
Posted on: 2010/6/29 2:01
|
|
 Transfer Transfer
|
||
Re: Engine Work on the 405. |
||
|---|---|---|
|
Guru
 
Joined:
2009/2/12 16:18 From Peoria, IL
Posts:
67
 |
Any update, Matt? How's it going?
Posted on: 2010/6/29 1:59
|
|
 Transfer Transfer
|
||
Re: Removable Rear Window Conversion |
||
|---|---|---|
|
Guru
 
Joined:
2009/2/12 16:18 From Peoria, IL
Posts:
67
 |
I was able to pull this off. A guy in Springfield, IL sold me a window, the lower plastic and aluminum wedge receptacle thingys, and a couple used latches for a good price. The broken springs in the latches drove me nuts, so I worked with a guy on eBay and got a pair of new reproduction latches for another $100.
I bought a new rear window seal from Willcox (I kind of got gouged on the shipping, but only for a few bucks) and made the rest of the pieces I needed. I ended up spending about $300 total, although I don't have the halo panels yet- those will probably set me back about $150 or so shipped unless I can find a deal on them somehow/somewhere.
Posted on: 2010/6/29 1:54
|
|
 Transfer Transfer
|
||
Re: C3 Tech - Corvette Publications |
||
|---|---|---|
|
Guru
 
Joined:
2009/2/12 16:18 From Peoria, IL
Posts:
67
 |
Very nice list, but quite incomplete without mentioning some other staples of C3 work:
Need LOTS of David Vizard references How can you leave out all the works of Lars Grimsrud? Finally, what about a Corvette Guru membership?
Posted on: 2010/6/29 1:49
|
|
 Transfer Transfer
|
||
Anyone here done Megasquirt EFI? |
||
|---|---|---|
|
Guru
 
Joined:
2009/2/12 16:18 From Peoria, IL
Posts:
67
 |
Hey guys,
I'm badly wanting to convert my '76 to EFI using a tunnel ram based EFI intake manifold I just picked up on a Camaro forum I'm on occasionally. Do any of you have any experience with the Megasquirt controller/system? This is looking like a strong contender for me. I don't think I would have any trouble with the assembly and I have the necessary tools for the assembly and troubleshooting. What do you think?
Posted on: 2010/6/3 1:42
|
|
 Transfer Transfer
|
||
Re: Removable Rear Window Conversion |
||
|---|---|---|
|
Guru
 
Joined:
2009/2/12 16:18 From Peoria, IL
Posts:
67
 |
I would love to do this too, but the $$$ just isn't available for awhile. It's too bad, because my rear window is rattling around loose and only held in by my interior trim. I need to fix it right away, which would be oh-so-convenient if I was prepared to do the update now.
I am highly suspicious that it's all Durango Boy's fault. He sold me a fantastic subwoofer that has been highly stressful to the rear window seal since it is stressing my rear deck, but I sure don't mind. I enjoyed every vibration it created. The old seal must be getting hard and old by now.
Posted on: 2010/6/3 1:38
|
|
 Transfer Transfer
|
||
Re: What is the best C3 year to buy? |
||
|---|---|---|
|
Guru
 
Joined:
2009/2/12 16:18 From Peoria, IL
Posts:
67
 |
The early C3's (up to '73) are more popular but are more expensive, which reduces the "bang for the buck" value. I'd stay away from the 80-82 models because of the late model rear differential design, it was weaker than the earlier cast iron one without the batwings.
I'm personally partial to the flat deck behind the cabin, but if you like the bubble rear window, a 78-79 would be good. If you like the flat rear deck, look at something up to a '77. If you want a convertible, you're looking at a 75 or earlier. Big blocks drop into any of them without one causing more hassle than the others, with the possible exception of some of the later ones having a more difficult to deal with transmission crossmember- take a look at it to make sure you have a spot for the exhaust to pass through on both sides, and it's nice if the crossmember is bolted in rather than welded in place. So, if you're wanting to swap engines, any year will do.
Posted on: 2010/4/25 3:27
|
|
 Transfer Transfer
|
||
Re: Electric Headlight Conversion |
||
|---|---|---|
|
Guru
 
Joined:
2009/2/12 16:18 From Peoria, IL
Posts:
67
 |
Very impressive work.
Any chance you can post the drawings/plans? I might like to copy them (for my own car) if you don't make them commercially.
Posted on: 2010/3/14 22:42
|
|
 Transfer Transfer
|
||
Re: Better Gauge Illumination. |
||
|---|---|---|
|
Guru
 
Joined:
2009/2/12 16:18 From Peoria, IL
Posts:
67
 |
You have a fuel warning light? Wow.
Posted on: 2009/8/27 0:46
|
|
 Transfer Transfer
|
||
Re: Odd Signal and Light Symptoms. |
||
|---|---|---|
|
Guru
 
Joined:
2009/2/12 16:18 From Peoria, IL
Posts:
67
 |
Do you think you have a couple wires melted together or something?
Posted on: 2009/8/20 3:22
|
|
 Transfer Transfer
|
||
Re: Better Gauge Illumination. |
||
|---|---|---|
|
Guru
 
Joined:
2009/2/12 16:18 From Peoria, IL
Posts:
67
 |
A PWM (pulse width modulation) circuit could be made to dim the lights, which turns the LEDs off and on at a high speed, varying what percentage of the time the lights are off.
DB, do you have any idea how much current total the interior LED's consume?
Posted on: 2009/8/20 3:21
|
|
 Transfer Transfer
|
||
Re: My Rear Differential and Suspension Rebuild Chronicles |
||
|---|---|---|
|
Guru
 
Joined:
2009/2/12 16:18 From Peoria, IL
Posts:
67
 |
Ha, sometimes it seems like I haven't.
Yeah, there are quite a few things I haven't disturbed. Headlights, fuel tank, body mounts, windshield wipers, interior is mostly unchanged (other than fixing the horn and the stereo install). I'm still running the stock wheels, and for the most part the external surfaces are all unchanged. Thank you for the compliments guys, I just hope this thread is helpful to someone in some way.
Posted on: 2009/8/2 13:26
|
|
 Transfer Transfer
|
||
Re: My Rear Differential and Suspension Rebuild Chronicles |
||
|---|---|---|
|
Guru
 
Joined:
2009/2/12 16:18 From Peoria, IL
Posts:
67
 |
Yep, on Thursday- depending on the weather forecast. Phillip and I are coming for a few days of fishing with his grandpa if the weather forecast looks clear. It'll be a rare day trip- will you be available in the afternoon?
It has already been postponed once, so we'll see...
Posted on: 2009/8/2 4:34
|
|
 Transfer Transfer
|
||
Re: My Rear Differential and Suspension Rebuild Chronicles |
||
|---|---|---|
|
Guru
 
Joined:
2009/2/12 16:18 From Peoria, IL
Posts:
67
 |
Well, I wrapped up the last few details on this today. The crappy french locks I bought from a restoration vendor just twisted into pretzels when I torqued them to spec, so I replaced then with some outstanding stainless steel ones from Gary. No problems whatsoever. The exhaust has been fabricated- starting with a Magnaflow kit originally for a '74 big block car with stock manifolds. I need to get pictures while it's on a lift, but until then here are a few while on jackstands in front of my house:
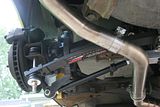 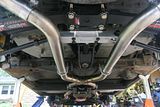 I took it in for an alignment, and the alignment tech said my lower ball joints needed replaced. He was right, they were bad. So, I gave the front end the full treatment: New springs New Bilstein sport shocks (match the rear) New upper and lower ball joints New upper and lower control arm bushings New sway bar end links with polyurethane bushings While I was in there I cleaned up the tie rod ends and took care of an issue with the power steering control valve. Here's an "after" shot: 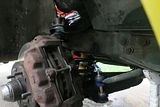 The technician had no trouble with the alignment after all that was done. He was quite complimentary about the car, which is quite a statement since he does the alignments for all of the local autocross racers. I've been marching down my to-do list quickly lately. I've fixed the horn, installed new tires, and a ton of little stuff. I still have to tune the carburetor and build a mount for the amplifier, and I'd like to replace the carpet and seat covers, but otherwise the car is just the way I'd like to keep it.
Posted on: 2009/8/2 2:14
|
|
 Transfer Transfer
|
||
Re: Odd Signal and Light Symptoms. |
||
|---|---|---|
|
Guru
 
Joined:
2009/2/12 16:18 From Peoria, IL
Posts:
67
 |
Seems like a relatively straight forward thing to check. With the bulb/socket out of the lens, measure the voltage on the ground pin with respect to the engine block. If the voltage on the ground wire/pin varies by more than about 1/2 volt, you have a grounding problem. If possible, check the base of the bulb (the cylindrical part, I'm not referring to the contacts) for this measurement.
If ground voltage is stable (less than a half volt of fluctuation) while in operation, check the voltage on each of the supply wires at the light socket. Note any anomalies...
Posted on: 2009/7/30 20:20
|
|
 Transfer Transfer
|
||
Re: My Rear Differential and Suspension Rebuild Chronicles |
||
|---|---|---|
|
Guru
 
Joined:
2009/2/12 16:18 From Peoria, IL
Posts:
67
 |
Thanks, guys. Yeah, no question that what Gary gets for these things is 100% earned.
I have well over $1000 just in parts, so whoever is buying them for $800 isn't getting the best parts, and that rebuilder has got to be leaving a lot of things to chance. For example, my left (ring gear side) bearing cap had 0.0035" gap between the bearing race and the cap, so the race was totally unsupported. A rebuilder may or may not have taken the pains to get the best possible pattern, but then again they have far more experience than I and could have done it much more quickly. Nothing but 100% USA-made Timken bearings in this differential. Most rebuilders would have thrown the original bolts back in instead of researching to find much better bolts in every location. The tuned posi is a major advantage, and Gary points out that none he is aware of except him and Mike bother to even check side yoke end play, let alone precision grind them to a tight permissible range. Of course, for $800 you'll never get a polished carrier either. Last, this one is now powder coated- a step that none of the rebuilders I'm aware of offer as standard. I'm glad I went through it myself but at the same time I'm sure glad it's done. I thought building engines was tedious with all the careful hand-fitting (and it is), but these should be just as carefully prepared. They're nothing like a 9" Ford that are tough enough to stand up without all the careful prep with just a quick set of quality bearings, proper gear setup, and good lube.
Posted on: 2009/6/10 2:16
|
|
 Transfer Transfer
|
||
Re: My Rear Differential and Suspension Rebuild Chronicles |
||
|---|---|---|
|
Guru
 
Joined:
2009/2/12 16:18 From Peoria, IL
Posts:
67
 |
I've been steadily working on this projects for a few weeks and I finally have some tangible progress.
After 22 iterations, I was finally able to zero in on a final acceptable pattern with backlash within acceptable parameters. 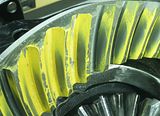 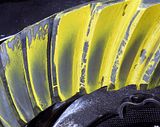 The final fill-up and leak was an exciting event for me. I left it like this for about 24 hours. No leaks!!! 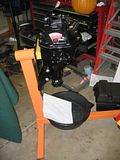 A few days later, I took it back out to the car and it became very comfortable in its new home. Lots of new parts, almost like bling: 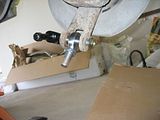 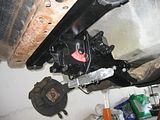 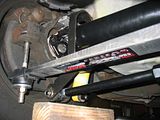 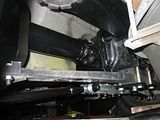 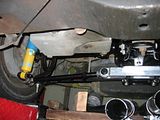 The big challenge now is making the new exhaust kit from Magnaflow fit my car with the drive shaft safety loop, headers, and new rear suspension. The safety loop and winding around the transmission seem to be the biggest obstacles. More soon...
Posted on: 2009/6/9 19:33
|
|
 Transfer Transfer
|
||
Re: Power Steering Issues |
||
|---|---|---|
|
Guru
 
Joined:
2009/2/12 16:18 From Peoria, IL
Posts:
67
 |
I bought my most recent one from a local store- either AutoZone or O'Reilly's because it came with a lifetime warranty. I just consider it a lifetime supply of valves since even GM never really "got them right". I've never personally torn one open but I have replaced mine more than once in less than 10,000 miles.
Posted on: 2009/6/3 3:37
|
|
 Transfer Transfer
|
||
Re: Smarter strut rods |
||
|---|---|---|
|
Guru
 
Joined:
2009/2/12 16:18 From Peoria, IL
Posts:
67
 |
Quote:
Thank you, sir. I've wanted a mill for a long time, I was fortunate enough to be able to pick one up a couple years ago. I've learned a lot with it and I get a lot of good out of it these days. My little two car garage won't swallow much more than it has now either; I know just what you mean.
Posted on: 2009/5/11 4:04
|
|
 Transfer Transfer
|
||
Re: Smarter strut rods |
||
|---|---|---|
|
Guru
 
Joined:
2009/2/12 16:18 From Peoria, IL
Posts:
67
 |
Quote:
Whoa, that worked perfectly!  I've updated both posts. Thank you, Matthew! I've updated both posts. Thank you, Matthew! 
Posted on: 2009/5/11 4:01
|
|
 Transfer Transfer
|
||
Re: My Rear Differential and Suspension Rebuild Chronicles |
||
|---|---|---|
|
Guru
 
Joined:
2009/2/12 16:18 From Peoria, IL
Posts:
67
 |
I was able to finish the machining of the center bracket but I still have to finish shaping the rounded ends.
 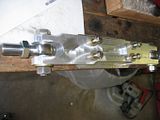 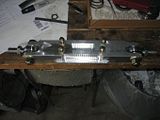 I was also able to get some powder coating done. I had to leave before the differential cover could cool, but it was in the oven too. 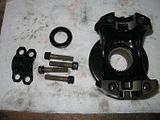
Posted on: 2009/5/11 2:59
|
|
 Transfer Transfer
|
||
Re: Smarter strut rods |
||
|---|---|---|
|
Guru
 
Joined:
2009/2/12 16:18 From Peoria, IL
Posts:
67
 |
Thanks, guys.
I got a little bit more done over the weekend. I got all of the machining done on the strut rod bracket, now all I need to do is spend some time rounding the ends (by hand, unless I pick up the belt sander on Tuesday that I've been considering) and maybe powder coat it black. I still haven't figured out how to post pictures on this site well. I'm sorry that the pictures come out in unpredictable sizes. Here are some pictures of the machining: The 3" x 1-1/2" x 2' 6061-T6511 bar I started with: 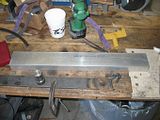 First I machined the bar to length and cut the slots for the rod ends: 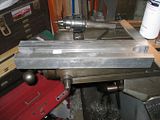 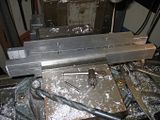 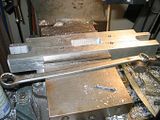 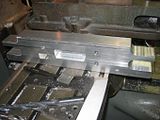 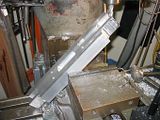 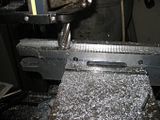   I also got the chromoly strut rod tubes and all of the bolts powder coated (chassis black), along with a bunch of other rear suspension/differential parts. I might actually have this thing back together some time this year!
Posted on: 2009/5/10 21:10
|
|
 Transfer Transfer
|
||
Re: My Rear Differential and Suspension Rebuild Chronicles |
||
|---|---|---|
|
Guru
 
Joined:
2009/2/12 16:18 From Peoria, IL
Posts:
67
 |
Yes, it's about 1/2" lower than stock.
It occurred to me that my bracket- or even the stock one- could be shimmed with a machined block to lower the pivot positions. Using this idea all this work I did may have been over-the-top, but the machined part sure looks cool. It's almost done. I'll post pictures soon.
Posted on: 2009/5/9 15:22
|
|
 Transfer Transfer
|
||
Re: Smarter strut rods |
||
|---|---|---|
|
Guru
 
Joined:
2009/2/12 16:18 From Peoria, IL
Posts:
67
 |
Quote:
I'll have to see what the total cost is when it's all done. The aluminum billet costs about $45. Spherical rod ends are about $22 each + shipping, the tubes are $13 plus shipping. High quality fasteners & related hardware add up to about $40 or so. The center bracket and welding the strut rods I could probably do as a kit, you could buy all the rest yourself if you want. I don't know how much time I'll end up spending on the mill to get the bracket made up since I haven't done one yet. I have the aluminum block but I haven't started making any chips yet.
Posted on: 2009/5/8 17:48
|
|
 Transfer Transfer
|
||
Re: Smarter strut rods |
||
|---|---|---|
|
Guru
 
Joined:
2009/2/12 16:18 From Peoria, IL
Posts:
67
 |
Posted on: 2009/5/8 17:40
|
|
 Transfer Transfer
|
||
Re: My Rear Differential and Suspension Rebuild Chronicles |
||
|---|---|---|
|
Guru
 
Joined:
2009/2/12 16:18 From Peoria, IL
Posts:
67
 |
Thanks a ton, Bill.
The rear end work is a pre-emptive action on my part, as it hadn't really totally failed yet but I'd sure like to have non-broken parts when I do this rather than have to buy all new. At least I'm able to use my old housing, pinion yoke, spider gears, and crosspin retention bolt. Apparently that's about it. EDIT: Sorry, I forgot to answer your questions! I found the spherical rod ends cheaper at Summit, and they are Competition Engineering- more of a name brand than the ones at Speedway, and I've heard a few rumblings about the ones Speedway carrying being offshore made without much history on quality control. QA1 rod ends aren't what they once were, the finish on the outside has changed somewhat at the same time as quality problems have crept up, possibly signaling a change in supplier or process, and I couldn't justify the cost of Aurora ends without trying these first. These were only about $22 each. Now that you mention it, I think I bought the tubes from Coleman Racing rather than Speedway. The guy that gave me the info I needed to get started bought his stuff from Speedway, so that's where I started shopping, but now that I think about it I'm almost postive I got them from Coleman Racing. Here's a preview of the new center bracket for the camber (strut) rods. 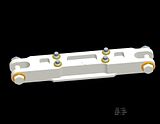 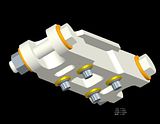
Posted on: 2009/5/8 17:26
|
|
 Transfer Transfer
|
||
Re: Any Repair issues going on? |
||
|---|---|---|
|
Guru
 
Joined:
2009/2/12 16:18 From Peoria, IL
Posts:
67
 |
Quote:
I can do that. Here ya go! New rear suspension resto-modification thread
Posted on: 2009/5/8 4:04
|
|
 Transfer Transfer
|
||
Re: My Rear Differential and Suspension Rebuild Chronicles |
||
|---|---|---|
|
Guru
 
Joined:
2009/2/12 16:18 From Peoria, IL
Posts:
67
 |
Once the new posi carrier arrived, the polishing- round two- could commence. They have certainly improved their processes in the last 30 years. The casting was much cleaner, and it was obvious they had made a few changes to the mold designs as the parting lines had moved.
Before polishing: 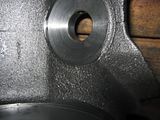 After: 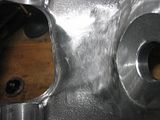 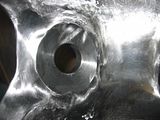 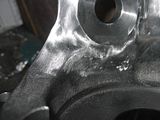 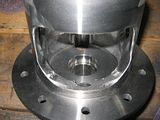 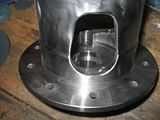 A spanner wrench-like tool is needed to rotate the case. I made another one using another surplus piston pin and some more 3/8 x 2" bar stock. 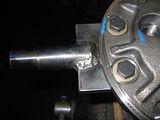 Next, I spent 2-3 days trying to tune the clutches, including trying to do it "by feel" (I never really figured out what I was looking/feeling for) and then by measuring the lash between the side gears and the carrier spider gears with the clutches compressed by a screwdriver wedged between the side gear and the crosspin. 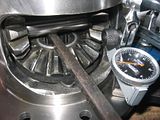 The resulting shim thickness range I kept coming up with, using both methods- between .050 and .055- seemed far too much to Gary, so I gave up and shipped it to him. He knows what to look for and I must have been missing something. That brings me up to today. I've about finished the design of my center mounting bracket, so I'll post up some Pro/E model images soon.
Posted on: 2009/5/8 3:55
|
|
 Transfer Transfer
|
||
Re: My Rear Differential and Suspension Rebuild Chronicles |
||
|---|---|---|
|
Guru
 
Joined:
2009/2/12 16:18 From Peoria, IL
Posts:
67
 |
So, I ordered a new case. In the mean time, I ordered threaded tubes suitable for camber rods from Speedway, spherical rod ends from Summit, and misc. hardware (including two very large stainless steel nuts) from McMaster-Carr. I bored out the nuts just large enough to slip over the threaded tubes so that the alignment shop has something to grab onto that won't rust when it gets scarred up.
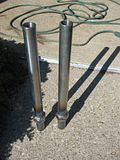 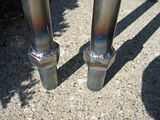 I'll powder coat these at my next opportunity. Next, as Gary instructs I shaved the heads off of five of my ring gear bolts and made dowels out of them. 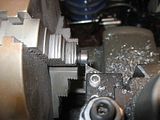 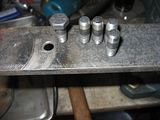 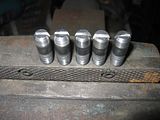 This was also a good time to finish up the halfshafts, with a nice black powder coat and new solid U-joints. 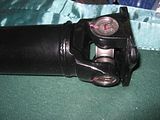 It also seemed like a good time to clean up the crossmember, give it a coat of Rust Bullet (my favorite, somewhat like POR-15), a coat of semigloss Rust-Oleum paint, and new bushings. 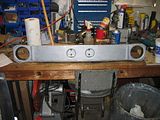 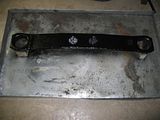
Posted on: 2009/5/8 3:32
|
|
 Transfer Transfer
|
||
Re: My Rear Differential and Suspension Rebuild Chronicles |
||
|---|---|---|
|
Guru
 
Joined:
2009/2/12 16:18 From Peoria, IL
Posts:
67
 |
Powder coating is absolutely magical!
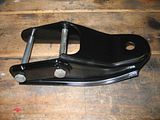 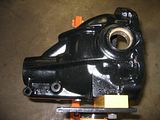 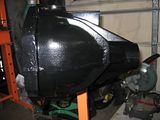 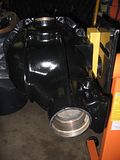 Just like when building an engine, and especially after sandblasting, it's crucial to clean the housing thoroughly before any further assembly or work with the other clean parts. 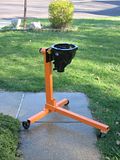 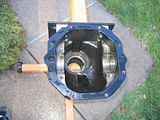 Also, this is a good time to drill and tap the drain plug hole. 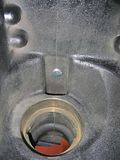 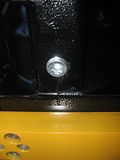 Now, at about this time I spent two or three days polishing the differential carrier inside and out for fatigue resistance. Unfortunately, only after this was finished Gary noticed a significant ridge in the crosspin bore- my original case was toast. 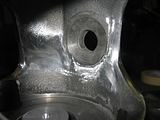
Posted on: 2009/5/8 3:16
|
|
 Transfer Transfer
|
||
Re: My Rear Differential and Suspension Rebuild Chronicles |
||
|---|---|---|
|
Guru
 
Joined:
2009/2/12 16:18 From Peoria, IL
Posts:
67
 |
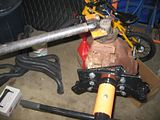
Add a few feet of pipe and the pinion nut doesn't stand a chance.
 Once I got the guts out of the housing, I sent the case to a machine shop so that they could degrease it in their tank. While they had it, I had them face the gasket surface since GM upset it pretty badly when they stamped the codes on the bottom of the rear flange. Here's what it looked like when I got it back: 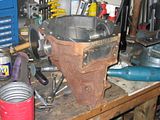 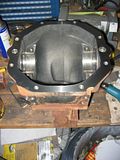 The edges still needed deburred, so I did this and chamfered all the bolt holes. 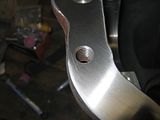 I masked all of the machined surfaces that accept either seals or bearing races in preparation for sandblasting. 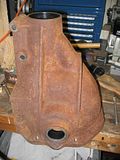 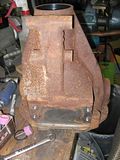 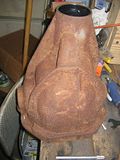 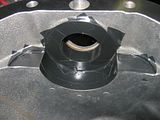 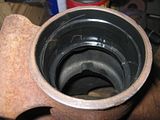 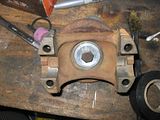 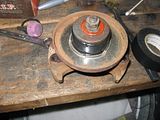
Posted on: 2009/5/8 2:57
|
|
 Transfer Transfer
|
||
My Rear Differential and Suspension Rebuild Chronicles |
||
|---|---|---|
|
Guru
 
Joined:
2009/2/12 16:18 From Peoria, IL
Posts:
67
 |
OK guys, I like seeing photo journals of other people's projects (especially when I'm considering doing the same thing) so I figured I'd post up some progress shots as I go through my rear suspension.
I pulled the original 52,000 mile, 180hp L48 350 last fall and replaced it with a freshly built 409 SBC. Simulations suggest I can expect about 415hp, 485 ft-lbs torque from the new engine. This won't happen until I upgrade the exhaust (basic local muffler shop dual 2" crimp bent tubing and stock type mufflers) with a new Magnaflow stainless steel 2-1/2" mandrel bent system with X-pipe. I didn't want to install the new exhaust until I've put to bed any concerns with the rear differential. With the new engine but old exhaust, there's a strong vibration at WOT and signs that the U-joints are binding. Time to take care of it before I am replacing broken parts. Once the new engine was installed, I asked Gary what concerns I should have about the rear suspension and differential while I replace the U-joints and he suggested that I might check a few things like side yoke end play. I'm replacing the rear spring (original 9-leaf for new VB&P 330 lb/in composite), new shocks all the way around (matching Bilstein Sport), new gears, differential bearings, solid U-joints, H/D halfshaft yoke conversion, new camber (strut) rods made from chromoly tubing and spherical rod ends, and I'll make a billet aluminum center strut rod bracket. That's when all the "fun" began. First, pull the old parts: 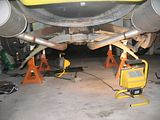 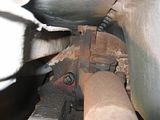 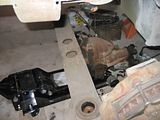 Once it was out, it was time to make an adapter so that I could comfortably mount the differential housing to the engine stand. 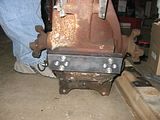 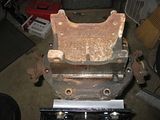 Now, to check end play on the side yokes: 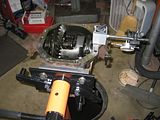 Uh-oh, way over spec: 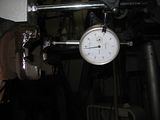 Once I pulled the crosspin, it was easy to see that it wasn't only the yokes that are bad. 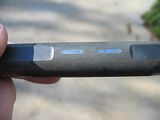 This car has had an easy life, and is fairly low in miles- these things were just plain inadequate by design. Fortunately, Gary (GTR1999) knows exactly what to do. Next, I had to make a spanner wrench to get the yoke loose. I made one out of some scrap 3/8 x 2" bar stock I had lying around plus an old smallblock piston wrist pin. 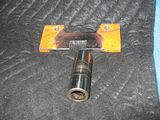 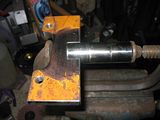 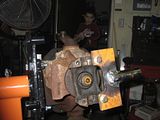
Posted on: 2009/5/8 2:38
|
|
 Transfer Transfer
|
||
Re: Odd Signal and Light Symptoms. |
||
|---|---|---|
|
Guru
 
Joined:
2009/2/12 16:18 From Peoria, IL
Posts:
67
 |
Have you checked how good the ground to your headlights is? If you have upgraded the headlights, did you upgrade the ground wire too?
Posted on: 2009/5/8 1:54
|
|
 Transfer Transfer
|
||
Re: Tracking Down Marker Problems. |
||
|---|---|---|
|
Guru
 
Joined:
2009/2/12 16:18 From Peoria, IL
Posts:
67
 |
What's a one-way resistor? Do you mean a diode?
Posted on: 2009/5/8 1:51
|
|
 Transfer Transfer
|
||
Re: Smarter strut rods |
||
|---|---|---|
|
Guru
 
Joined:
2009/2/12 16:18 From Peoria, IL
Posts:
67
 |
Just a quick update, I changed direction again. A friend of mine is experienced in weld fatigue analysis, and after much conversation and a little simulation I decided to ditch the design I had and am now going to make the center bracket thing from solid aluminum billet.
The Pro/E model is almost done, so I'll be making chips soon. There's no rush since I'm still working on tuning this #@&#(*&_**@#)( posi anyway. I haven't even started to set up gears yet, and I hear that's a joy too- at least the measurements are fairly straightforward, at least compared to posi clutch tuning!
Posted on: 2009/5/7 3:18
|
|
 Transfer Transfer
|
||
Re: Tracking Down Marker Problems. |
||
|---|---|---|
|
Guru
 
Joined:
2009/2/12 16:18 From Peoria, IL
Posts:
67
 |
Can you check the bulb- with it out of the car, what do you get when you measure the resistance between each of the three bulb contacts (without the harness connected to the bulb)?
Are there any schematics available online?
Posted on: 2009/5/7 3:11
|
|
 Transfer Transfer
|
||
Re: Debating Rocker Ratio. |
||
|---|---|---|
|
Guru
 
Joined:
2009/2/12 16:18 From Peoria, IL
Posts:
67
 |
If it helps any, I ran extensive simulations on my 409 SBC and found very little benefit to 1.6 ratio rocker arms. I was using engine analyzer plus. My combination is limited by the intake manifold (Performer AirGap, non-RPM) and no additional lift or duration will help.
I'm betting that if you're using the same manifold design (and I think you were) you'll find yourself in the same position.
Posted on: 2009/5/7 3:08
|
|
 Transfer Transfer
|
||
Re: Curt's new Hydrobooster. |
||
|---|---|---|
|
Guru
 
Joined:
2009/2/12 16:18 From Peoria, IL
Posts:
67
 |
It sounds like I should add this to my "to do" list as well.
DB, do you use new or rebuilt boosters?
Posted on: 2009/5/7 3:05
|
|
 Transfer Transfer
|
||
Re: Any Repair issues going on? |
||
|---|---|---|
|
Guru
 
Joined:
2009/2/12 16:18 From Peoria, IL
Posts:
67
 |
I'm going through my rear differential now. Apparently GM's design was a bit less than adequate, but thankfully Gary and Mike have figured out what it takes to patch them up. With their help I'll be back in the saddle, hopefully before the summer is over.
Posted on: 2009/5/7 2:57
|
|
 Transfer Transfer
|
||
Re: Rear Gear Swap |
||
|---|---|---|
|
Guru
 
Joined:
2009/2/12 16:18 From Peoria, IL
Posts:
67
 |
I'll second the recommendation. I'm going through mine now and Gary has been a gentleman and a professional. He has held my hand through the whole thing and I'd be far over my head without his help, and he has been patient and kind the whole time.
Posted on: 2009/5/7 2:54
|
|
 Transfer Transfer
|
||
Re: Smarter strut rods |
||
|---|---|---|
|
Guru
 
Joined:
2009/2/12 16:18 From Peoria, IL
Posts:
67
 |
Based on those pics and a couple from other forums, I've decided to lower my pivot points a little bit. Thanks for the tip!
I designed a new strut rod bracket and machined part of it tonight. I bought a plate on eBay to finish it up, and with any luck it will be here this coming week. I'll post up pics of it when I get it built. Thank you again!
Posted on: 2009/4/19 2:45
|
|
 Transfer Transfer
|
||
Re: Tracking Down Marker Problems. |
||
|---|---|---|
|
Guru
 
Joined:
2009/2/12 16:18 From Peoria, IL
Posts:
67
 |
Do you suppose the voltage is carrying over from one circuit to the other through the harness rather than through the bulb?
If you can, try disconnecting the front clip harness at the firewall and try your tests again. I'll bet you find the interconnection between bright and dim circuits are somewhere inside the "cab".
Posted on: 2009/4/19 2:42
|
|
 Transfer Transfer
|
||


