


|
|
|
|
|
Register To Post |

| Matatk | 1989 L98 Engine rebuild - Part 2: prep and install | ||
|
Webmaster
 
|
Ok, for anyone who recalls, the block has been back from the builder for about a week now. I unfortunately don't have pictures during the rebuild process itself because they don't take any
 I spent several hours over the past couple days making sure things are installed and torqued properly so I can drop it in without too much issue. I spent several hours over the past couple days making sure things are installed and torqued properly so I can drop it in without too much issue.As I got it:  Put it up on the hoist so I could install the flexplate. Here you see the rear main seal:  On this particular build, I need a 153 tooth neutral balanced flexplate. This is due to the engine being internally balanced. These are hard to get cheap, so most builders will take an externally balanced unit and grind off the weights. I personally called scat and this is what the phone tech told me is their recommended procedure:  The stock flexplate has a stamp for direction, aftermarket may not. If not, the "humps" for the torque converter bolts should be protruding out towards the transmission:  You can see I used new bolts for that, they were Mr Gasket brand. They also come with star washers. They should be torqued to 74 ft lbs. I also used a small amount of blue thread locker on them. It's not specified in the FSM, but many aftermarket companies recommend it. You should also use thread locker on the torque converter bolts when reinstalling them. When installing the flexplate, do not use the bolts to pull the flexplate in. Use a rubber mallet or deadblow hammer and gently tap it on. When torquing the bolts, use a star pattern similar to tightening lug nuts on a wheel. Also, if you look at the rear of the block, you can see I sanded off the paint from the surface that connects to the bellhousing. This should be clean. Next I was tackling the water pump. You can see there is a coolant tube that needs to be transferred over as well as a bolt in the top:  Here it is installed. ARP thread sealant on all the bolts, torqued to 30 ft lbs:  I cleaned and installed a new gasket on the fuel pump block off plate. The longer stud goes in the front for a bracket:  I then cleaned and reattached the oil cooler lines. You can see how is secures to the oil pan with several studs. The oil pan should be torqued to 17 ft lbs:  Oil temp sensor and the bolt above it is the ground point. This should be sanded bare of any paint:  Knock sensor and drain shield on the passenger side of the block:  Coolant sensor in the head. The little bracket underneath secures the wire when installed:  All of the sensors have a small amount of ARP sealant since they are going into coolant passages and we don't need any leaks  Next was the intake manifold. Gaskets were placed on the heads and lined up using a small amount of silicone sealant around the water passages to hold it in place. Once tacky and stuck on, I placed a bead of the right stuff (3/8" high) on the china wall that I had slightly dimpled. Intake manifold was dropped on and the bolts were inserted. All bolts had been cleaned with a wire wheel and coated with ARP sealant. Bolts were torqued in two stages. The FSM doesn't call for this, but I prefer it. I did 25 ft lbs in the correct order then 35 ft lbs. If you need the order let me know. You can also see the front coolant passage installed with a sensor underneath. If you look closely, you can see a pipe plug in the manifold next to these. This is a multi year manifold and on 85-88 cars that's were the cold start injector sensor would go. Also, you can see we taped up the ports to prevent debris from falling in:  As a last little note I removed the harmonic balancer bolt. The engine will be installed with it on the crank snout, but the pulley still has to go on once in the car, so it's easier to pull the bolt out now. Just a little time saver. I also installed the motor mounts and will try to drop it that way first. Here are a couple little mock-up shots before it was done:    Looking forward to getting it all done! Matthew |
||
Posted on: 2010/5/16 13:36
|
|||
|
_________________
2002 EBM convertible, Magnusson supercharger, cam, headers, etc. 1989 Corvette...RIP |
|||
 Transfer Transfer
|
 
|
||

| Livin_the_dream | Re: 1989 L98 Engine rebuild - Part 2: prepping for install | ||
|
Senior Guru
 
|
looking good bet you cant wait to get it on the road!
|
||
Posted on: 2010/5/16 13:40
|
|||
|
Transfer
|
|
||
| joeld | Re: 1989 L98 Engine rebuild - Part 2: prepping for install | ||
|
Guru
 
|
Looks good Mat!
Those little details take a lot of time and effort, but worth it. I know you have done a lot of research on this, but I would like to pass along just one tip. With that new flex plate, I would check the starter engagement gap prior to setting the engine in. Much easier with the engine on the stand. What brand water pump did you go with? I'm going to be installing a new pump in the next few days when I replace head gaskets. Good luck with the new engine Joel |
||
Posted on: 2010/5/16 16:53
|
|||
|
_________________
1989 Coupe,L98 automatic |
|||
|
Transfer
|
|
||
| sliding | Re: 1989 L98 Engine rebuild - Part 2: prepping for install | ||
|
Senior Guru

|
Looks great! Keep us posted on yor progress!
|
||
Posted on: 2010/5/16 17:40
|
|||
|
_________________
'90 L98 auto with a lot of mods |
|||
|
Transfer
|
|
||
| bogus | Re: 1989 L98 Engine rebuild - Part 2: prepping for install | ||
|
Grand Imperial Pooh-Bah
 
|
Awesome!!!
|
||
Posted on: 2010/5/16 18:23
|
|||
|
_________________
The single biggest problem with communication is the illusion that it has taken place. - George Bernard Shaw Education is the best tool to overcome irrational fear. - me |
|||
|
Transfer
|
|
||
| flyboy | Re: 1989 L98 Engine rebuild - Part 2: prepping for install | ||
|
Elite Guru
 
|
Nice!
|
||
Posted on: 2010/5/16 19:42
|
|||
|
_________________
'91coupe, LT4Hotcam, some other stuff. If it's too loud, you're too old. "He works on old cars, then junks 'em" |
|||
|
Transfer
|
|
||
| Durango_Boy | Re: 1989 L98 Engine rebuild - Part 2: prepping for install | ||
|
Elite Guru

|
Great work Matt. It'll payoff big when you're done.
|
||
Posted on: 2010/5/16 20:35
|
|||
|
Transfer
|
|
||
| Matatk | Re: 1989 L98 Engine rebuild - Part 2: prep and install | ||
|
Webmaster
|
Joel, it's just an autozone water pump. I bought it last year and never installed it, so I'm using it now. I should have checked the starter clearance! But I never even thought about it. Good tip for other guys in the future, though.
I got a chance to play today. Of course, being a one man band makes it a little more difficult. There were several points trying to push/pull/insert a bolt all at the same time that really required 3 hands. Oh well. I tried to install with the motor mounts on and I just couldn't do it. Maybe the guys who do it that way have the trans out. That's the only thing I can figure. So I removed them, dropped them into the brackets, and then bolted them up once the bellhousing was bolted up. Trying to remember all the routing for everything was a little tricky after more than a month, but I did ok. For you guys in the future, the stud for the bellhousing goes on the driver's side, lower bolt hole. Most of the grounds attach here. I also left the motor mount through bolts out so that I can lift it slightly if I need to when I put the headers on. I left a few of the sensors disconnected, too, for this same reason.   |
||
Posted on: 2010/5/16 23:57
|
|||
|
_________________
2002 EBM convertible, Magnusson supercharger, cam, headers, etc. 1989 Corvette...RIP |
|||
|
Transfer
|
|
||
| RickAnthony | Re: 1989 L98 Engine rebuild - Part 2: prep and install | ||
|
ASE Master Certified
 
|
Awesome... I was wondering how far you got today.. I would have been over to help, but too much going on with "Dog Day" show, and the Helping the mother-in-law show the 71' Nova SS.... good thing they were both about a mile apart..
So who went crazy with the blue painters tape?? LoL... Nice shot of my mix/matched gloves there! Good work on the write-up/post man.... it takes alot of time to stop and take pics and write everything.. and I know alot of people are enjoying reading this and it maybe helpful both ways.. -=Rick |
||
Posted on: 2010/5/17 4:14
|
|||
|
_________________
My Automotive Blog autoserviceupdated.blogspot.com CORVETTE SERVICE & REPAIR RickAnthonyMotorsports.NET |
|||
|
Transfer
|
|
||
| Woodstock | Re: 1989 L98 Engine rebuild - Part 2: prep and install | ||
|
Senior Guru
 
|
That looks great! Especially your color choice for the engine I like. Never understood, why a fairly new model engine would be painted orange to look like 20 years older.
Didn't you have any clearance issues with the balancer? Yours looks like 8" and you may recall the write up of my friend, where I helped to dial in the tune? |
||
Posted on: 2010/5/17 14:50
|
|||
|
_________________
91 convertible |
|||
|
Transfer
|
|
||
| PeteK | Re: 1989 L98 Engine rebuild - Part 2: prep and install | ||
|
Moderator
 
|
Summit does sell a 153 tooth, neutral balanced, 1 pc rear main seal flexplate. Just a heads up in case this comes up in a search.
|
||
Posted on: 2010/5/17 16:52
|
|||
|
_________________
"It was really on a pass until it came apart." "Yeah. They always are." |
|||
|
Transfer
|
|
||
| Matatk | Re: 1989 L98 Engine rebuild - Part 2: prep and install | ||
|
Webmaster
|
Quote:
If it's the one made by fidanza, it's mismarked. The builder called fidanza and they said it's an external balanced flexplate. The balancer is a professional products 6 3/4" just like stock size. Matthew |
||
Posted on: 2010/5/17 22:12
|
|||
|
_________________
2002 EBM convertible, Magnusson supercharger, cam, headers, etc. 1989 Corvette...RIP |
|||
|
Transfer
|
|
||
| -=Jeff=- | Re: 1989 L98 Engine rebuild - Part 2: prep and install | ||
|
Master Guru
 
|
looks like it is coming along Matt..
once it is done you will have to meet a bunch of us for Pizza in Addison |
||
Posted on: 2010/5/18 13:09
|
|||
|
_________________
-=Jeff=- 1990 Corvette ZR-1 #1051 |
|||
|
Transfer
|
|
||
| pianoguy | Re: 1989 L98 Engine rebuild - Part 2: prep and install | ||
|
Guru Emeritus
 
|
Great job, Matt!
|
||
Posted on: 2010/5/18 17:31
|
|||
|
_________________
1996 LT4 �Before you criticize someone, you should walk a mile in their shoes. That way when you criticize them, you are a mile away from them and you have their shoes.�- Jack Handey |
|||
|
Transfer
|
|
||
| pr0zac | Re: 1989 L98 Engine rebuild - Part 2: prep and install | ||
|
Elite Guru

|
the 153 tooth neutral balanced flexplate is a purple unicorn. and i always heard white cars were faster.. just sayin.. :-)
|
||
Posted on: 2010/5/18 19:06
|
|||
|
_________________
96 lt4. 357ci, 11:1, LE 226/232, LE2 LT4 heads, ported LT4 intake, EM Gladiator44, EM LT's, stock exhaust, NX kit. |
|||
|
Transfer
|
|
||
| Matatk | Re: 1989 L98 Engine rebuild - Part 2: prep and install | ||
|
Webmaster
|
Quote:
Well that's false because it's black cars There are two companies at least that make them. The one is like $150 I can't recall offhand who makes it (some big company). The other company is called PRW - I spoke to their customer service rep personally and they sell it for around $75. Matthew |
||
Posted on: 2010/5/19 0:18
|
|||
|
_________________
2002 EBM convertible, Magnusson supercharger, cam, headers, etc. 1989 Corvette...RIP |
|||
|
Transfer
|
|
||
| pr0zac | Re: 1989 L98 Engine rebuild - Part 2: prep and install | ||
|
Elite Guru
|
wanna see my flow sheet lol
|
||
Posted on: 2010/5/19 1:49
|
|||
|
_________________
96 lt4. 357ci, 11:1, LE 226/232, LE2 LT4 heads, ported LT4 intake, EM Gladiator44, EM LT's, stock exhaust, NX kit. |
|||
|
Transfer
|
|
||
| Matatk | Re: 1989 L98 Engine rebuild - Part 2: prep and install | ||
|
Webmaster
|
I've had a hell of a time with the headers tonight. Not really in a cheery mood. A little gentle persuasion with a BFH was necessary along with slightly enlarging the two outer bolt holes. Still not done with one side! I need a set of these for the allen cap bolts:
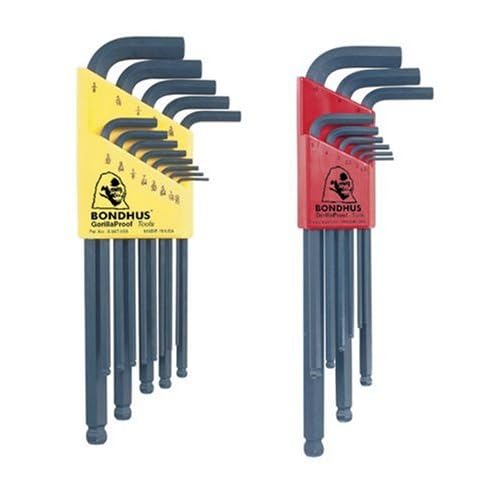 The ball end makes it easier to swivel and tighten. Might get a set tomorrow. Matthew |
||
Posted on: 2010/5/21 2:29
|
|||
|
_________________
2002 EBM convertible, Magnusson supercharger, cam, headers, etc. 1989 Corvette...RIP |
|||
|
Transfer
|
|
||
| flyboy | Re: 1989 L98 Engine rebuild - Part 2: prep and install | ||
|
Elite Guru
|
McMasterCarr has them in singles.
Also straight ended ones so you can use it with a socket. One day delivery to you. They're in Elmhurst. |
||
Posted on: 2010/5/21 2:35
|
|||
|
_________________
'91coupe, LT4Hotcam, some other stuff. If it's too loud, you're too old. "He works on old cars, then junks 'em" |
|||
|
Transfer
|
|
||
| Matatk | Re: 1989 L98 Engine rebuild - Part 2: prep and install | ||
|
Webmaster
|
Thanks Joe, but a whole set is like $12. I actually have a socket style allen/hex head in the right size, but it only works on 1/2 the bolts due to header clearance.
Matthew |
||
Posted on: 2010/5/21 2:46
|
|||
|
_________________
2002 EBM convertible, Magnusson supercharger, cam, headers, etc. 1989 Corvette...RIP |
|||
|
Transfer
|
|
||
| pappyfreebird | Re: 1989 L98 Engine rebuild - Part 2: prep and install | ||
|
Senior Guru

|
this is really cool how ya took time fer pix n write ups ,,bet ya cant wait heyhuh...mayun that intake is really fuggan awesum lookin,,specially commin from a boy that stares at the ugly crossfire square chunk...
|
||
Posted on: 2010/5/21 11:45
|
|||
|
Transfer
|
|
||
| BillH | Re: 1989 L98 Engine rebuild - Part 2: prep and install | ||
|
The Stig Moderator
 
|
Quote:
Get the Bondhus in the pic. NOT the ones at HF. And, if possible, do the final tightening without using the ball end. |
||
Posted on: 2010/5/21 15:21
|
|||
|
_________________
Every man dies but not every man lives. |
|||
|
Transfer
|
|
||
| Matatk | Re: 1989 L98 Engine rebuild - Part 2: prep and install | ||
|
Webmaster
|
Well I had a much more successful day today tinkering with the car. Finished up the driver's side with the help of the ball end socket. I also got the passenger side installed. The driver side goes in from the top, passenger side from the bottom. It takes some wiggling but it will go in. On the passenger side I had trouble with the bolt behind the number 6 cylinder. No room to play. So what I did is ground of the short end of an allen key to about half the size and that gave me more room to maneuver. Once the headers were in I connected the sensors, put in my motor mount through bolts (which could have been done before). I also made sure to zip tie a few wires out of the way so they don't rest on the headers. I couldn't remember where the rear alternator bracket went on the original manifold so I'll fiddle with that when I put the accessories back on. Either the stud will go back on or I'll make it work.
  What I used as far as bolts and tools. 3/8-16 1" stainless steel hex cap bolts with lock washers and several variations of allen keys. I got a nice set of the ball end hex keys at grainger, they are eklind.  A few more little projects at this pace and I'll be done....can't wait. Matthew |
||
Posted on: 2010/5/22 2:06
|
|||
|
_________________
2002 EBM convertible, Magnusson supercharger, cam, headers, etc. 1989 Corvette...RIP |
|||
|
Transfer
|
|
||
| RickAnthony | Re: 1989 L98 Engine rebuild - Part 2: prep and install | ||
|
ASE Master Certified
|
Quote:
I figured you were fighting with something the other night, could tell you sounded pretty frustrated. but the end is near! And it's looking awesome and your doing great with the progress and pics! keep it up! -=Rick |
||
Posted on: 2010/5/22 2:30
|
|||
|
_________________
My Automotive Blog autoserviceupdated.blogspot.com CORVETTE SERVICE & REPAIR RickAnthonyMotorsports.NET |
|||
|
Transfer
|
|
||
| BillH | Re: 1989 L98 Engine rebuild - Part 2: prep and install | ||
|
The Stig Moderator
|
Lookin' Good.
Most guys have a cut off allen wrench in their box for something specific. |
||
Posted on: 2010/5/22 12:57
|
|||
|
_________________
Every man dies but not every man lives. |
|||
|
Transfer
|
|
||
| Matatk | Re: 1989 L98 Engine rebuild - Part 2: prep and install | ||
|
Webmaster
|
Tried to work on this last night. Rick stopped by to give me a hand. I had a hell of a time with the AC bracket, routing the fuel lines through, etc. I had that thing off and on about 4 times. Finally quit before getting too extremely pissed off. What I found from some internet browsing is that I put the fuel line clip on backwards. That made just enough difference to cock the lines in a goofy way. The clip mounts on the fuel pump block off plate stud, and the lines should be closer to the block rather than farther away. Also had a mystery bracket I couldn't figure out.
Fast forward to today. This is the offending mystery bracket:  I kept thinking it belonged under the a/c bracket connected to the fuel pump stud like the fuel lines. Well after scratching our heads (my cousin and me), I said F it I'll just move on. Got the a/c bracket, coolant lines and tensioner installed:  You can't see it, but I kind of ghetto rigged the manifold stud with lock washers so the a/c rear brace would fit. No biggie. Went to the other side and started installing the power steering pump. The bolt goes in the bottom, stud goes in the top. Well wouldn't you know it, I found where the stupid mystery bracket goes. Underneath the p/s pump bracket. It connects to the motor mount front bolt:  Put the top air bracket on and called it a night:  That's it for now. I'm picking up my fuel injectors tomorrow so I'm happy about that. I'll probably get to do some more work on Wednesday. It's getting closer! Matthew |
||
Posted on: 2010/5/24 3:18
|
|||
|
_________________
2002 EBM convertible, Magnusson supercharger, cam, headers, etc. 1989 Corvette...RIP |
|||
|
Transfer
|
|
||
| RickAnthony | Re: 1989 L98 Engine rebuild - Part 2: prep and install | ||
|
ASE Master Certified
|
Awesome it's getting there Matt!
|
||
Posted on: 2010/5/24 12:02
|
|||
|
_________________
My Automotive Blog autoserviceupdated.blogspot.com CORVETTE SERVICE & REPAIR RickAnthonyMotorsports.NET |
|||
|
Transfer
|
|
||
| Matatk | Re: 1989 L98 Engine rebuild - Part 2: prep and install | ||
|
Webmaster
|
Made some more progress tonight. Got the fuel rails and injectors installed along with the rest of the spark plugs and the SLP runners.
The spark plugs were the hardest part! Geeze. I got to the #4,6,8 holes from under the car, but I still have the starter removed. I had it rebuilt so that will be going on soon. The edelbrock heads are horrible for installing the plugs. Once you get them in, it's almost impossible to torque them down the way they sit in and the fact that the head bolts are right next to them. Ugh. As far as the SLPs, read the instructions For the two bolts that go inside-out, you have to use the stock bolts. There are three sizes of stock - short, medium, long. The medium ones go on the inside-out. Also, put the lower bolts both in together before you tighten them down, otherwise they won't get past the VCs.I still need to fab a new alternator rear bracket when I get a chance. One thing I noticed about the WP when trying to install the pulley is it's different that the stock one. My stock WP had studs with nuts to hold on the pulley. This new one just has holes in the mounting plate for bolts to go through. Of course they are not provided, and the size is not marked on it or in the instructions. Figures. Looks like it's a 5/16 something from trying some random bolts out of my misc bolt bucket. I'll stop by the hardware store tomorrow. A few pics of the progress:    Matthew |
||
Posted on: 2010/5/27 2:14
|
|||
|
_________________
2002 EBM convertible, Magnusson supercharger, cam, headers, etc. 1989 Corvette...RIP |
|||
|
Transfer
|
|
||
| TommyT-Bone | Re: 1989 L98 Engine rebuild - Part 2: prep and install | ||
|
Chair-man of the bored
 
|
Looks like your moving in the right direction.
 |
||
Posted on: 2010/5/27 3:24
|
|||
|
Transfer
|
|
||
| RickAnthony | Re: 1989 L98 Engine rebuild - Part 2: prep and install | ||
|
ASE Master Certified
|
Matt, Typically you would swap the studs over from the old pump to the new thats kinda normal... I just take 2 nuts jam them together and the one closes to the pump I turn to remove the stud.. then I kinda do the opposite on the new pump.. but you probably could just get bolts..
|
||
Posted on: 2010/5/27 4:01
|
|||
|
_________________
My Automotive Blog autoserviceupdated.blogspot.com CORVETTE SERVICE & REPAIR RickAnthonyMotorsports.NET |
|||
|
Transfer
|
|
||
| Matatk | Re: 1989 L98 Engine rebuild - Part 2: prep and install | ||
|
Webmaster
|
Rick - I don't really have a choice since I gave you the old water pump...lol. Unless you still have it laying around the garage?
Matthew |
||
Posted on: 2010/5/27 11:27
|
|||
|
_________________
2002 EBM convertible, Magnusson supercharger, cam, headers, etc. 1989 Corvette...RIP |
|||
|
Transfer
|
|
||
| -=Jeff=- | Re: 1989 L98 Engine rebuild - Part 2: prep and install | ||
|
Master Guru
|
bolts are fine.. I did that on my 89 I think
|
||
Posted on: 2010/5/27 14:46
|
|||
|
_________________
-=Jeff=- 1990 Corvette ZR-1 #1051 |
|||
|
Transfer
|
|
||
| RickAnthony | Re: 1989 L98 Engine rebuild - Part 2: prep and install | ||
|
ASE Master Certified
|
Quote:
Um nope it's probably already melted down and being made into part of a Kia... But as Jeff said bolts are fine too, I think that's how bobs blown 383 is and has been... -=Rick |
||
Posted on: 2010/5/27 17:43
|
|||
|
_________________
My Automotive Blog autoserviceupdated.blogspot.com CORVETTE SERVICE & REPAIR RickAnthonyMotorsports.NET |
|||
|
Transfer
|
|
||
| Matatk | Re: 1989 L98 Engine rebuild - Part 2: prep and install | ||
|
Webmaster
|
I bought some 5/16 coarse thread today and those don't fit. I'll just have to get a few sizes and figure it out.
|
||
Posted on: 2010/5/27 22:09
|
|||
|
_________________
2002 EBM convertible, Magnusson supercharger, cam, headers, etc. 1989 Corvette...RIP |
|||
|
Transfer
|
|
||
| 89Vette | Re: 1989 L98 Engine rebuild - Part 2: prep and install | ||
|
Senior Guru

|
Quote:
That mystery brace supports the powersteering bracket. It connects to the upper left driver's side motor mount bolt. (use a 1/4" longer bolt in that hole) The other end hooks to the middle hole on the powersteering bracket. (It's length should point you to the right hole.) You probably also figured out that the alt support bracket used to connect to the RH #1 cylinder manifold bolt. You (and I) will need to fab something else. If you're interested, I posted a thread in the CorvetteForum to show how I created a new attaching point (for the alt support bracket). http://forums.corvetteforum.com/c4-te ... rackets-with-headers.html |
||
Posted on: 2010/5/28 3:36
|
|||
|
_________________
383 stroker -- Semi-Siamesed SLP long-runner intake, AFR 195's, 4-2-1 headers, and a SR cam. ZF6 short-throw shifter. Custom body/interior. |
|||
|
Transfer
|
|
||
| Matatk | Re: 1989 L98 Engine rebuild - Part 2: prep and install | ||
|
Webmaster
|
Quote:
Thanks Gregg. If you read above I did find the bracket attachment points for the ps bracket and posted a picture of it. I am still working on my rear alternator bracket. I'll probably end up using a longer bar and extend it to the exhaust bolt in front of cylinder #5. Nice looking work on your bracket. Matthew |
||
Posted on: 2010/5/28 11:20
|
|||
|
_________________
2002 EBM convertible, Magnusson supercharger, cam, headers, etc. 1989 Corvette...RIP |
|||
|
Transfer
|
|
||
| Woodstock | Re: 1989 L98 Engine rebuild - Part 2: prep and install | ||
|
Senior Guru
|
Hi Matthew,
must be fun working with all those new clean parts, that have so much sweat into them. Not trying to be negative, but are those headers coated or just painted? I see you got a metal brake booster, good, but I saw already a number of stock boosters, that have holes patched from to much header heat. Still probably a good idea to build some sort of heat shield to protect the booster. Just something that came to mind to protect you from later grief. Later, Axel |
||
Posted on: 2010/5/28 13:28
|
|||
|
_________________
91 convertible |
|||
|
Transfer
|
|
||
| Matatk | Re: 1989 L98 Engine rebuild - Part 2: prep and install | ||
|
Webmaster
|
Thanks for the tip, Axel. They are at this point just painted headers. Down the road I'd like to put a nicer set of coated headers on there....tpis, exotic muscle, etc...but I didn't want to drop the $700 right now. I don't know what road I'll go down with my final exhaust route, either. I have a feeling this might be too loud for me once it's together.
On a side note, I played around with the water pump - it will need 5/16-24 bolts (the old studs were 5/16 coarse based on the original nuts I had). I will buy both 3/4 and 1" to see what works better. Looks like there is enough room on the back of the mount to slip some nuts back there for extra grip. If it doesn't work out, a lock washer and a dab of loctite will do the trick. Matthew |
||
Posted on: 2010/5/29 1:09
|
|||
|
_________________
2002 EBM convertible, Magnusson supercharger, cam, headers, etc. 1989 Corvette...RIP |
|||
|
Transfer
|
|
||
| joeld | Re: 1989 L98 Engine rebuild - Part 2: prep and install | ||
|
Guru
|
Hey Matt,
Looks goood! I was catching up on your thread and noticed in post #28, picture #3 a small support bracket at the rear of the AC comp. I don't have this on mine, so I need to find one. So, thanks for the pictures! Joel |
||
Posted on: 2010/5/29 1:58
|
|||
|
_________________
1989 Coupe,L98 automatic |
|||
|
Transfer
|
|
||
| Matatk | Re: 1989 L98 Engine rebuild - Part 2: prep and install | ||
|
Webmaster
|
No problem, Joel. Some 89 (maybe 88s)-91s also have a support bracket running across the front of the a/c bracket from a mounting hole under the coolant hose to one of the water pump studs. Mine does not have this, but others do. I have an early build date, so not sure if that affects which ones got them. Weird, huh?
The one you're talking about, though, will prevent a/c vibration at higher rpms. Matthew |
||
Posted on: 2010/5/29 11:26
|
|||
|
_________________
2002 EBM convertible, Magnusson supercharger, cam, headers, etc. 1989 Corvette...RIP |
|||
|
Transfer
|
|
||
| joeld | Re: 1989 L98 Engine rebuild - Part 2: prep and install | ||
|
Guru
|
Thanks Mat. I had never noticed this on other Corvette's, just hadn't paid that much attention.
While mine's apart now would be a good time get all the proper supports! Joel |
||
Posted on: 2010/5/29 13:34
|
|||
|
_________________
1989 Coupe,L98 automatic |
|||
|
Transfer
|
|
||
| Matatk | Re: 1989 L98 Engine rebuild - Part 2: prep and install | ||
|
Webmaster
|
No real progress the past few days, I haven't had a chance to work on it. I did finally get the proper 5/16-24 (fine thread) bolts in 3/4" size. I put the pulley on using those with a lock washer and a dab of loctite to hold it in. Hopefully I'll get a chance to tinker some more over my weekend.
Matthew |
||
Posted on: 2010/6/1 11:30
|
|||
|
_________________
2002 EBM convertible, Magnusson supercharger, cam, headers, etc. 1989 Corvette...RIP |
|||
|
Transfer
|
|
||
| sliding | Re: 1989 L98 Engine rebuild - Part 2: prep and install | ||
|
Senior Guru
|
Looks like we'll have our cars ready about the same time.
But I'm a little bit behind with posting. Nice work! |
||
Posted on: 2010/6/1 11:39
|
|||
|
_________________
'90 L98 auto with a lot of mods |
|||
|
Transfer
|
|
||
| Matatk | Re: 1989 L98 Engine rebuild - Part 2: prep and install | ||
|
Webmaster
|
Well, I got a chance to tackle a few projects today. My cousin came over and lent a hand with a few things so it went easier on those two-person type jobs. Started working on the exhaust. For the time being to save a little coin, I've decided to modify my stock front y-pipe and use it with the headers. So I bought some reducers. The way there are shipped, it's a 2.25 outlet to match the stock pipe, but I'd end up with a butt joint - no good. I took it to the Tuffy muffler shop down the street and they expanded them for me for a slip joint. Manager was great and didn't even charge me, just said come in if you need any work
 I measured and cut the stock y-pipe and this is the basic result. I still have to bend it slightly to line up better, but propane wasn't doing the job. I picked up a mapp torch to see if that will do it:  BTW, know what happens when you smash your thumb against the trans with an exhaust pipe?  If you think it hurt, you're wrong. It hurt like a @#($(*&^%!@!!!! Since I was temporarily done with the exhaust, I got a chance to install the torque converter bolts with my cousin helping hold the crank still. Torque to 46 ft lbs, use loctite. I then turned my attention to the little details on the top. I started reinstalling the plenum and had all sorts of little snags. The runners were already in place and torqued down. Every time I tried to set the plenum, it would push the gasket out or twist it. Then I couldn't get the bolts to line up. One of the plenum bolts was boogered and I had to pull it and chase the threads. It was starting to irritate me. I ended up loosening all the runner bolts and then installed the plenum and torqued. That was the best method. I then set about connecting all my sensors that I could, figuring out the best routing for everything, and putting in the vacuum tubes. I took this opportunity to replace some aged and cracked ones. I found a good way to shape the new tube (that comes coiled up) was with a cigarette lighter.  So I made some progress today. Still have to make a trip to the parts store tomorrow and pick up a couple little things. But the list is getting shorter. Pretty much the big stuff is done. All that's really left is the exhaust, reinstall the starter/inspection cover, fill the trans, fill the rad, install the chip, prime it, set the distributor and timing, and go. Looking forward to wrapping it up. Oh my God, it looks like an engine!   Matthew |
||
Posted on: 2010/6/4 2:43
|
|||
|
_________________
2002 EBM convertible, Magnusson supercharger, cam, headers, etc. 1989 Corvette...RIP |
|||
|
Transfer
|
|
||
| biggrizzly | Re: 1989 L98 Engine rebuild - Part 2: prep and install | ||
|
2011 Memorial Day Car Show Winner!

|
Looks good Matt, What is that style intake called?
Is that a mini-ram? I know nothing about L98s, that's apparent. I just know that isn't the stock configuration. |
||
Posted on: 2010/6/4 2:57
|
|||
|
_________________
Don Haller Corvette Club of America 94Coupe, 383Stroka, PeteK Trans, 3000stall, 3.54rear, Konis and bigger sways. |
|||
|
Transfer
|
|
||
| Matatk | Re: 1989 L98 Engine rebuild - Part 2: prep and install | ||
|
Webmaster
|
The stock system found on 85-91s is a TPI (tuned port injection).
I am using a modified TPI system...it consists of a higher flowing manifold base (basically the same as is found on a superram), SLP big tube runners, and a modified stock plenum (the boxy part on the top). I am using a stock 48 mm throttle body since that is more than adequate. Matthew |
||
Posted on: 2010/6/4 3:12
|
|||
|
_________________
2002 EBM convertible, Magnusson supercharger, cam, headers, etc. 1989 Corvette...RIP |
|||
|
Transfer
|
|
||
| RickAnthony | Re: 1989 L98 Engine rebuild - Part 2: prep and install | ||
|
ASE Master Certified
|
Your getting there!
|
||
Posted on: 2010/6/4 4:00
|
|||
|
_________________
My Automotive Blog autoserviceupdated.blogspot.com CORVETTE SERVICE & REPAIR RickAnthonyMotorsports.NET |
|||
|
Transfer
|
|
||
| BillH | Re: 1989 L98 Engine rebuild - Part 2: prep and install | ||
|
The Stig Moderator
|
Quote:
Hell, I can't even walk thru my shop without bleeding. Propane torch - the most worthless piece of crap in anyone's garage. Barely able to solder 2 wires together. Mapp's the way to go. Much easier to use than pulling out the big torch. Are you trying to spread the pipes apart a bit? Heating one of the curved bends? The Mapp should be enough to heat that area. You'll be glad you bought it. |
||
Posted on: 2010/6/4 12:46
|
|||
|
_________________
Every man dies but not every man lives. |
|||
|
Transfer
|
|
||
| Matatk | Re: 1989 L98 Engine rebuild - Part 2: prep and install | ||
|
Webmaster
|
Quote:
Just moving one pipe over about 1/4 - 1/2 inch, where the factory bend is. Mapp should be fine, I hope. |
||
Posted on: 2010/6/4 13:14
|
|||
|
_________________
2002 EBM convertible, Magnusson supercharger, cam, headers, etc. 1989 Corvette...RIP |
|||
|
Transfer
|
|
||
| BillH | Re: 1989 L98 Engine rebuild - Part 2: prep and install | ||
|
The Stig Moderator
|
Quote:
Suggestion: Cut a 2x4 to fit between the pipes 1/4,1/2 longer than than the current width. Put it between the pipes at an angle, heat the bend and tap the 2x4 with a hammer until you get the spread you want. Let the pipes cool with the 2x4 in place. |
||
Posted on: 2010/6/4 13:36
|
|||
|
_________________
Every man dies but not every man lives. |
|||
|
Transfer
|
|
||
You can view topic.
You cannot start a new topic.
You cannot reply to posts.
You cannot edit your posts.
You cannot delete your posts.
You cannot add new polls.
You cannot vote in polls.
You cannot attach files to posts.
You cannot post without approval.
|
|