


|
|
Register To Post |

| 96LT4CE | How To Part 1: Drain and Flush | ||
|
Guru Newb
 
|
While searching for radiator thread that was an end all be all and finding none I figured that I would work toward putting one together as I worked on my CE LT4. There are many ways to skin a cat, this was my way. YMMV so take this for what its worth.
after you get your car in a safe position go ahead and drain your radiator by opening the pedcock located on the passenger's side bottom of the radiator. In my case the leak in the radiator took care of most of that. 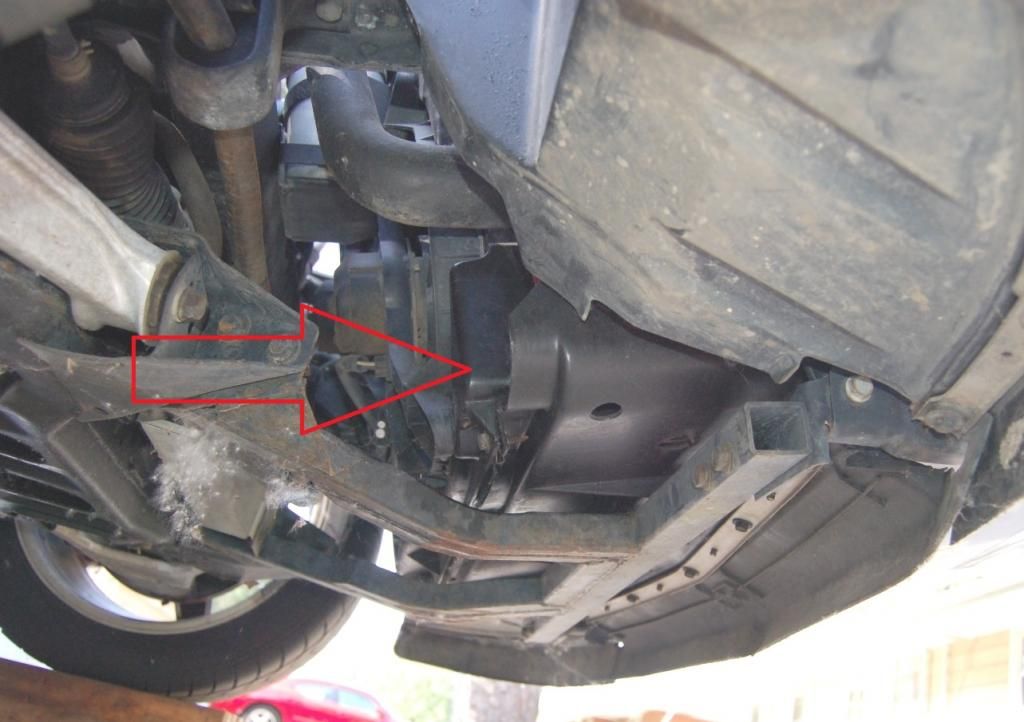 Next I began to take apart the duct work blocking the t-stat. All the arrows are areas that need to be addressed for removal: 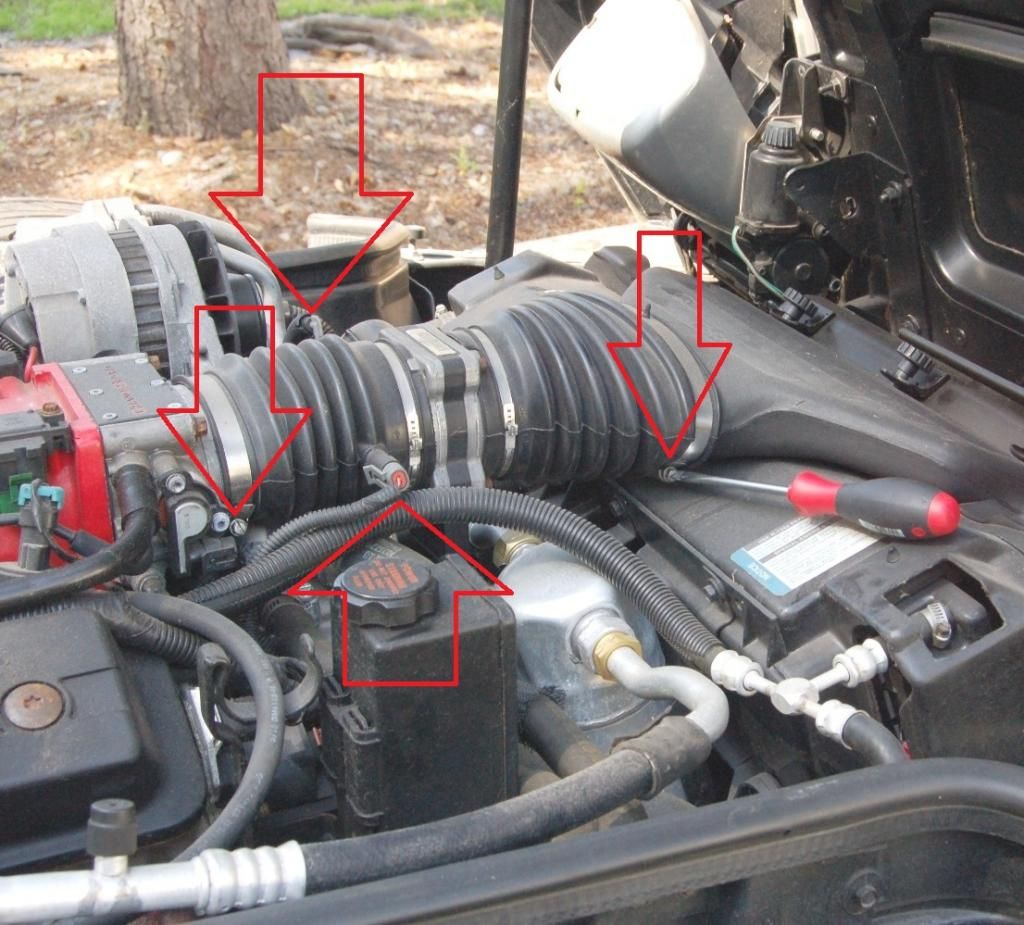 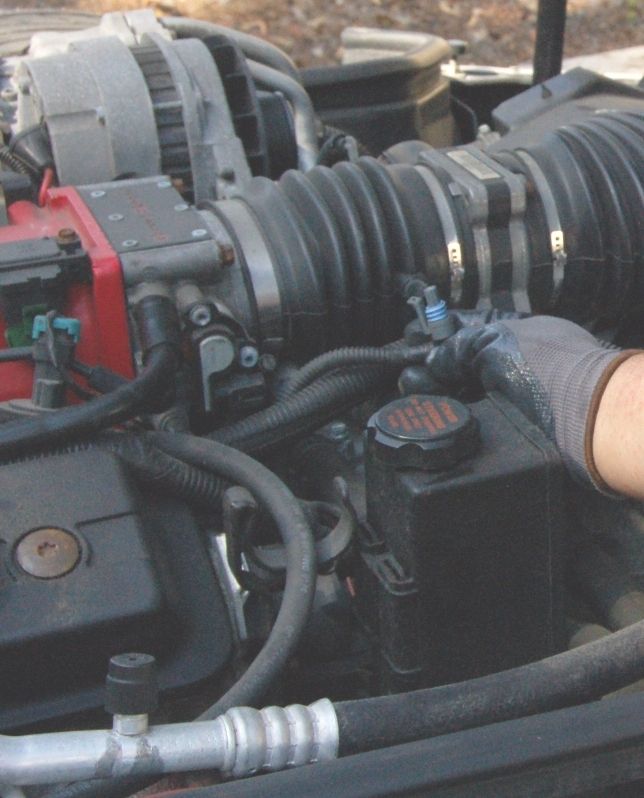 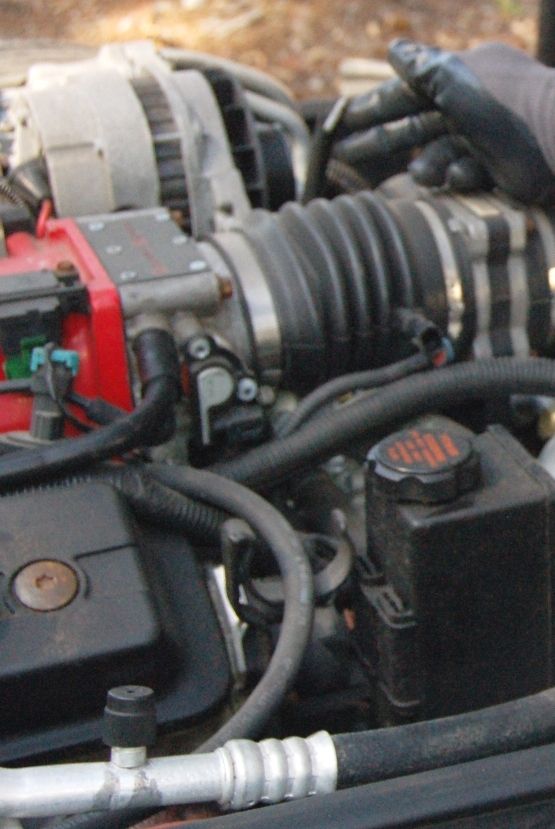 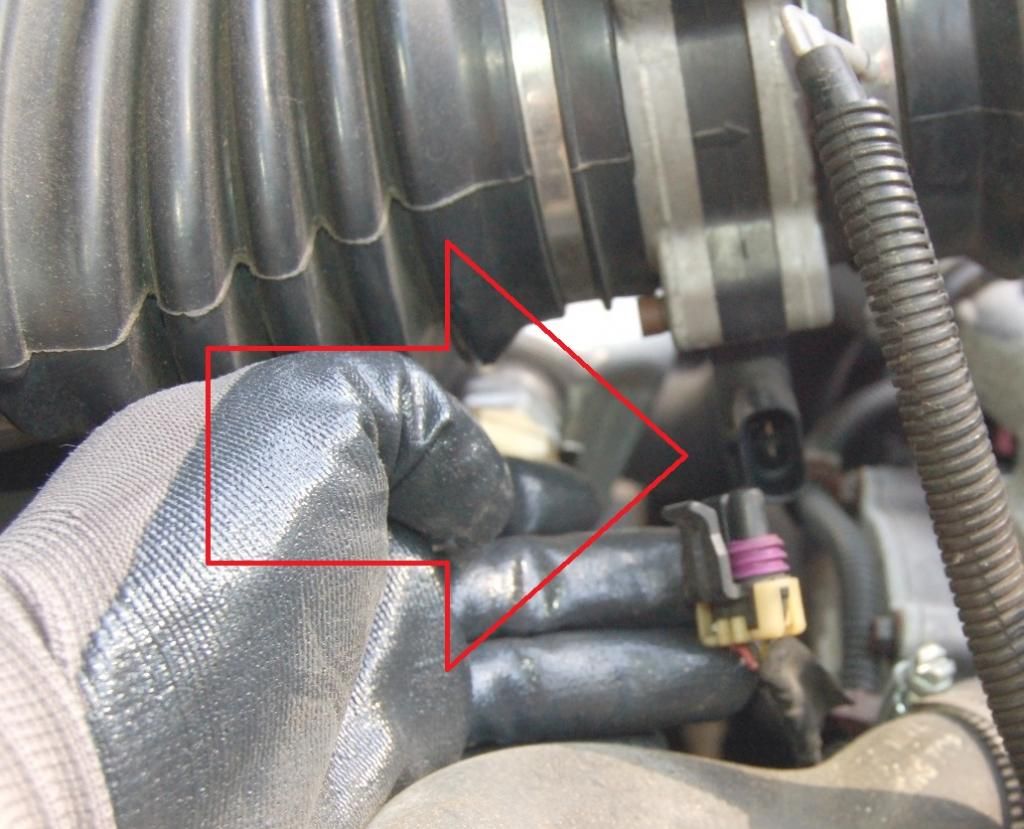 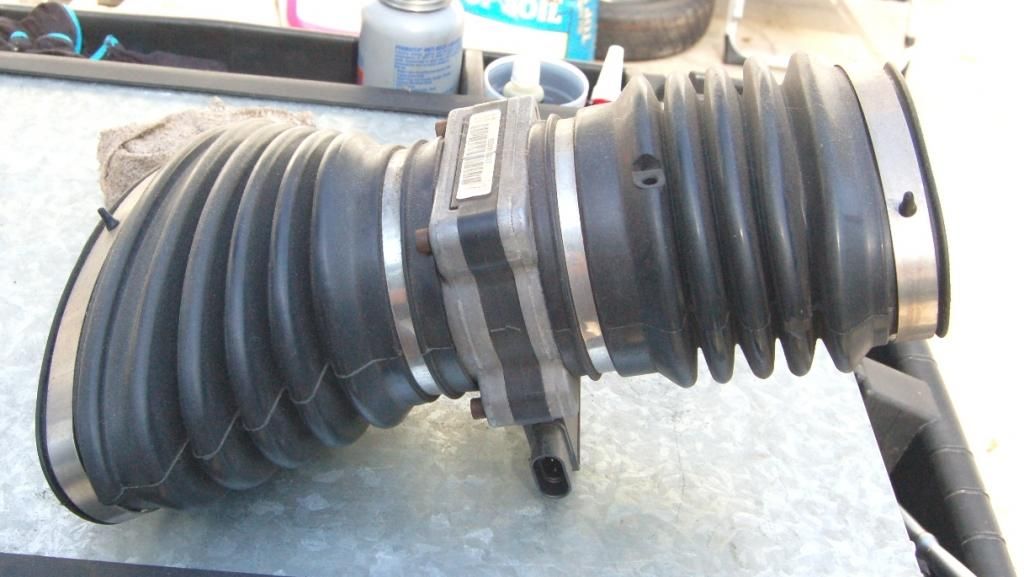 I then pulled the cap on the coolant reservoir: 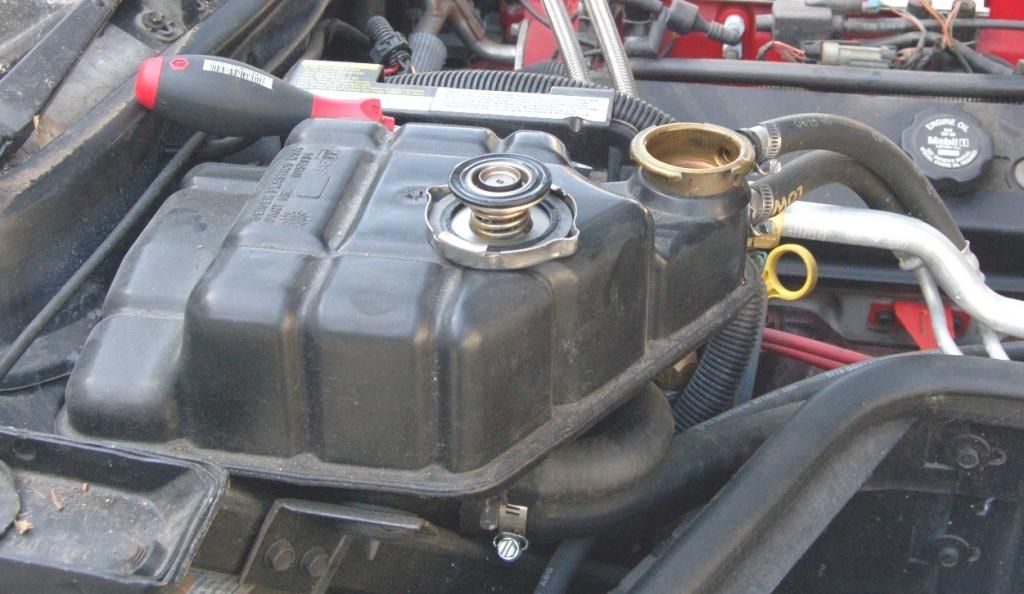 [/URL] [/URL]I then loosened the bolts on the t-stat housing to introduce air into the system. once you loosen them enough you'll get some seepage so be ready to tighten up or use a rag to catch:  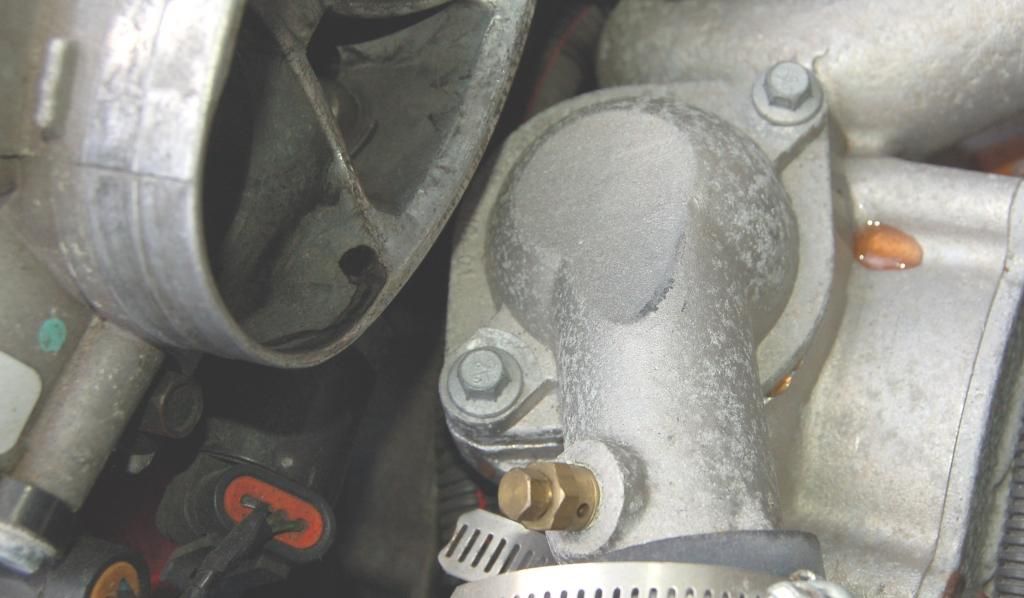 The air you introduced will lead to this so be ready to catch it! Remember, my radiator was already empty, so this is just residual in he system that needed air to be released: 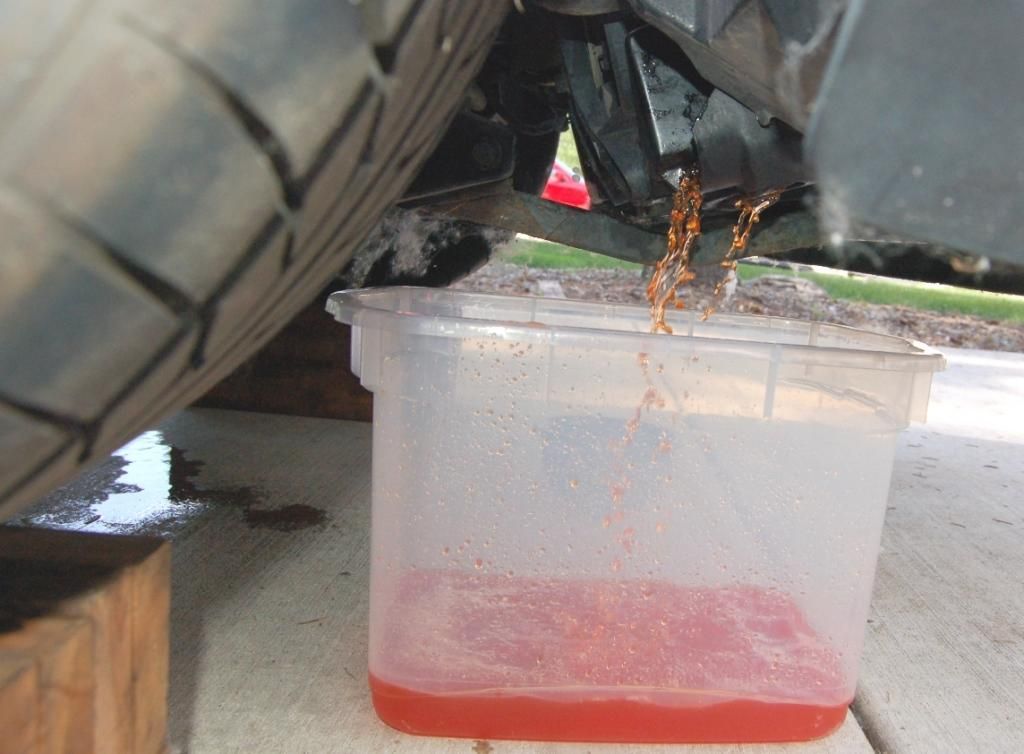 |
||
Posted on: 2014/7/11 2:40
|
|||
|
_________________
My shoulder hurts bad |
|||
 Transfer Transfer
|
 
|
||

| 96LT4CE | Re: How To Part 1: Drain and Flush | ||
|
Guru Newb
|
I decided to try and flush the system by pulling the t-stat and flowing water through it. This is how I did it.
Close the pedcock and then pull the t-stat housing off:  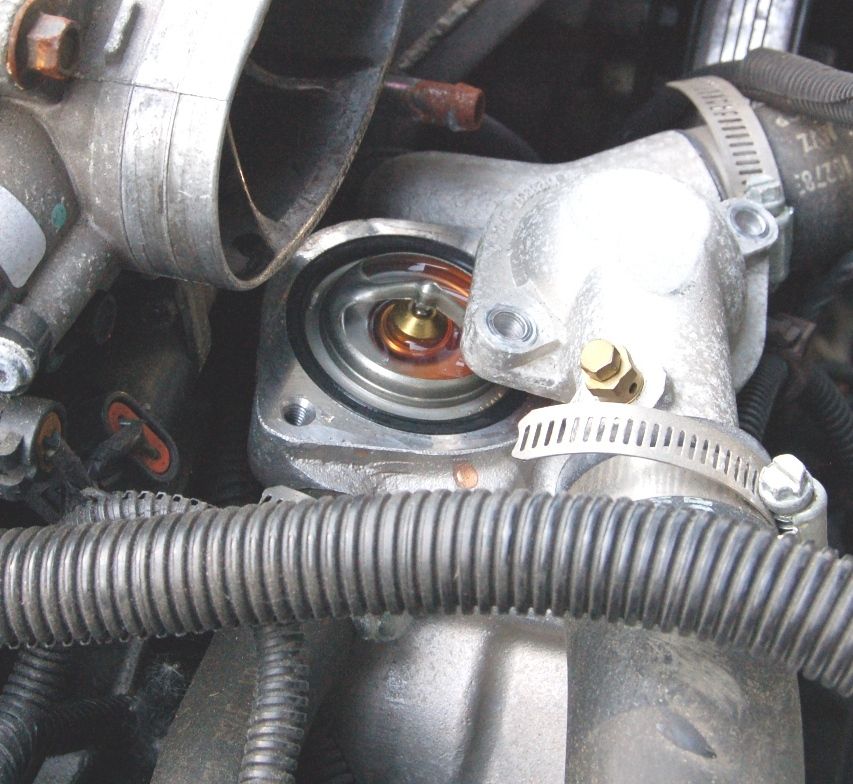 As you can see there was nothing wrong with my t-stat but since I was already there i will replace anyway. Cheap insurance: 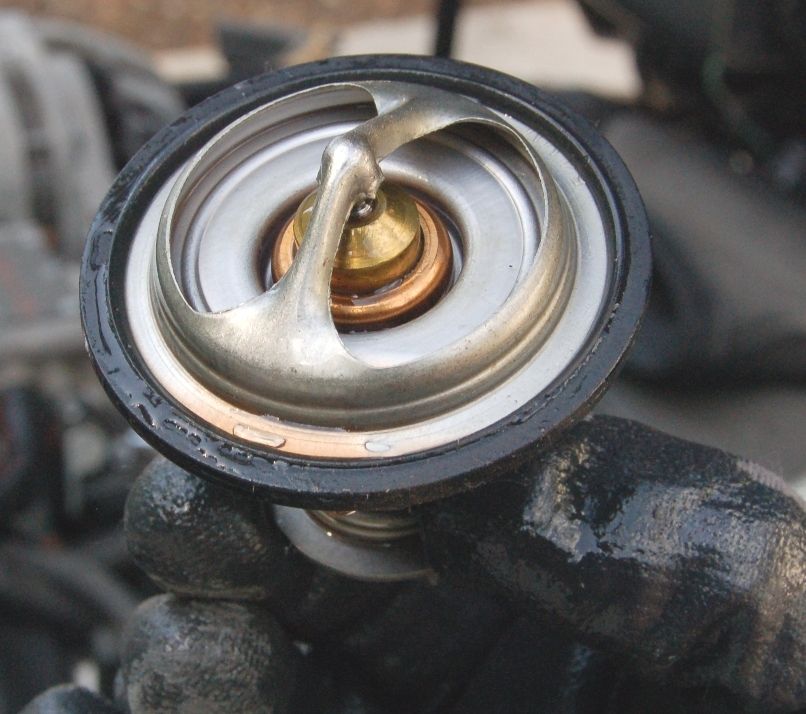 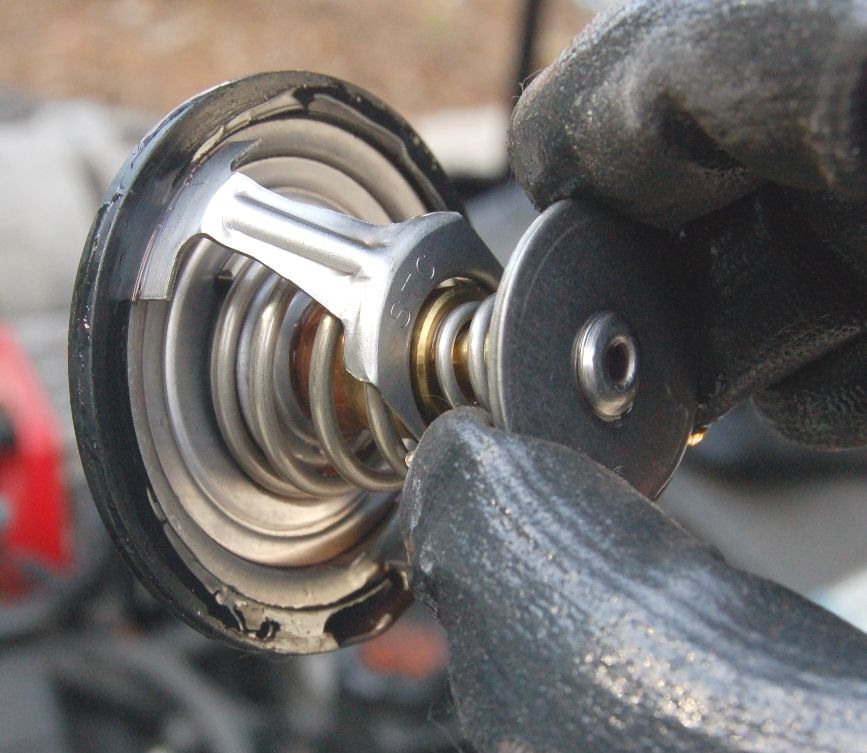 With the t-stat removed you can see coolant: 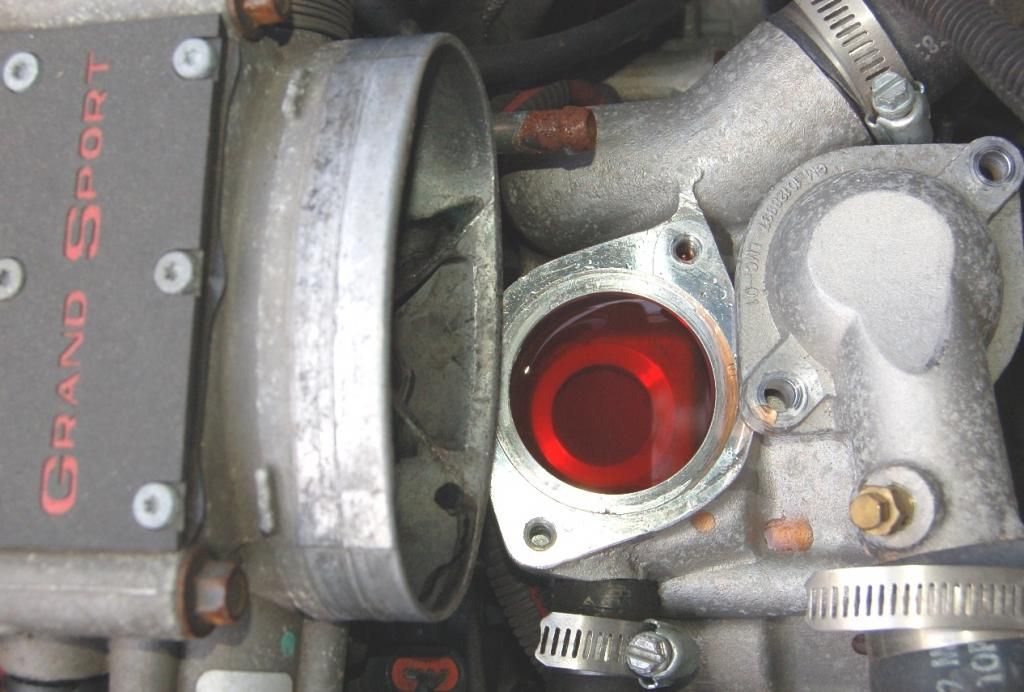 With the t-stat out, replace and tighten the housing: 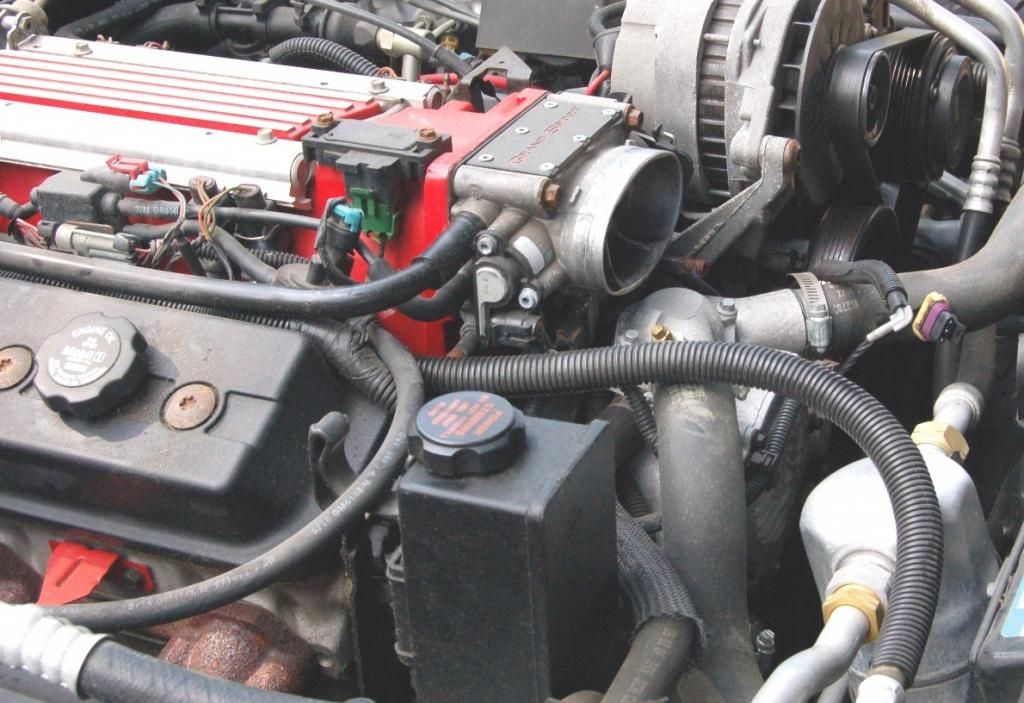 Now your pedcock should be closed and your t-stat housing tight with no t-stat loaded. Fill the reservoir with water. I in my naive state of mind thought 1 gallon of distilled water would do the trick. 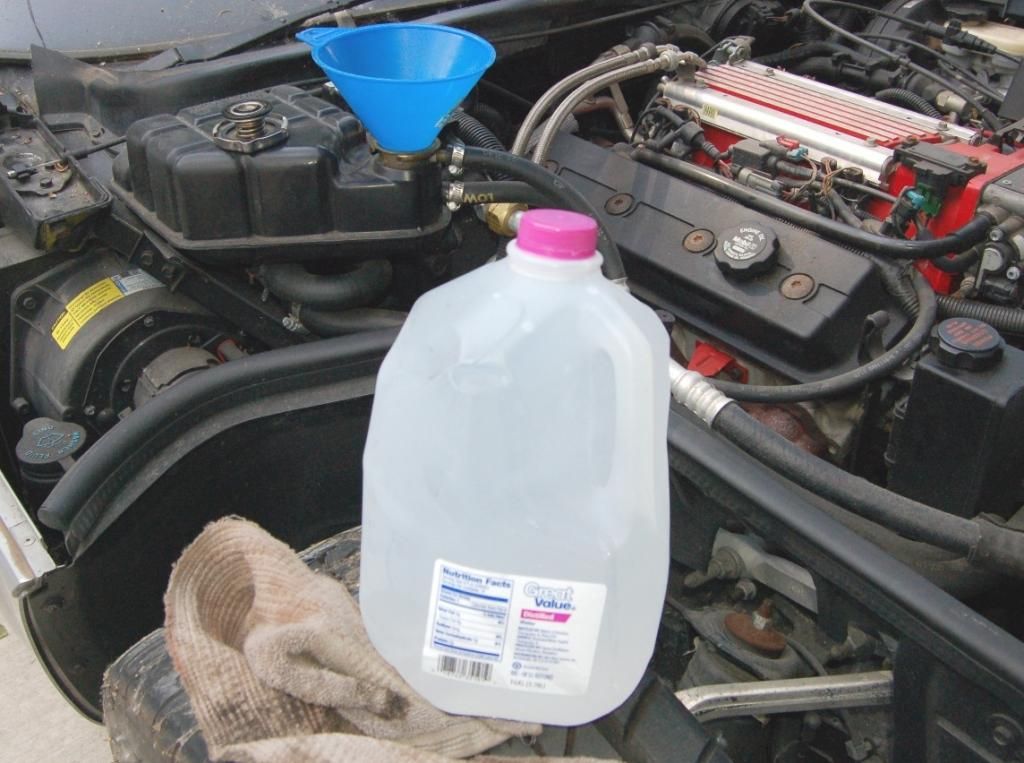 After filling the reservoir with the gallon. I started the car and let it run for 5 min. The idea is with no t-stat loaded you will get water circulating and flushing out everything when you open the pedcock again. Well when I opened the pedcock this came out: 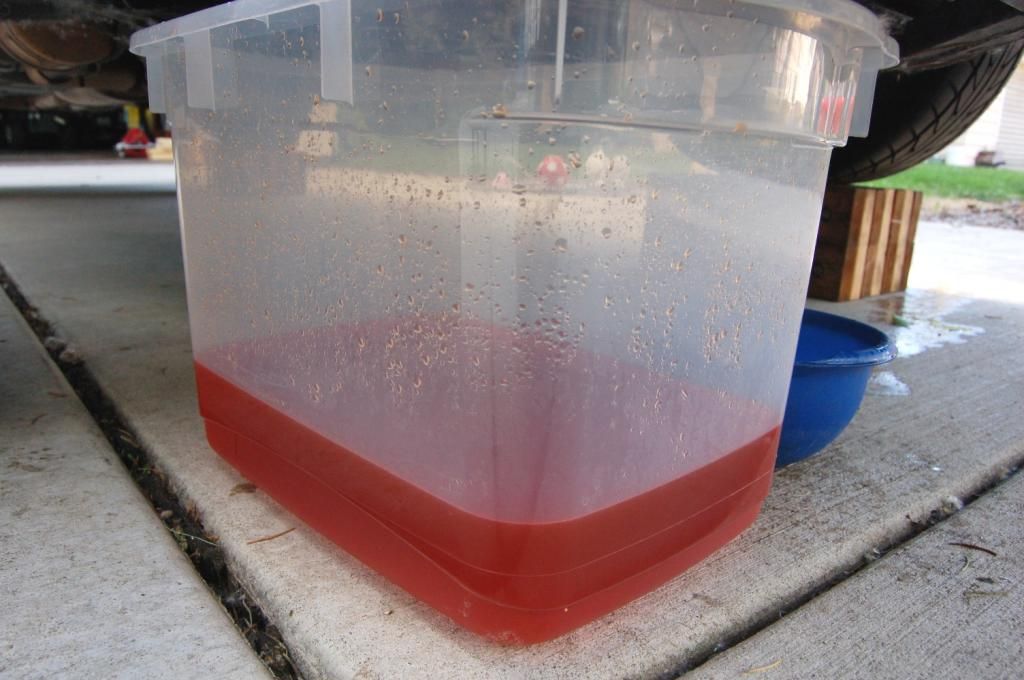 Yup, that's my gallon of distilled water. As orange as it gets. It was at this point i knew I was in for a long day. |
||
Posted on: 2014/7/11 3:01
|
|||
|
_________________
My shoulder hurts bad |
|||
|
Transfer
|
|
||
| 96LT4CE | Re: How To Part 1: Drain and Flush | ||
|
Guru Newb
|
After I noticed my gallon of distilled water didn't even cause a dent in the system I filled the reservoir with 2 more gallons of water. repeated the process. then added another gallon of water and repeated the process. So now we have 4 gallons of water through the system. and here are the results.
 OK, I was done with running the car. The coolant comes out hot and it burns! I decided to just leave the pedcock open and let water flow. I added 5 gallons through the system. and here they are: 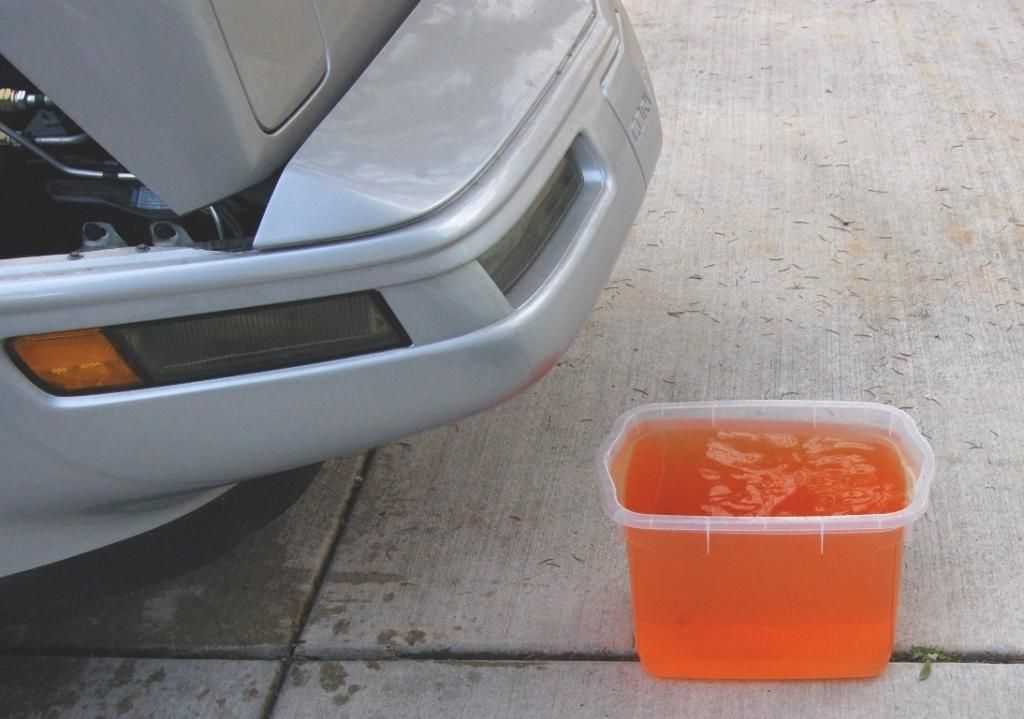 getting "cleaner" but still not clean. So another 4.5 gallons and we get to here: 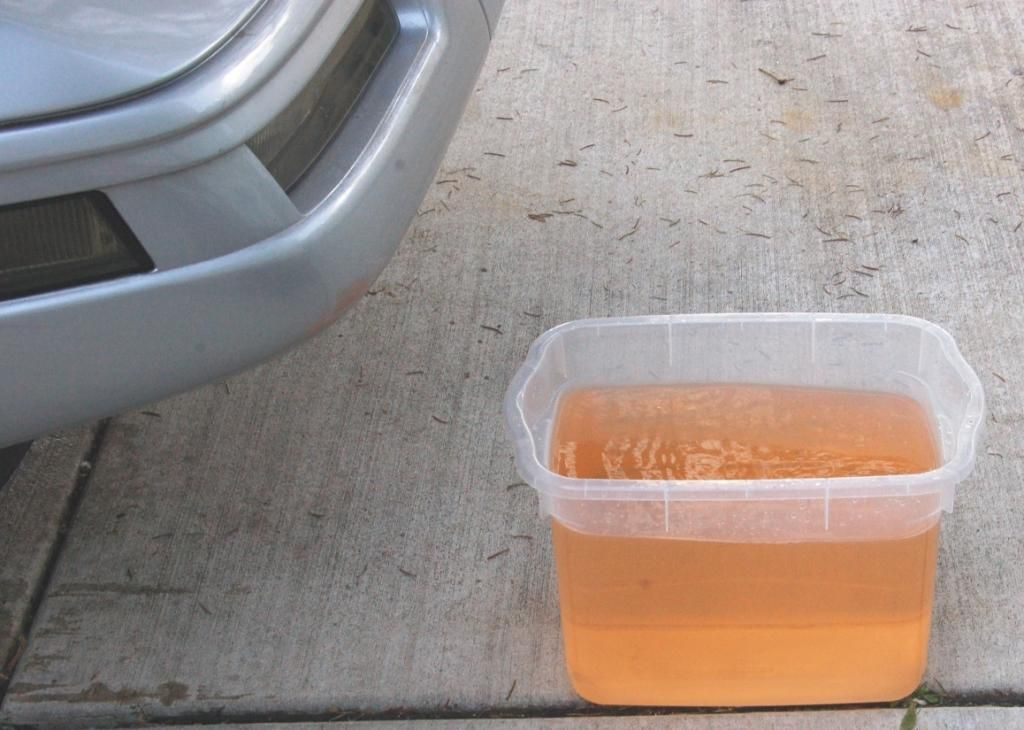 OMG. this is not working. By this time I've now come to the realization that if I wanna do this right the knock sensors have to come out! |
||
Posted on: 2014/7/11 3:09
|
|||
|
_________________
My shoulder hurts bad |
|||
|
Transfer
|
|
||
| 96LT4CE | Re: How To Part 1: Drain and Flush | ||
|
Guru Newb
|
Crawl under the passenger side and look near rhe header by the heat wrap and you'll see this.
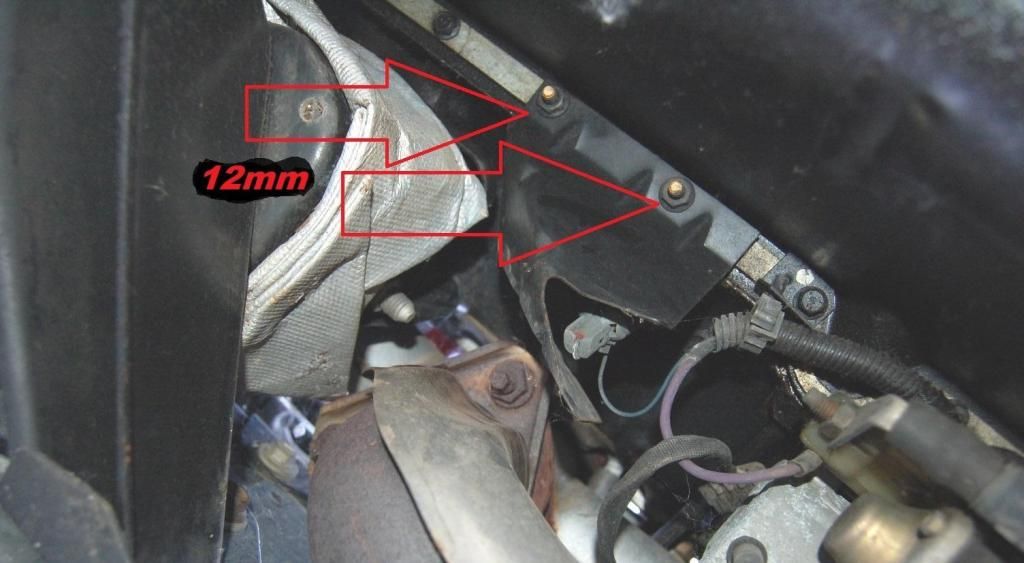 Driver side near the oil pan sensor and you'll see this: 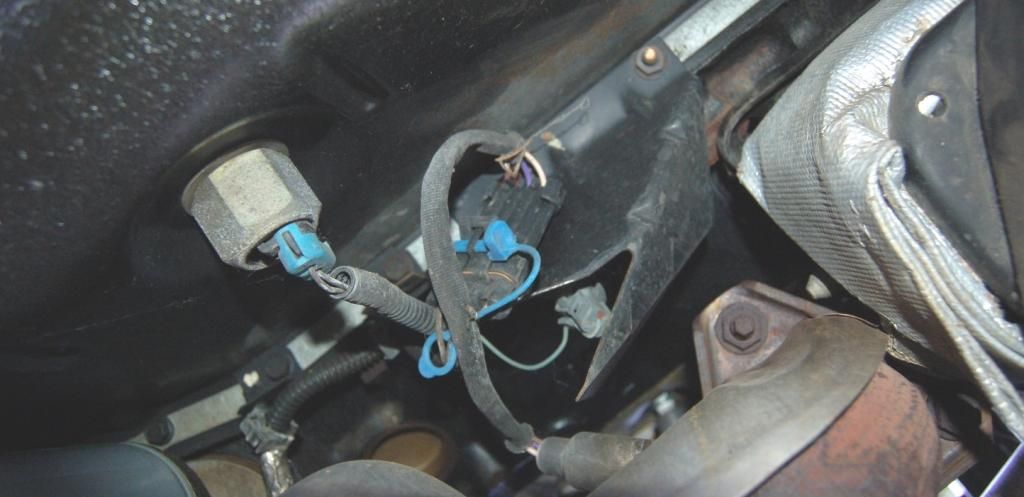 Those are teh shields that protect the KS. they have to be removed to gain access to them: 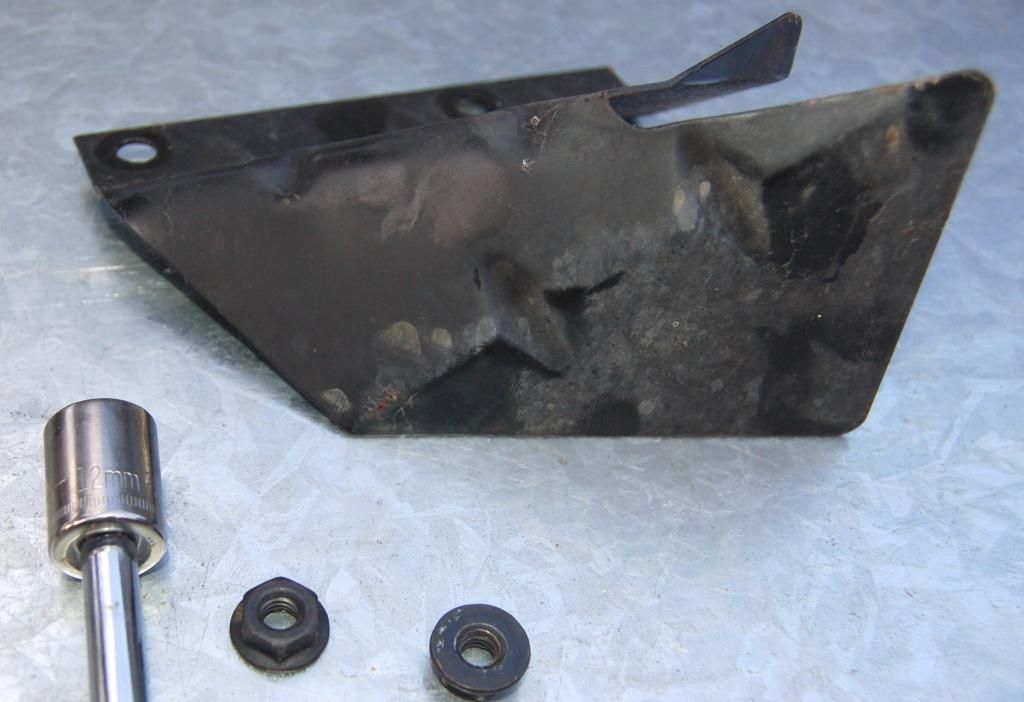 Once the shields are removed each knock sensor has a plug that needs to be removed. Just pinch and pull. and that will expose the KS 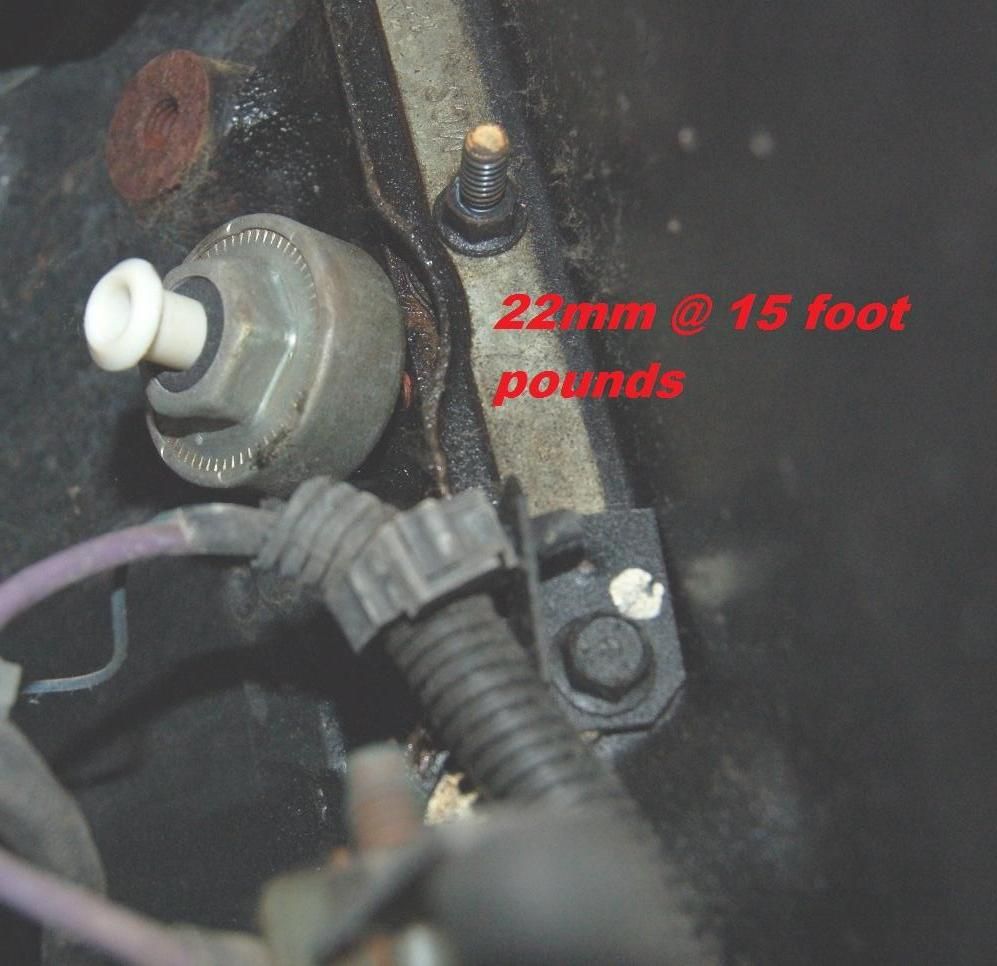 |
||
Posted on: 2014/7/11 3:15
|
|||
|
_________________
My shoulder hurts bad |
|||
|
Transfer
|
|
||
| 96LT4CE | Re: How To Part 1: Drain and Flush | ||
|
Guru Newb
|
Once the KS are exposed its time to remove them. Remember to have something under you to catch the fluid. and if you were running the car like me, THE COOLANT MAY STILL BE HOT EVEN IF YOU FLUSHED ALMOST 10 GALLONS OF WATER THROUGH IT!
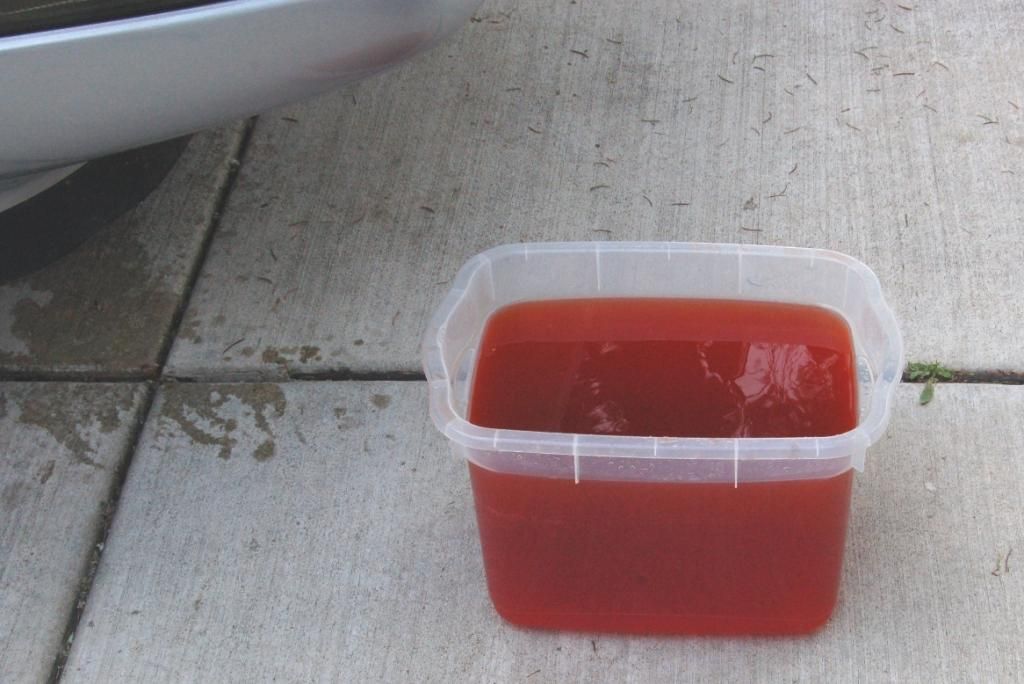
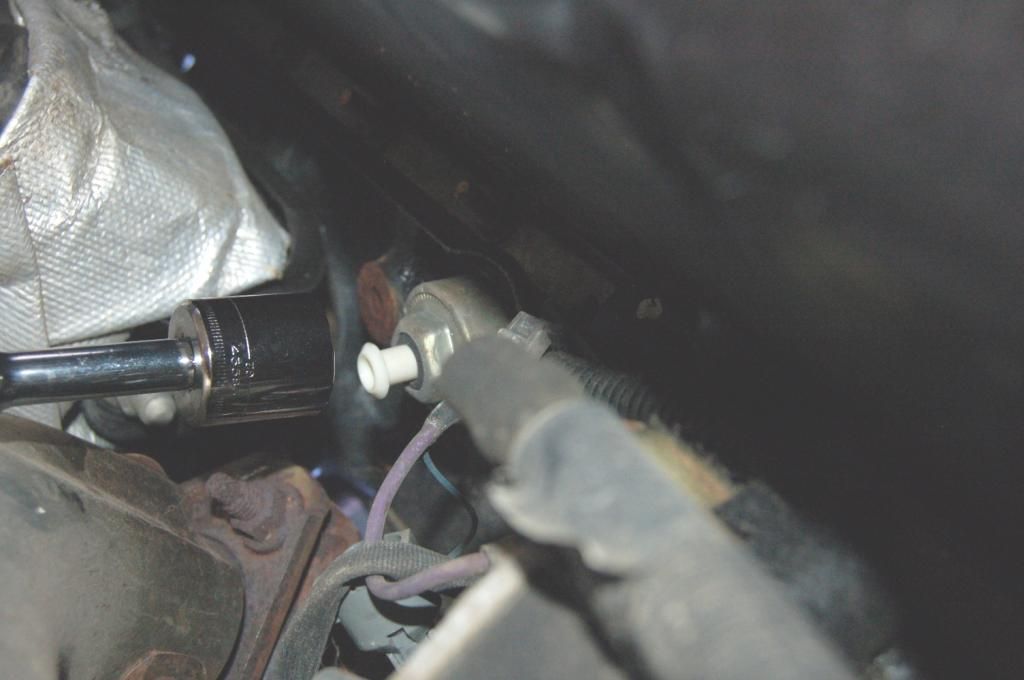 i pulled the KS on the passenger side 1st. In the block this is what came out. remember, the system has had almost 10 gallons of water through it: 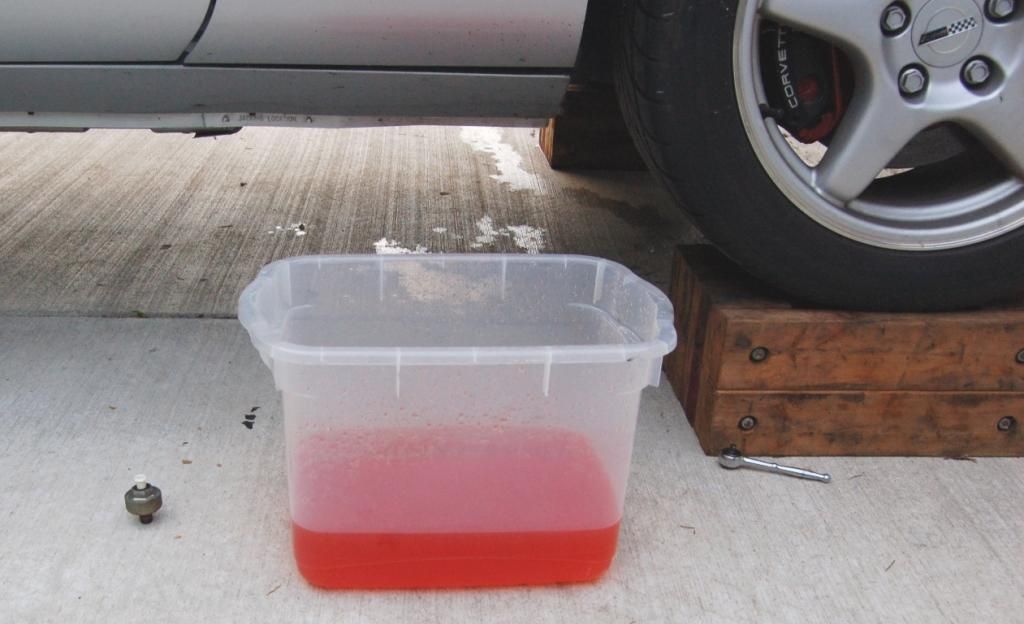 That's over 1 gallon out of just teh passenger side!!! 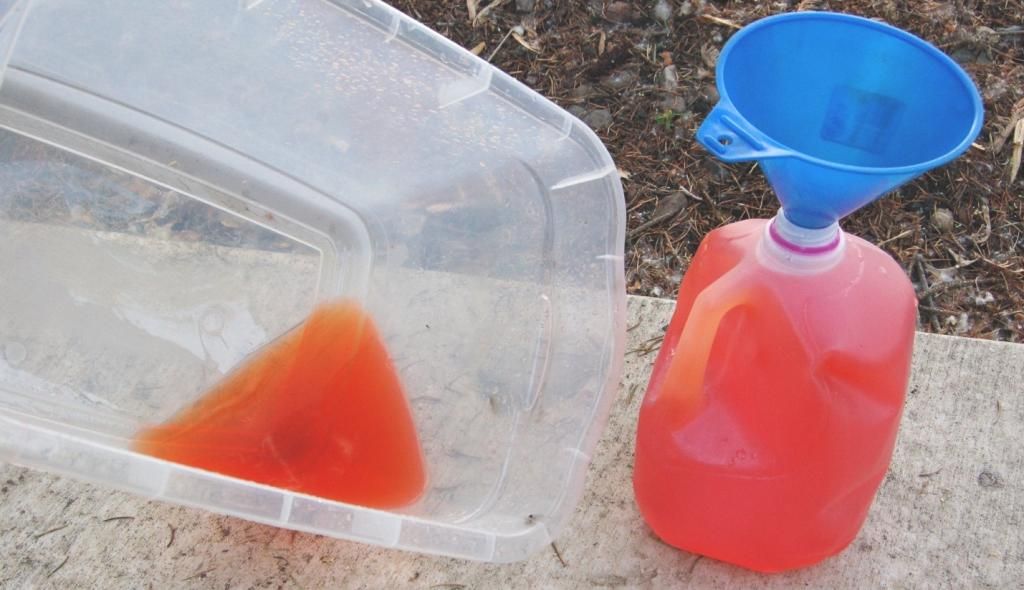 With the passenger KS out I decided to attack from the top with more water: 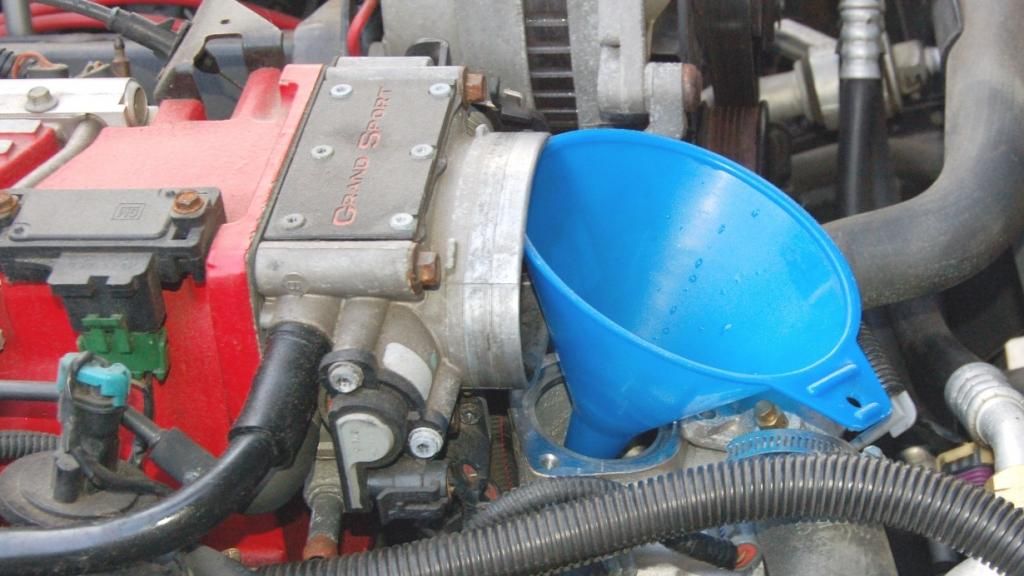 4.5 gallons from the top down and out the passenger side KS later.... Still ORANGE! 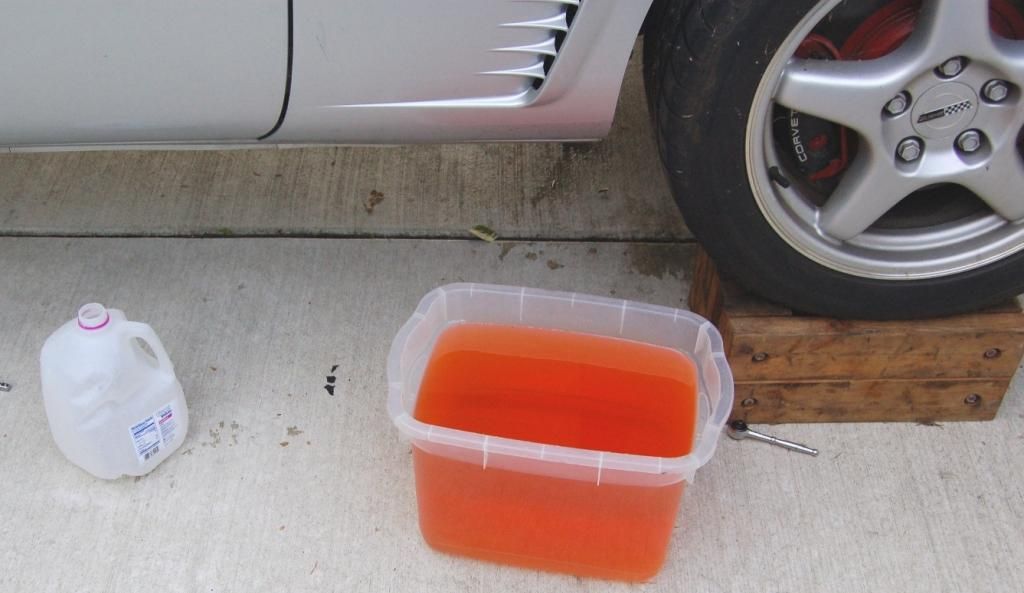 another 4.5 gallons 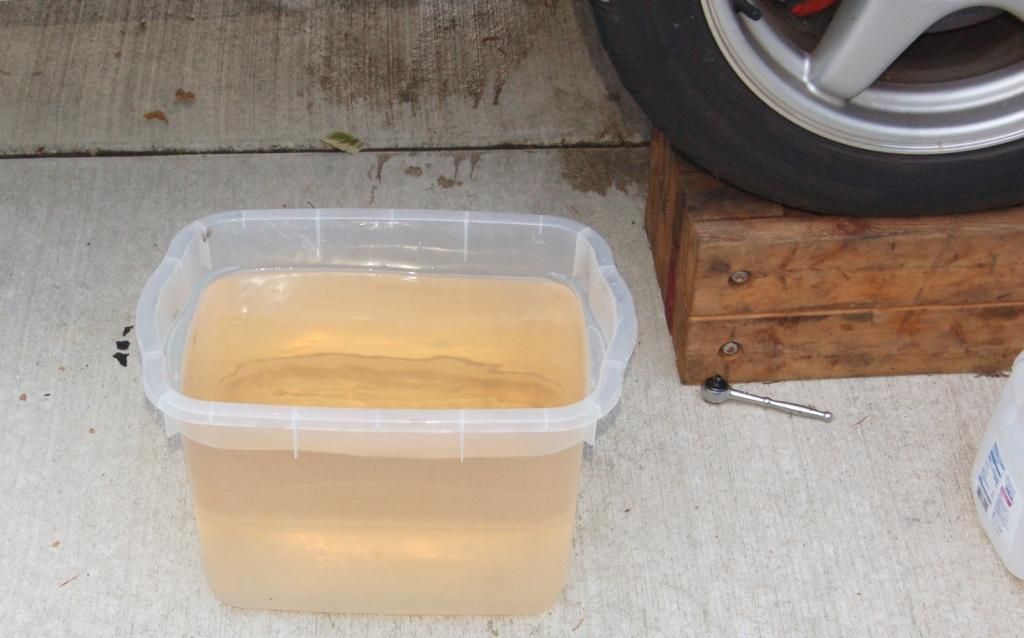 Frustrating! so I moved on to the driver side. But b4 I did I plugged the ks back into the passenger side. Even after flushing the passenger side with 9 gallons of water this is what came out of the drivers side: 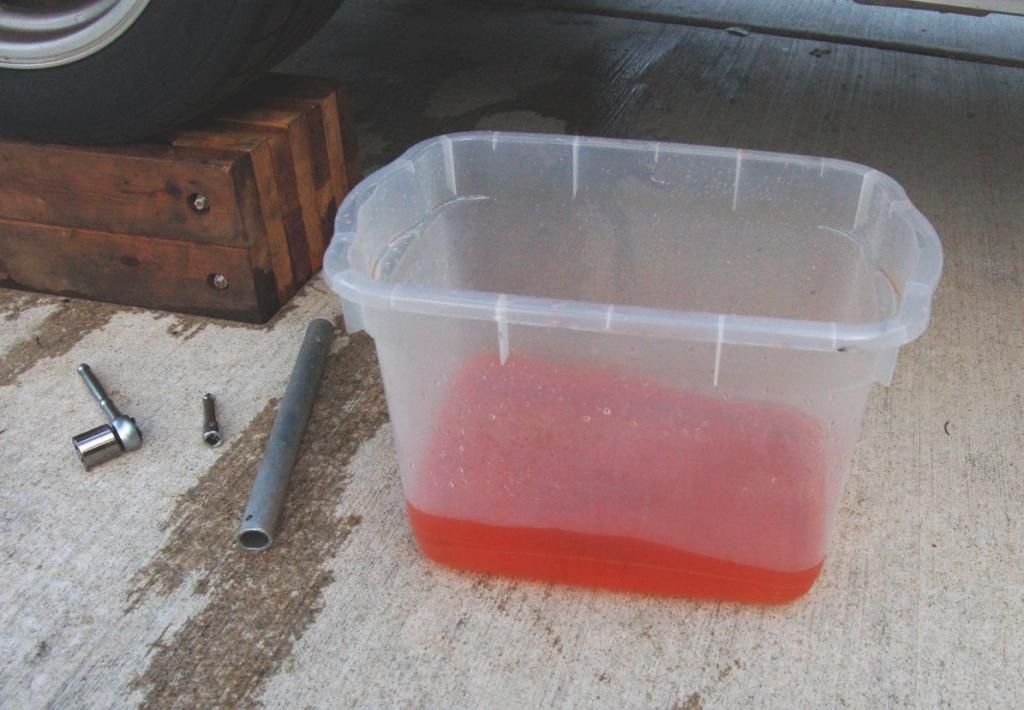 that's still close to 1 gallon of orange! 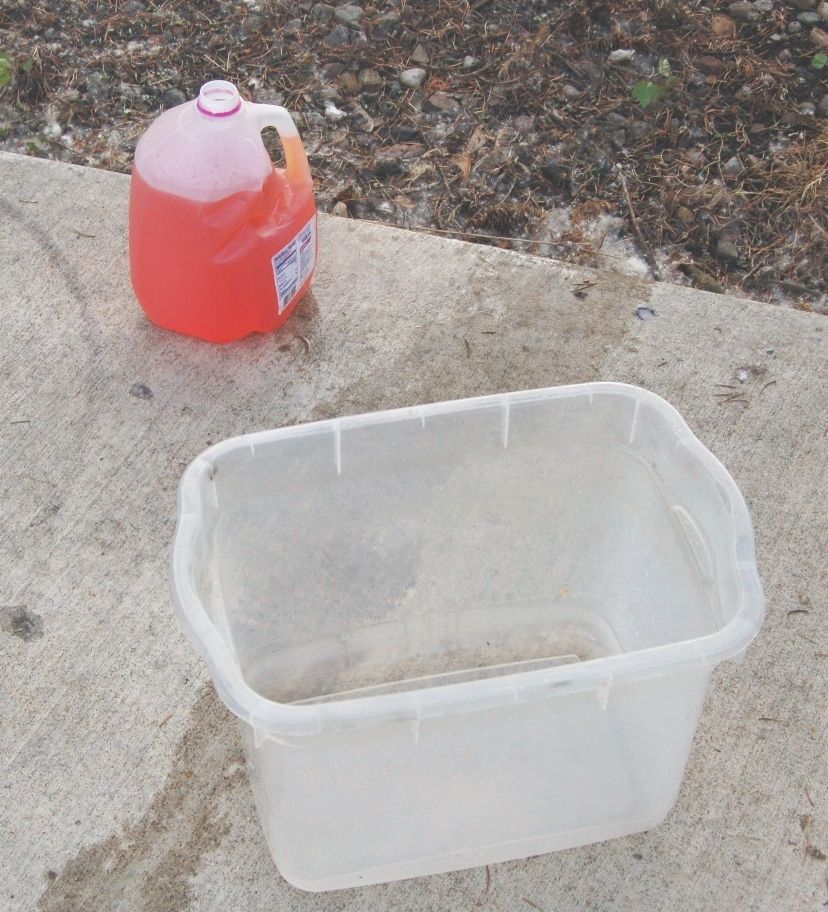 After only 3 gallons of water this is what I got: 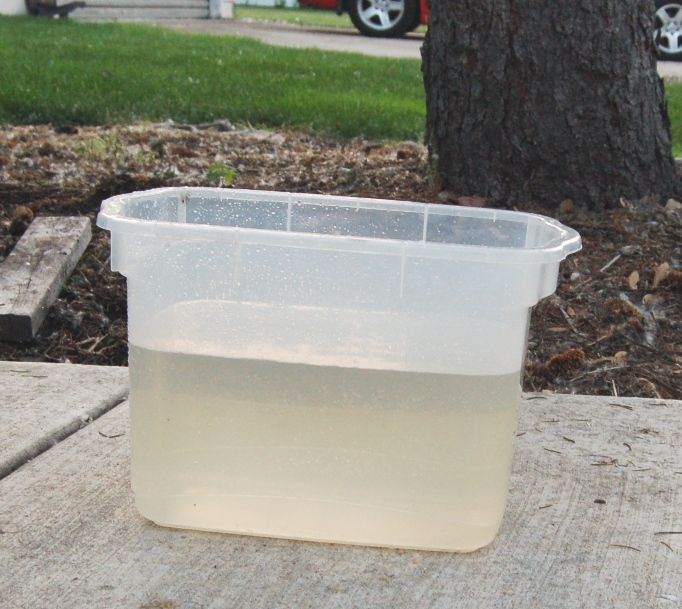 With my luck changing I pulled the passenger side KS and left the Drivers side out as well. Attacked from the top with the garden hose and just let it flow for a few minutes. 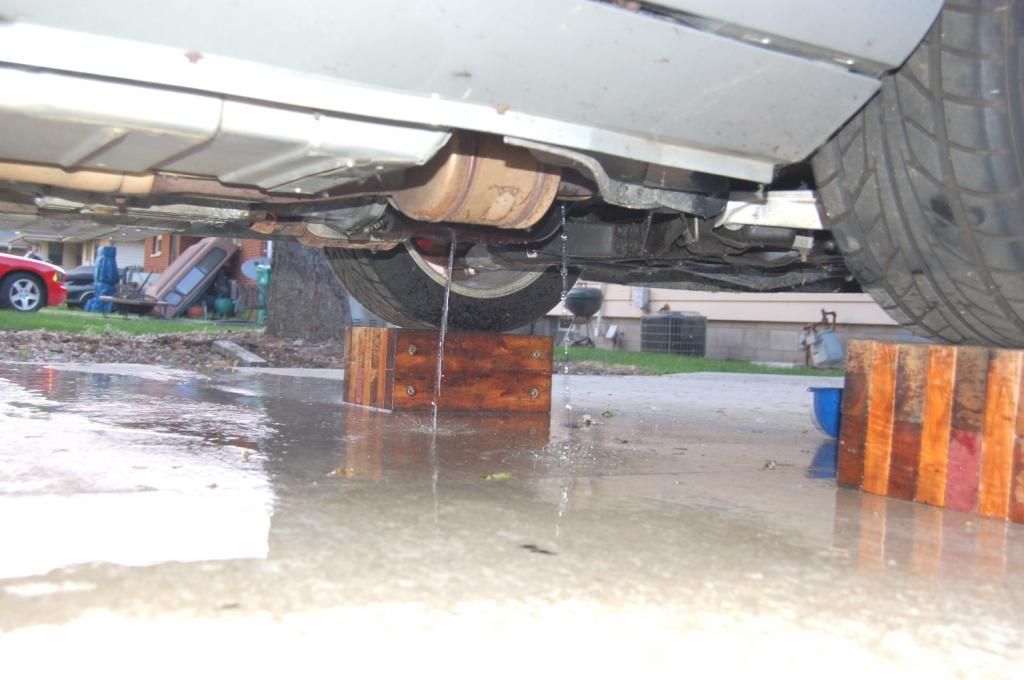 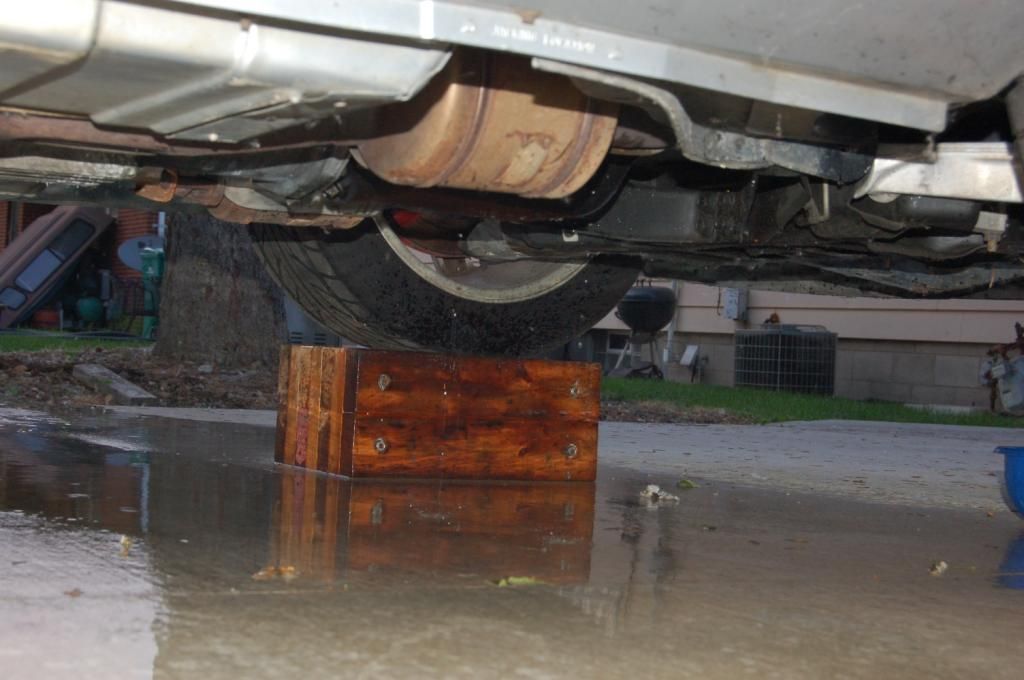 At this point saving the environment was the last thing on my mind. I was doing everything i could not to torch the car |
||
Posted on: 2014/7/11 3:29
|
|||
|
_________________
My shoulder hurts bad |
|||
|
Transfer
|
|
||
| 96LT4CE | Re: How To Part 1: Drain and Flush | ||
|
Guru Newb
|
By this time my thread about KS thread sealer was going strong and we learned that GM used some ultra top secret red in color thread sealer no one knew what it was or where to get it. So based on that thread the best choice I found was this:
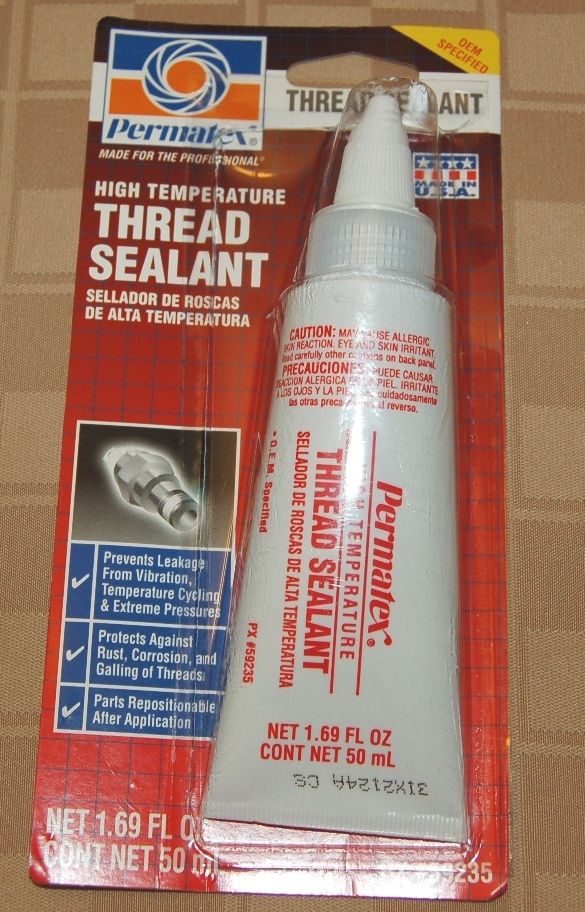 After letting the car air out over night with the KS removed it was now time to re install them. First it was time to put thread sealer on. leave the first 1/3 of the threads clean and apply to the 2nd 2/3: 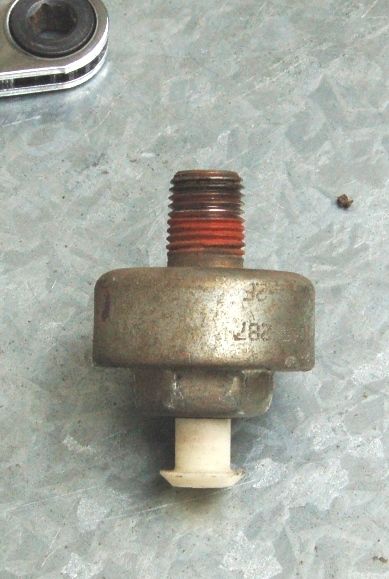 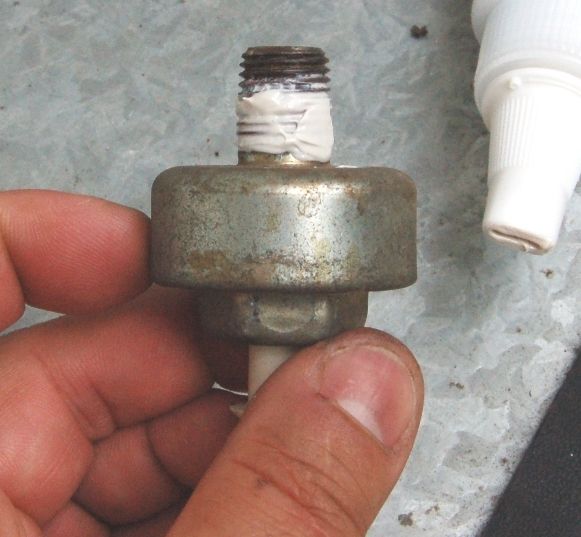 After you install the KS using your 22mm socket and torquing to 15 foot pounds go ahead and replace the electrical plug and shields: 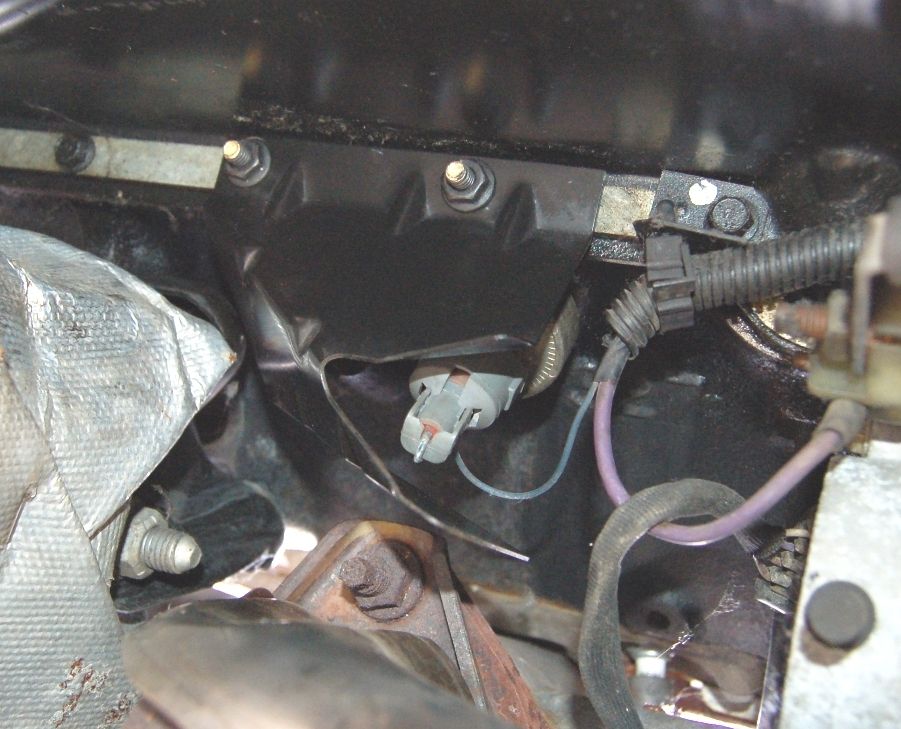 |
||
Posted on: 2014/7/11 3:40
|
|||
|
_________________
My shoulder hurts bad |
|||
|
Transfer
|
|
||
| 96LT4CE | Re: How To Part 1: Drain and Flush | ||
|
Guru Newb
|
Now that we have the engine block flushed, the radiator flushed, and the system "dry" we can focusing on cleaning the high fill and overflow reservoirs
High Fill first: 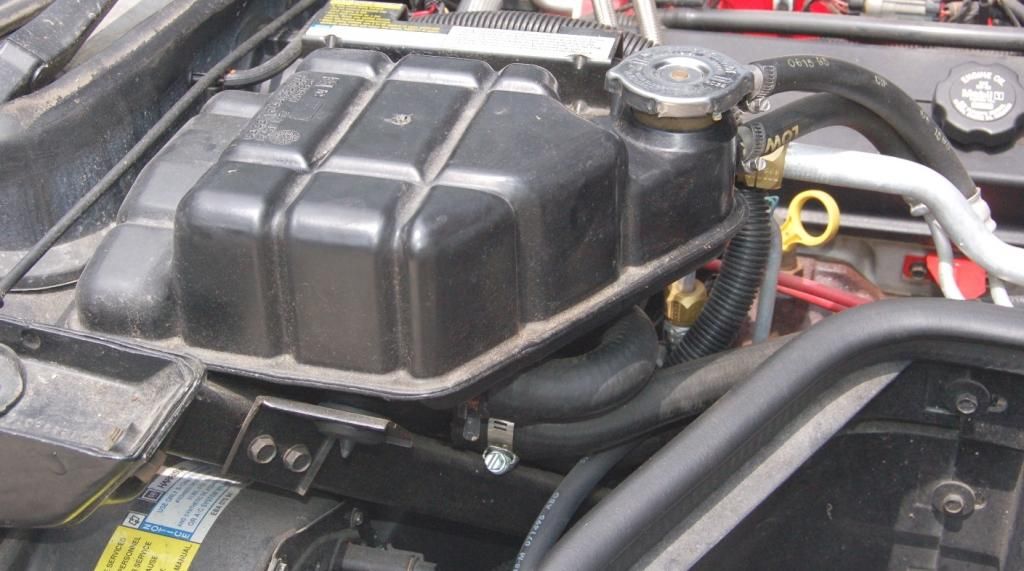 1st loosen and remove both hoses attached to it: 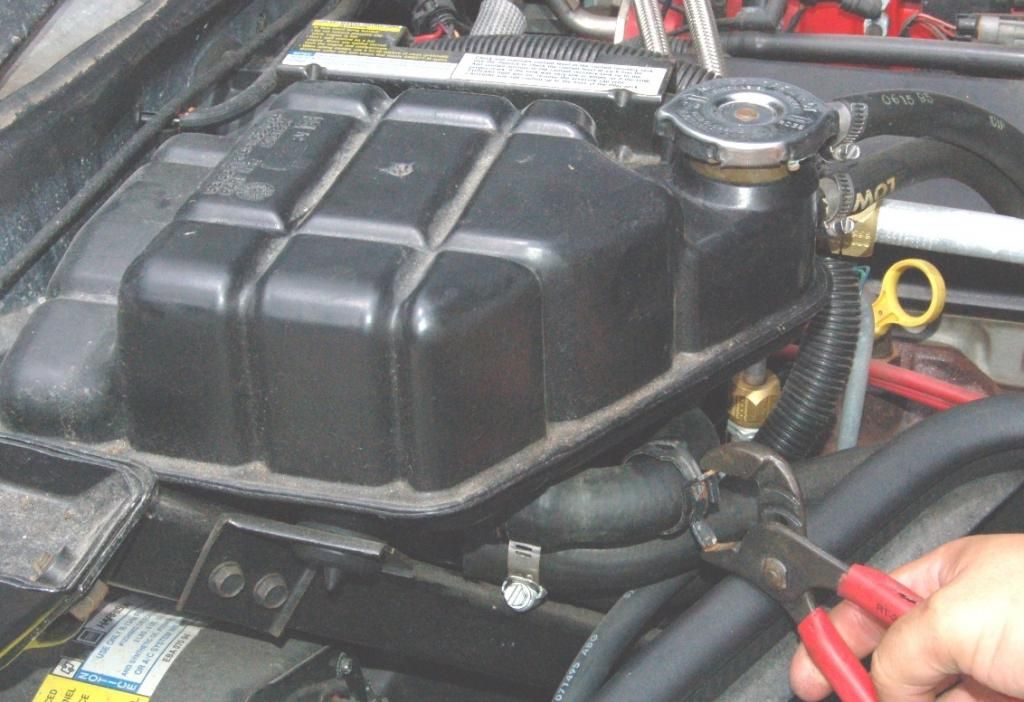 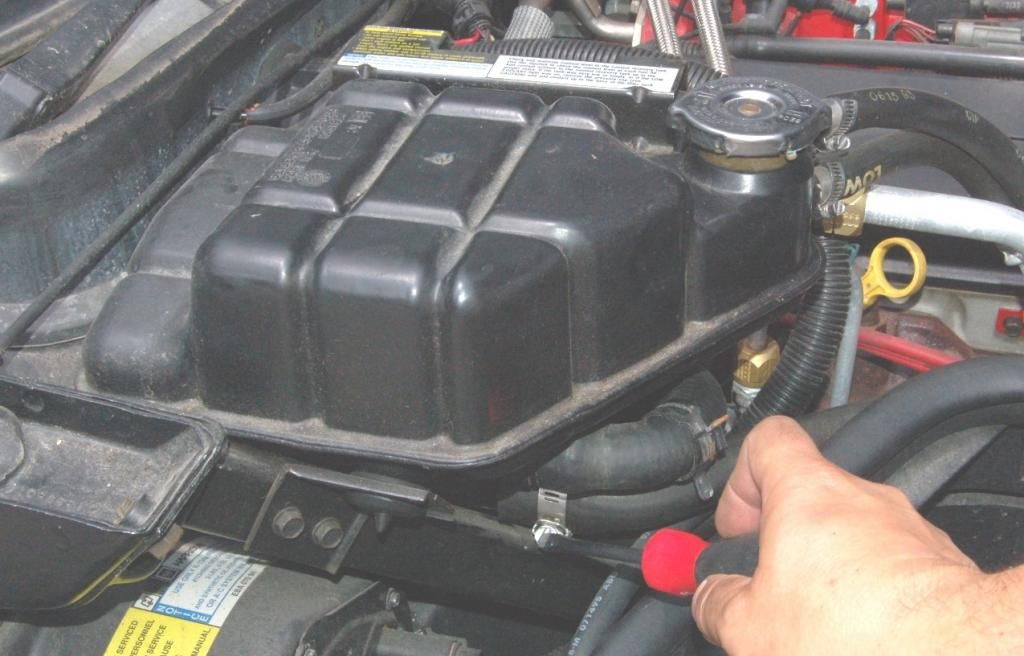 next remove the two top screws:  once the two top screws are removed you will be able to lift the tank out of it's place. Don't pull to hard as you still have to disconnect the wiring plug from the bottom. When lifting it out of place there is a plastic spike that's molded into the tank. It will be press fit into a rubber grommet. Gentle pressure will get it out. also, in my pic I still have the hoses attached. pull those 1st so that they will not be in your way. Once teh tank is removed go ahead and rinse it out and flush ant debris that may be trapped inside. 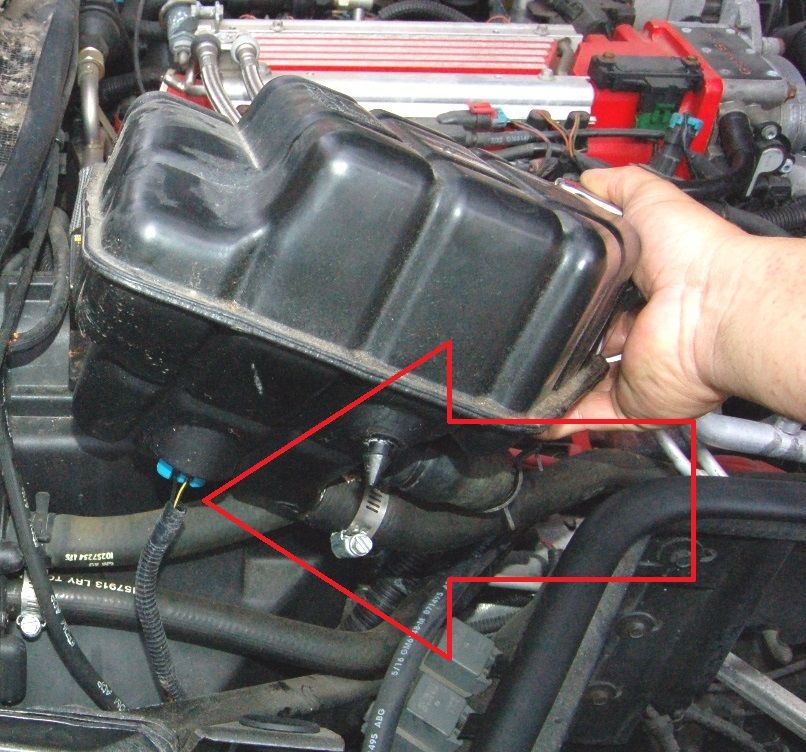 As a side track, while the tank is out, now is a great time to flush your heater core! One of the heater core hoses was attached to the high fill tank the other needs to be separated from it's valve to get access. Once separated use a garden hose at 1/4 to 1/2 open to flush the core. Flush from one hose for a minute or so then switch to the other hose. 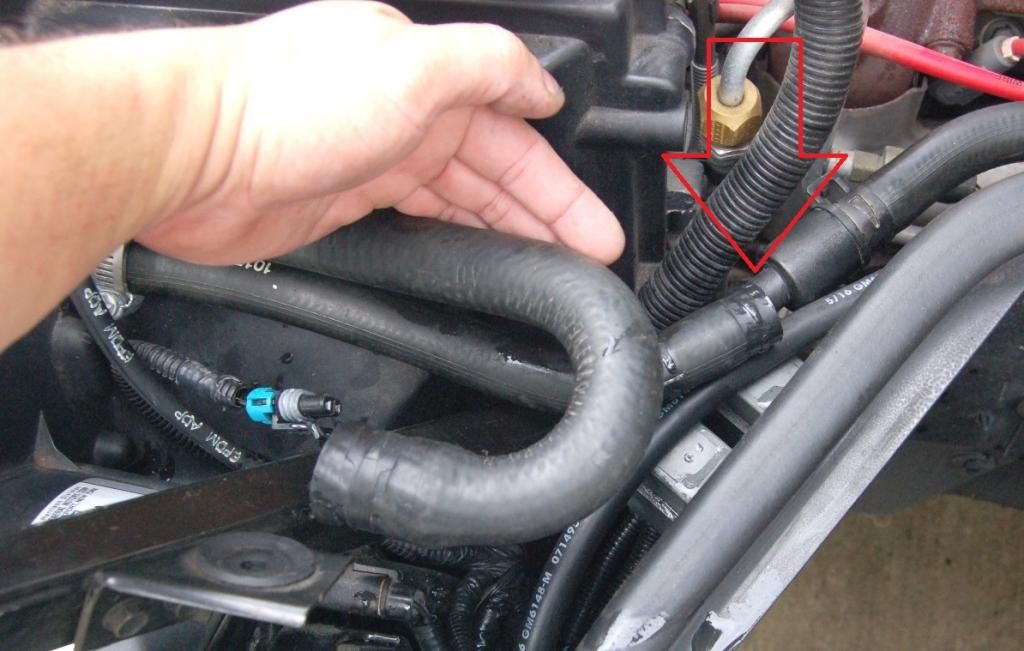 Once the heater core has been flush and the tank cleaned simply reverse the steps to reassemble. 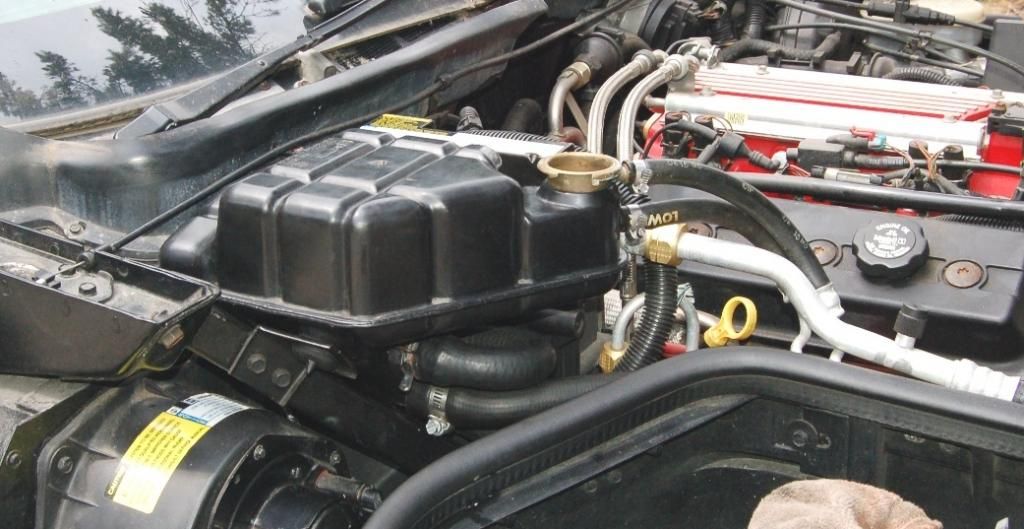 Now we turn to the overflow tank. Loosen one screw and remove three bolts. 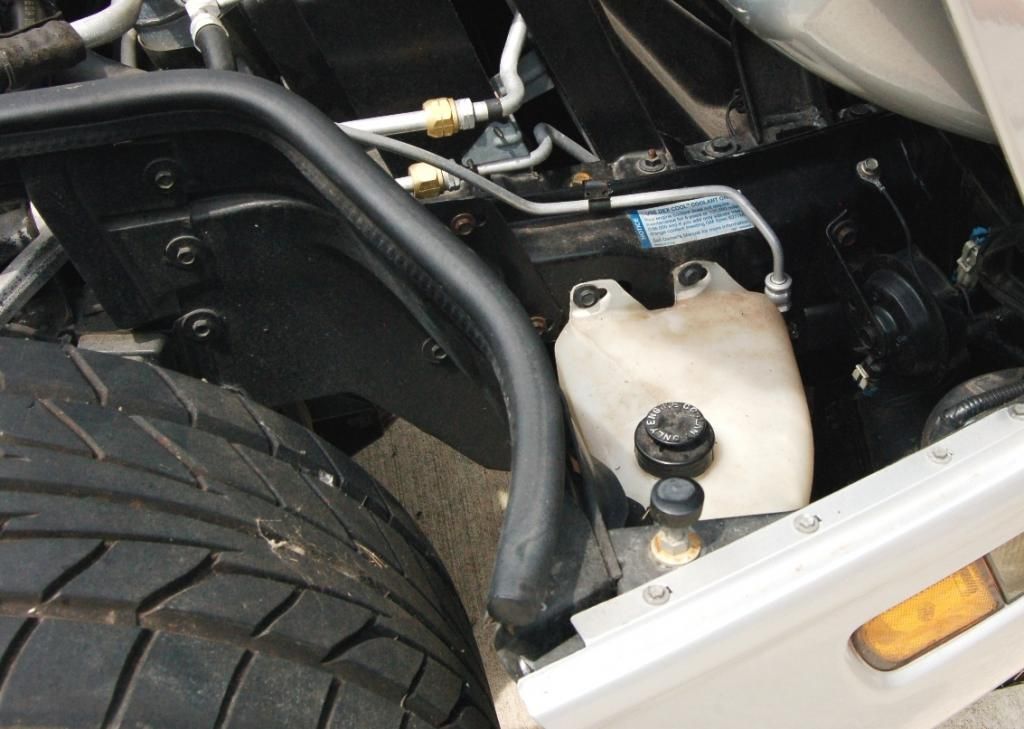  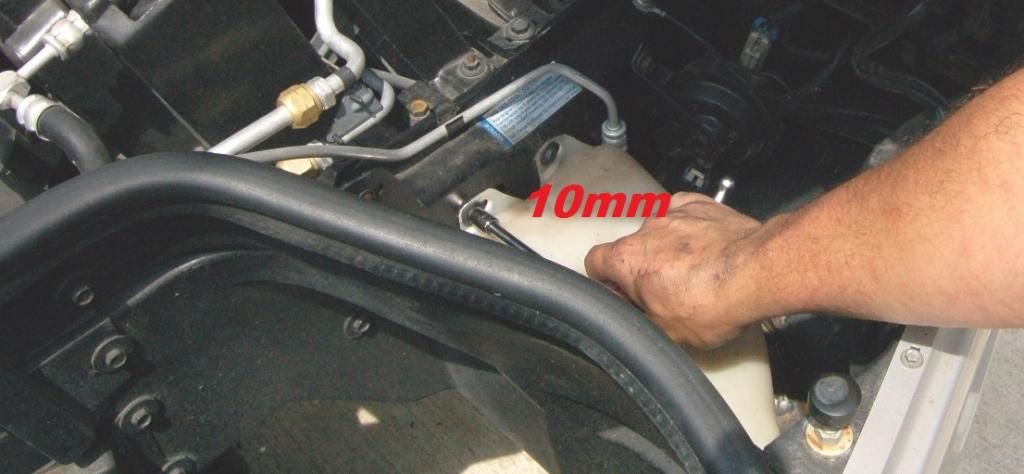 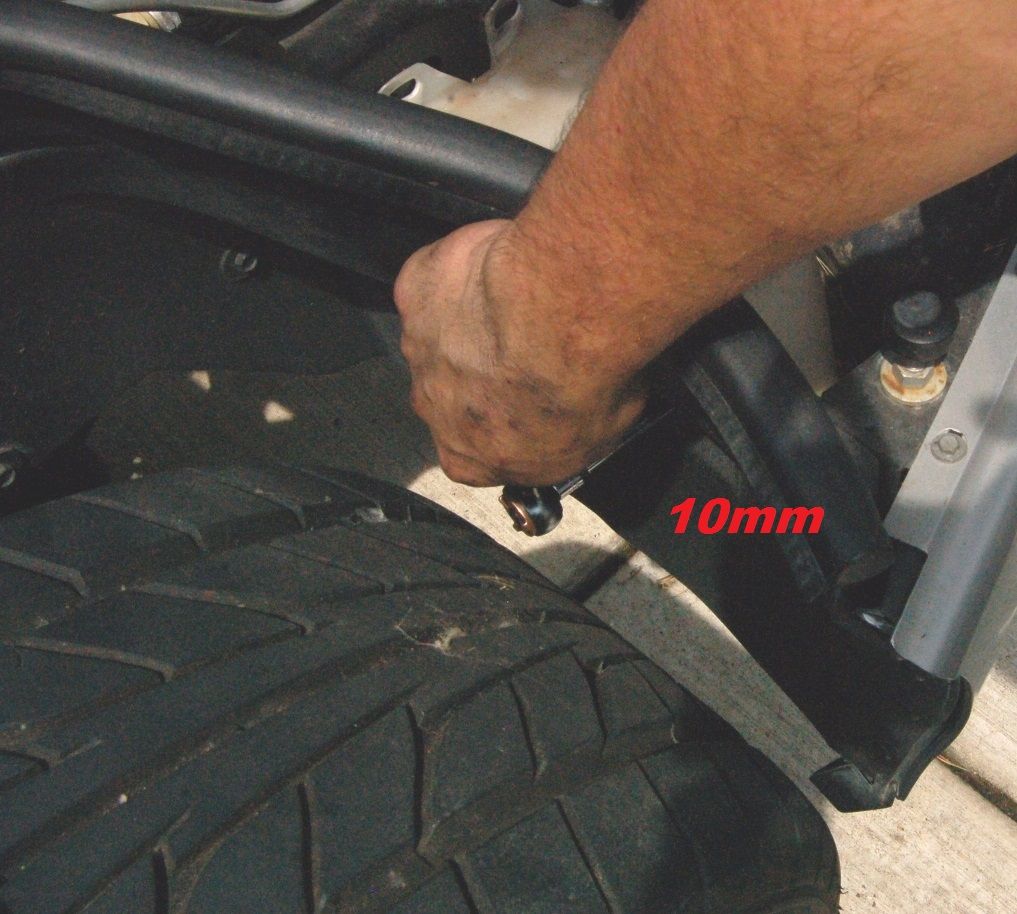 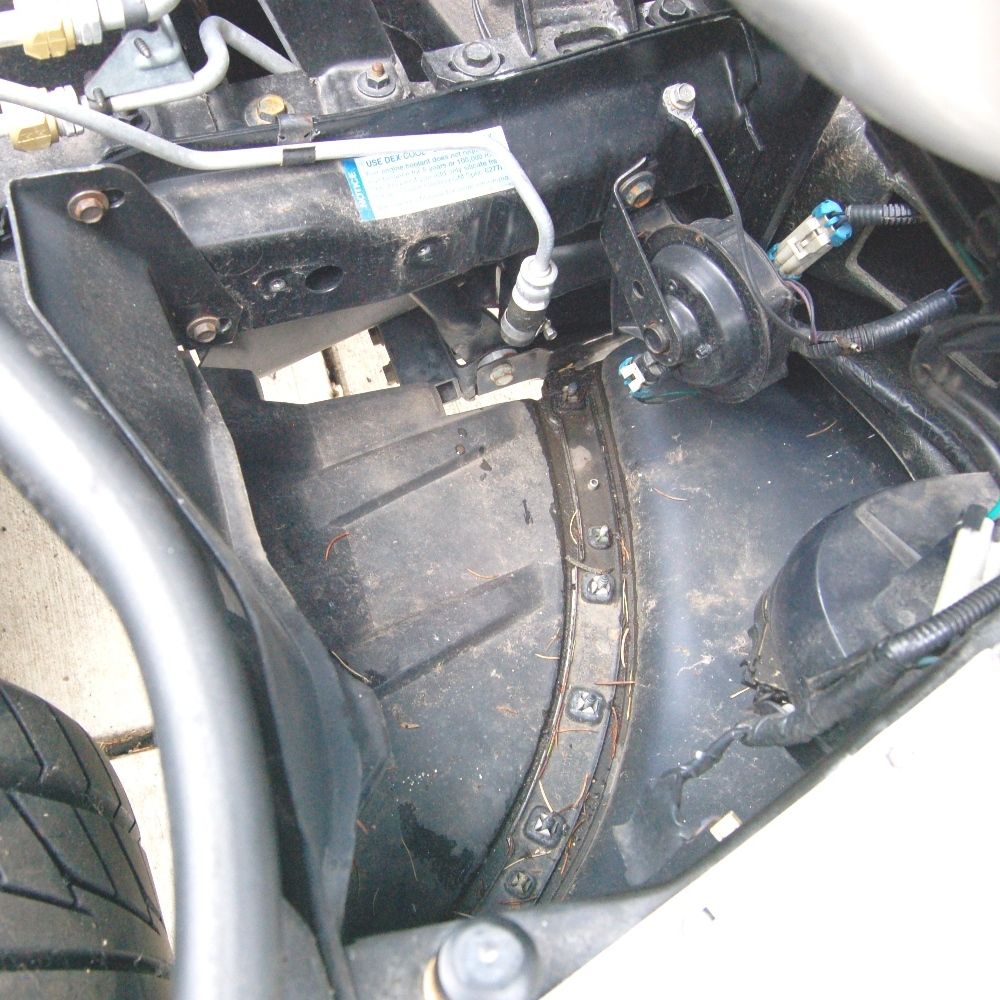 once out, clean: 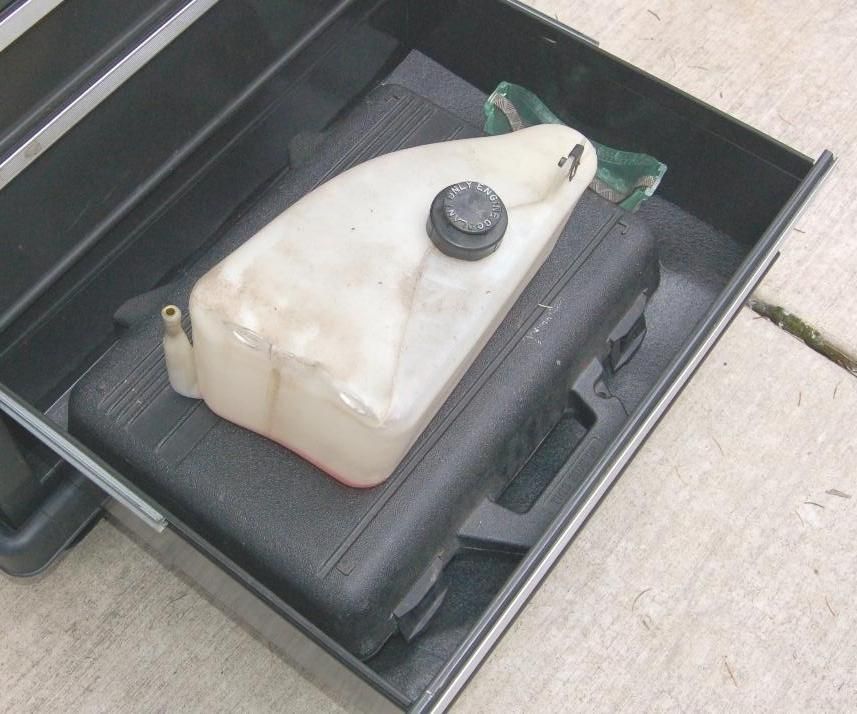 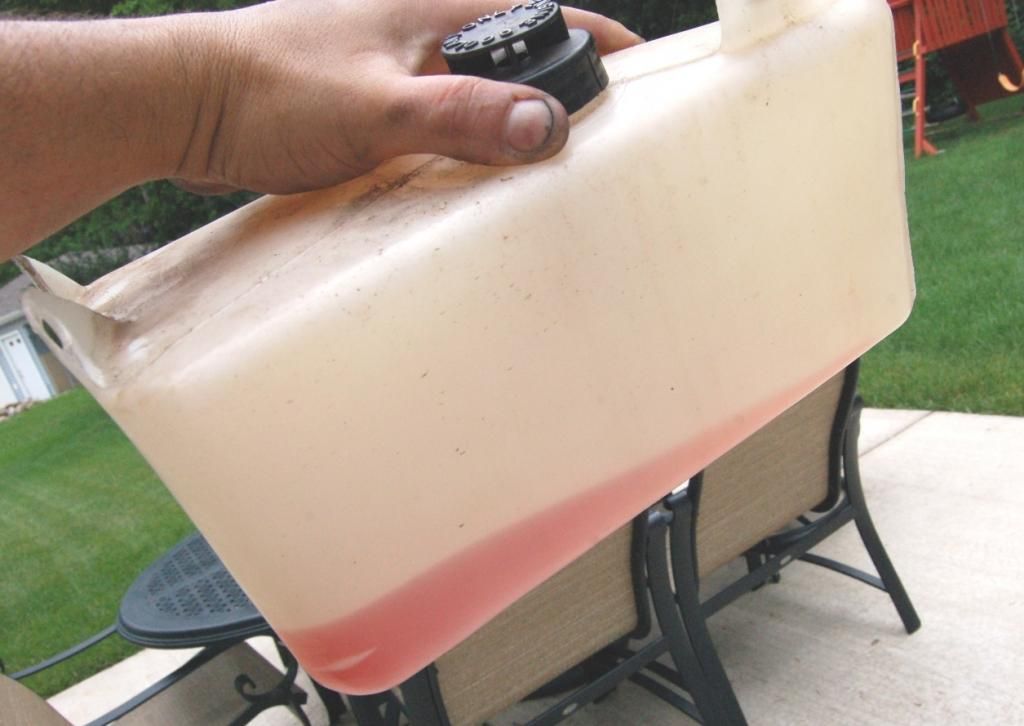 |
||
Posted on: 2014/7/11 4:44
|
|||
|
_________________
My shoulder hurts bad |
|||
|
Transfer
|
|
||
| 96LT4CE | Re: How To Part 1: Drain and Flush | ||
|
Guru Newb
|
This is the part of the story where if this was just a clean and flush I would say re install the overflow tank, load a t-stat and then do your fill procedure. But this inst that story. All this was done as a precursor to what really got us here, and that is the need for a radiator replacement. So with taht said, be on the look out for part 2 which is just that. A detailed thread on radiator replacement. The work is already done, pictures taken etc. But doing a thread like this takes a lot of time, and I need a break. I hope part 1 is helpful to at least one person out there!
Good luck, take your time and don't be scared |
||
Posted on: 2014/7/11 4:49
|
|||
|
_________________
My shoulder hurts bad |
|||
|
Transfer
|
|
||
| GRIS | Re: How To Part 1: Drain and Flush | ||
|
Elite Guru
 
|
THIS WAS A REALLY GREAT PRESENTATION! |
||
Posted on: 2014/7/11 13:05
|
|||
|
_________________
REMEMBER THE GOOD OLD DAYS WHEN NOUNS HAD GENDER AND PEOPLE HAD SEX? ---"yellow is for folks who think a bright red Corvette is too restrained." |
|||
|
Transfer
|
|
||
| bogus | Re: How To Part 1: Drain and Flush | ||
|
Grand Imperial Pooh-Bah
 
|
fantastic write up!!!!
A couple of thoughts... I had a lot of rust in my system... the engine sat for some time and had really gotten rusty inside. When I did my last coolant swap, I had a lot of rust in the overflow tank. It simply settled in the bottom. I used water, some Simple Green like cleaner, and a number of large self tapping screws with course threads. Shook that up and that removed just about all the rust inside the tank. I do want to replace it, simply because it is getting old (22 years and nearly 200k miles), but I don't have to YET. I am going to do another flush soon. I want all that rust out, and as of the last flushing, I think I got about 80% or more out, there is a touch more to get rid of. For the newbies to the LT1 world, note the t-stat in Post #2, Picture #4. The t-stat has a large disk on the bottom. That is because the water pump is much like the human heart, and that disk closes off one set of passages and opens up another. It is beyond important that when the LT1 t-stat is replaced that the right type of t-stat is used. |
||
Posted on: 2014/7/11 17:47
|
|||
|
_________________
The single biggest problem with communication is the illusion that it has taken place. - George Bernard Shaw Education is the best tool to overcome irrational fear. - me |
|||
|
Transfer
|
|
||
| 96LT4CE | Re: How To Part 1: Drain and Flush | ||
|
Guru Newb
|
It's funny that you mention rust and cars sitting.
My car sat in the garage unused for over 18 months. Closer to 24 actually. With that said, I have a FOLLOW up thread to my DIY's coming up addressing exactly what you mentioned. It has now been 10 days since I completed the work and about 350 miles and there are a few things I have noticed already that are in line with your mentioning of rust. Stay tuned! |
||
Posted on: 2014/7/11 18:41
|
|||
|
_________________
My shoulder hurts bad |
|||
|
Transfer
|
|
||
| Ultraman | Re: How To Part 1: Drain and Flush | ||
|
2015 Memorial Day Car Show Winner!

|
Well done....nice write up.....maybe that all has to do with your shoulder hurting....
 |
||
Posted on: 2014/7/11 20:02
|
|||
|
_________________
2010 Grand Sport Coupe Gone but not forgotten... Vote DeSantis in 2024.... Make the IRS go away... |
|||
|
Transfer
|
|
||
| 96LT4CE | Re: How To Part 1: Drain and Flush | ||
|
Guru Newb
|
lol, I wish my issue was from wrenching!
I just hope my issue doesn't effect my wrenching!! |
||
Posted on: 2014/7/11 21:17
|
|||
|
_________________
My shoulder hurts bad |
|||
|
Transfer
|
|
||
| bogus | Re: How To Part 1: Drain and Flush | ||
|
Grand Imperial Pooh-Bah
|
I hope the shoulder gets better!
I will be curious what you find re: rust. My engine was dry... hence, rust and lots of it But not anymore. |
||
Posted on: 2014/7/11 21:26
|
|||
|
_________________
The single biggest problem with communication is the illusion that it has taken place. - George Bernard Shaw Education is the best tool to overcome irrational fear. - me |
|||
|
Transfer
|
|
||
| Matatk | Re: How To Part 1: Drain and Flush | ||
|
Webmaster
 
|
Nice write up!
|
||
Posted on: 2014/7/11 23:47
|
|||
|
_________________
2002 EBM convertible, Magnusson supercharger, cam, headers, etc. 1989 Corvette...RIP |
|||
|
Transfer
|
|
||
You can view topic.
You cannot start a new topic.
You cannot reply to posts.
You cannot edit your posts.
You cannot delete your posts.
You cannot add new polls.
You cannot vote in polls.
You cannot attach files to posts.
You cannot post without approval.
|
|