|
|
Register To Post |
| Matatk | Harmonic Balancer Swap and Setting Timing (Pics) | ||
|
Webmaster
 
|
Well, if anyone recalls, when I went to check my timing a couple of weeks ago I couldn't because the harmonic balancer was bad. Well, finally got it swapped out and set the timing. Turns out it was way off like I suspected. Runs great now. Here's a few pics along the way:
Rented HB puller from AZ - you'll need one of these: 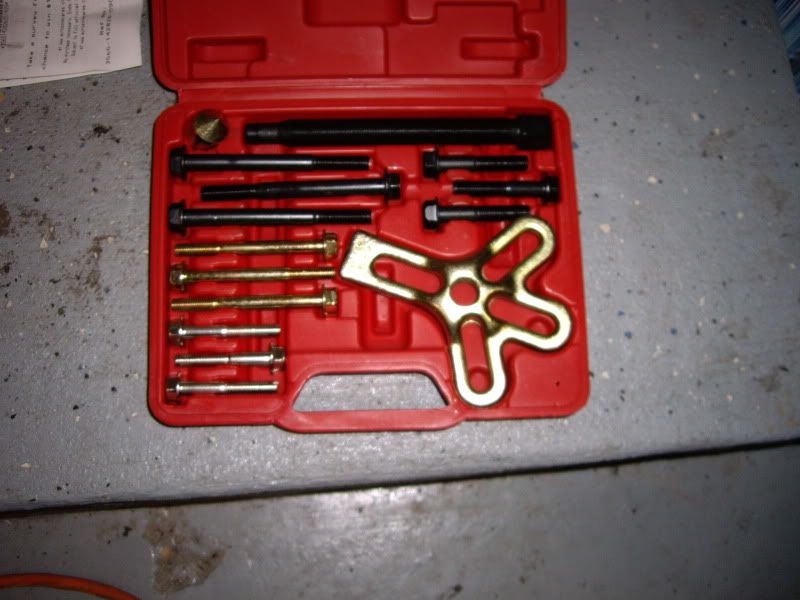 Go ahead and remove the air intake tube (I removed the filter housing, too) and then the serpentine belt. Once that's off, you will remove the water pump pulley (four nuts on mine). This is a good time to take off the "frisbee" on the front of the water pump if it hasn't been done before (I did mine 2 yrs ago). Once the pulley is off the water pump you will have a little more room to work. You will also have to loosen the belt tensioner and swing it out of the way. Top is the WP pulley, bottom is the HB pulley (kind of a step ahead, just a pic to show where everything is): 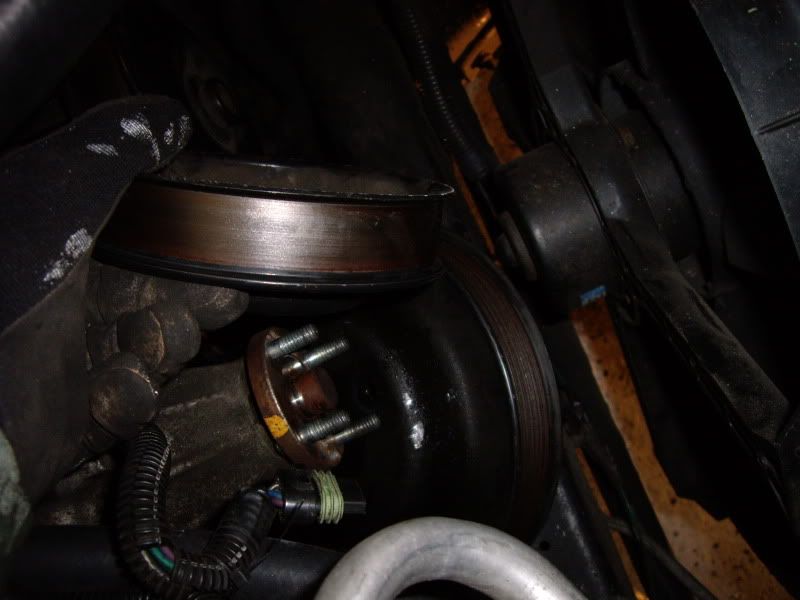 Next go ahead and remove the pulley off the front of the HB. There are a total of 4 bolts. It's a little difficult to prevent the crank from turning, so I stuck a crowbar behind the HB and held it in place. I wasn't worried about damaging it since I was replacing it. Removing the pulley: 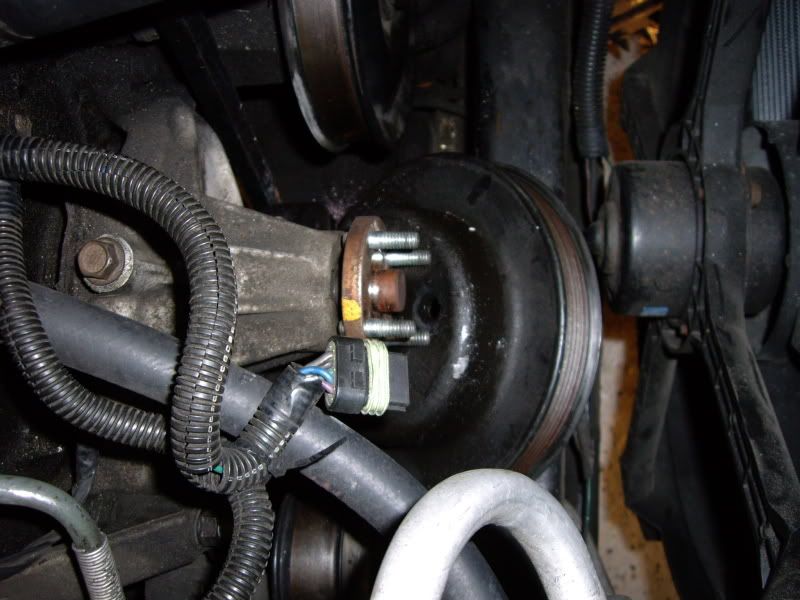 The offending HB still installed: 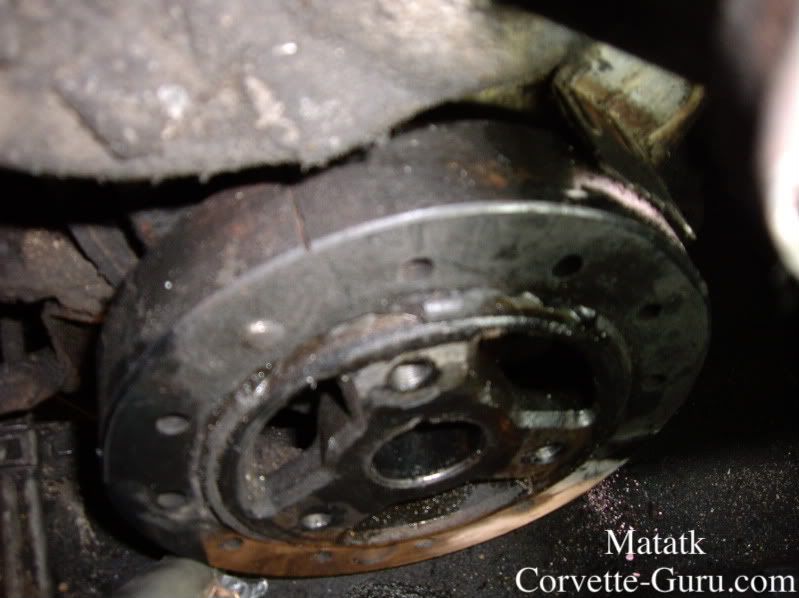 Next you have to crawl under the car and loosen the strap that holds the power steering line (10 mm nut). This is so you can slide in the HB puller tool. 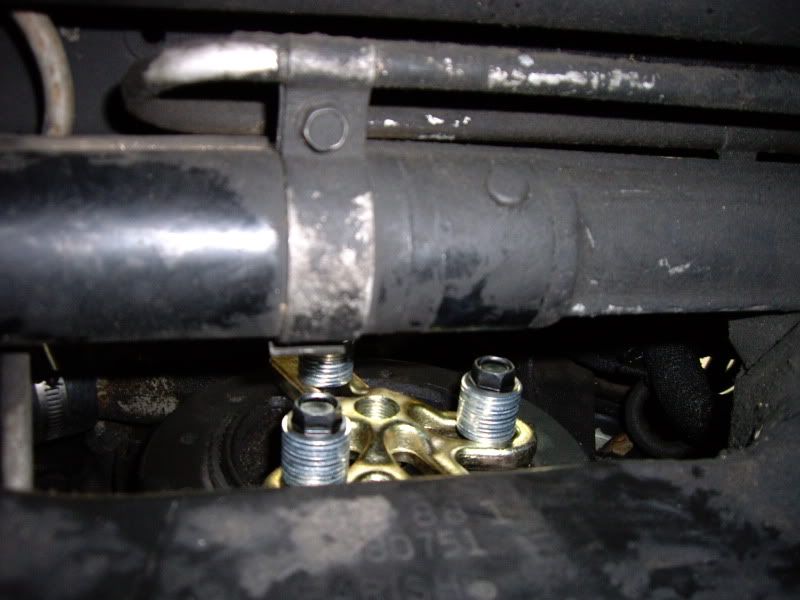 You can see in the above pic I had the HB puller partially installed. I put a bunch of washers on the bolts holding it on, this is not necessary. I just did it so it would be less time to thread the main bolt. Next slide the main (center) bolt through the PS line from the bottom and into the center of the puller. This is the bolt that presses into the crank (has a flared end) and pushes the tool back. 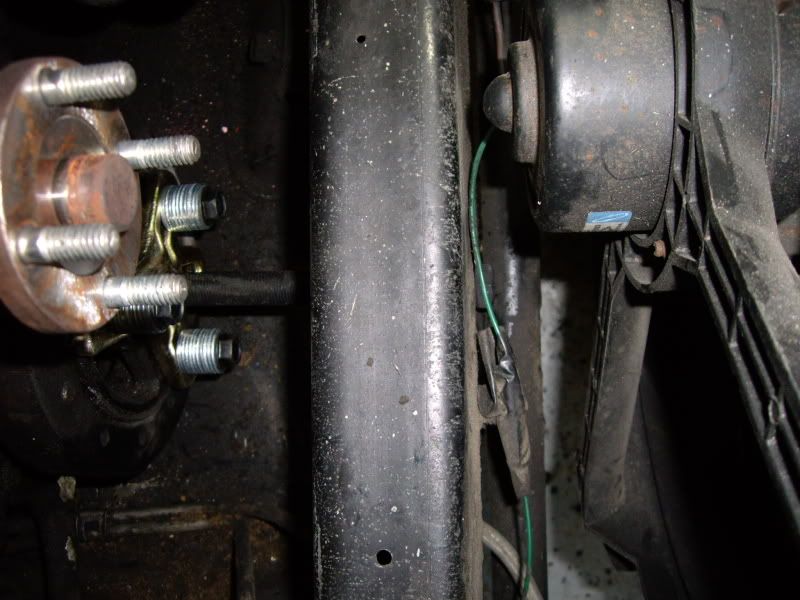 HB removed - old vs new: 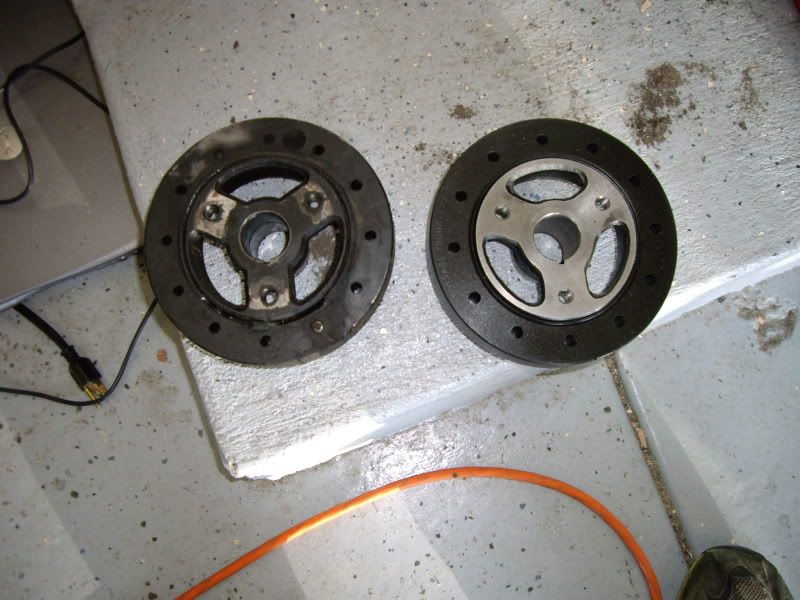 You can see the damage to the rubber ring: 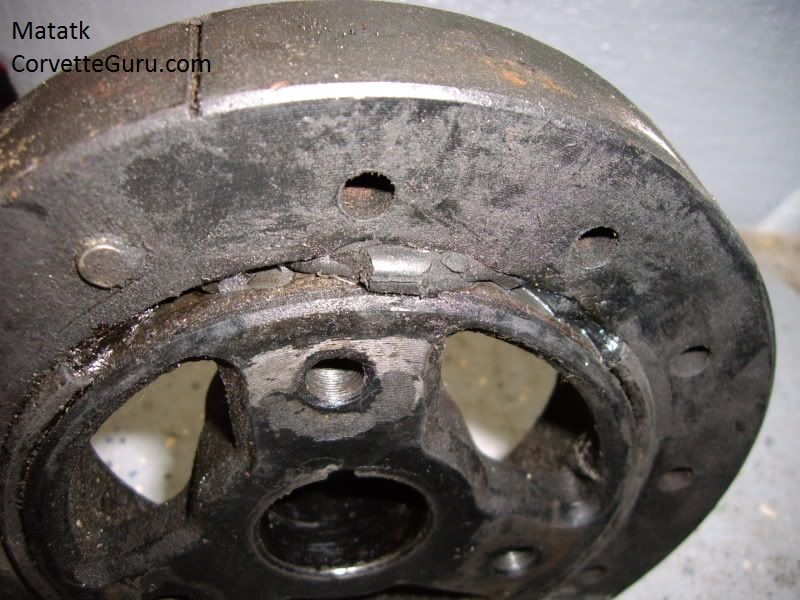 Unfortunately, I could not get my hands on a harmonic balancer installer. So I modified the puller and made my own. I went to the hardware store and bought a longer 7/16th (fine) bolt that was 4". I probably could have gotten a 3" and it would have worked, but I wanted to make sure it would grab enough thread. 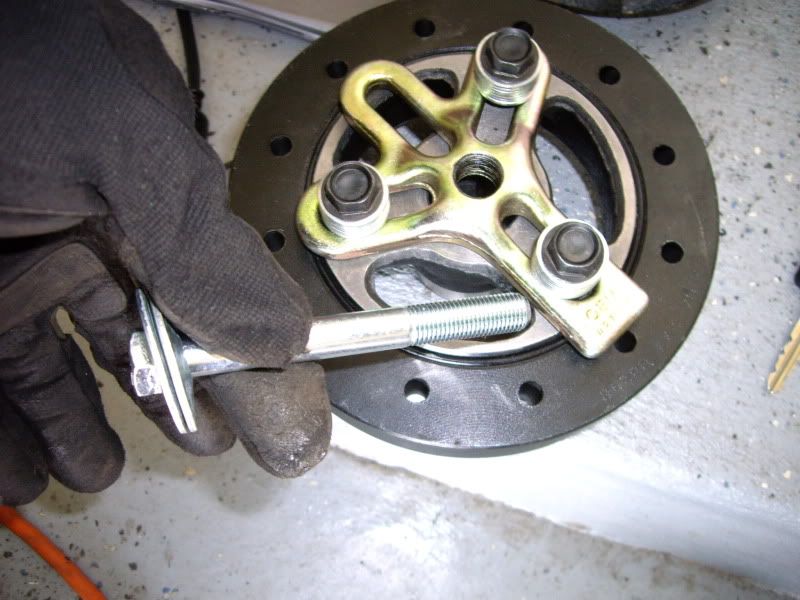 Install the puller on the new HB (lightly coat the inside of the HB with oil) and push it onto the crank. Then thread the new bolt with a series of washers on it into the crank and turn it. 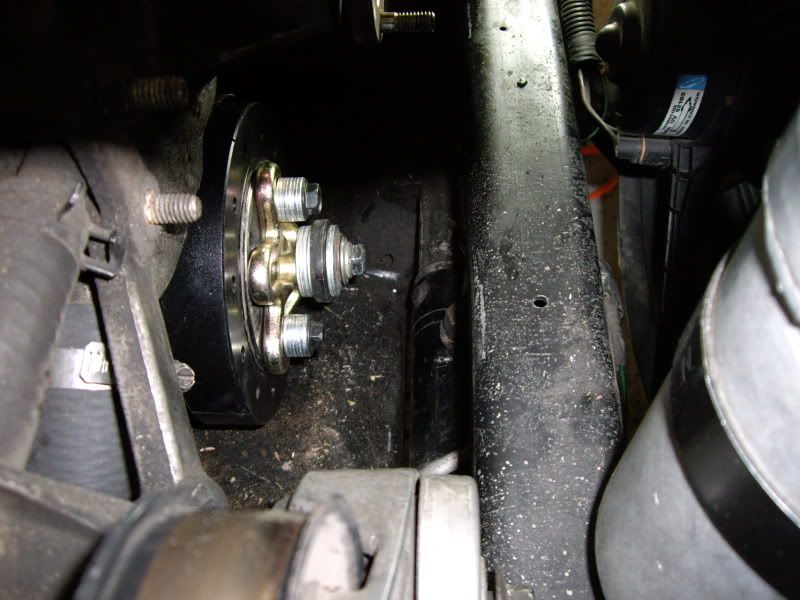 You'll notice the HB slowly being pulled into place. This is good. It'll be in place when the HB centerline (imaginary) is lined up with the "v" for the 0 on the timing tab. 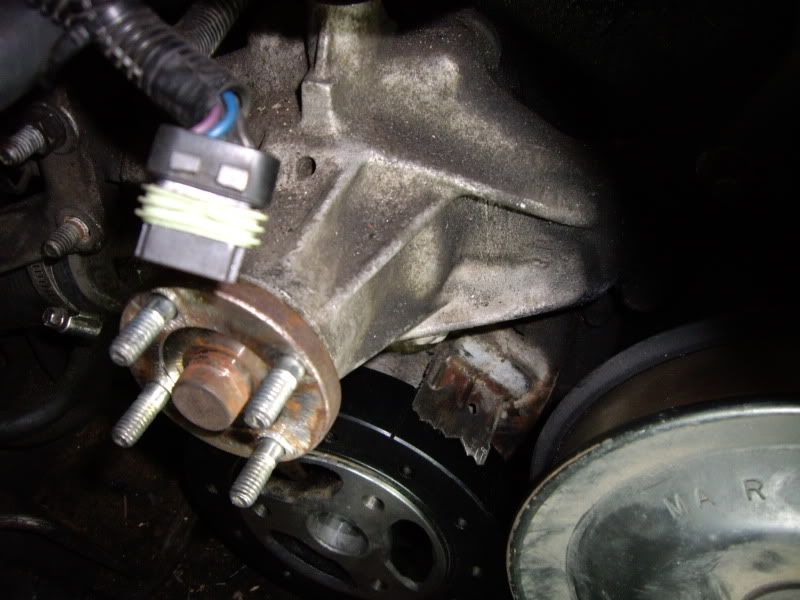 I do not recommend using the bubba method of a 2x4 or hitting it with a hammer, etc. Once the HB is on, you can replace the pulley and retorque the bolts. I believe the center is 70 ft lbs and the outer bolts are 32 ft lbs. 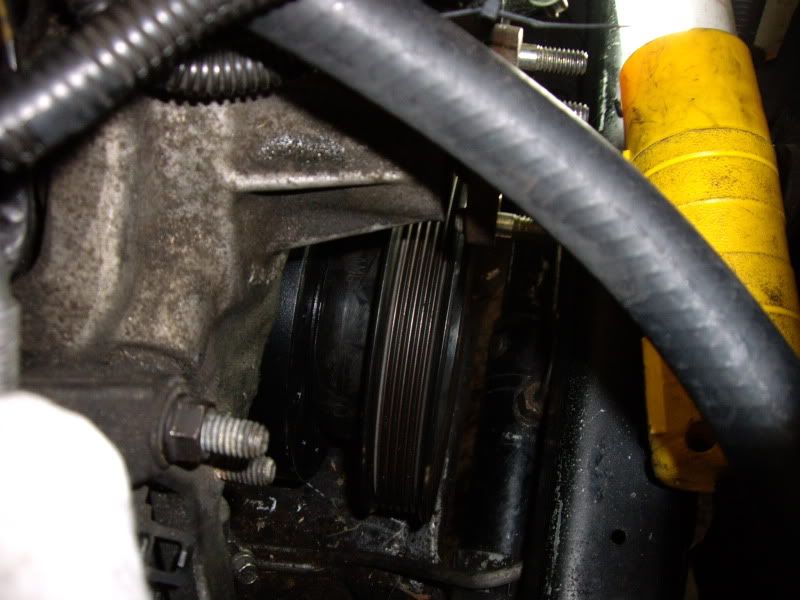 Reinstall the WP pulley, tensioner, serpentine belt, and air intake. Make sure the pulleys and belt line up properly. Now that the HB is installed, you can set the timing. You will need a timing light: 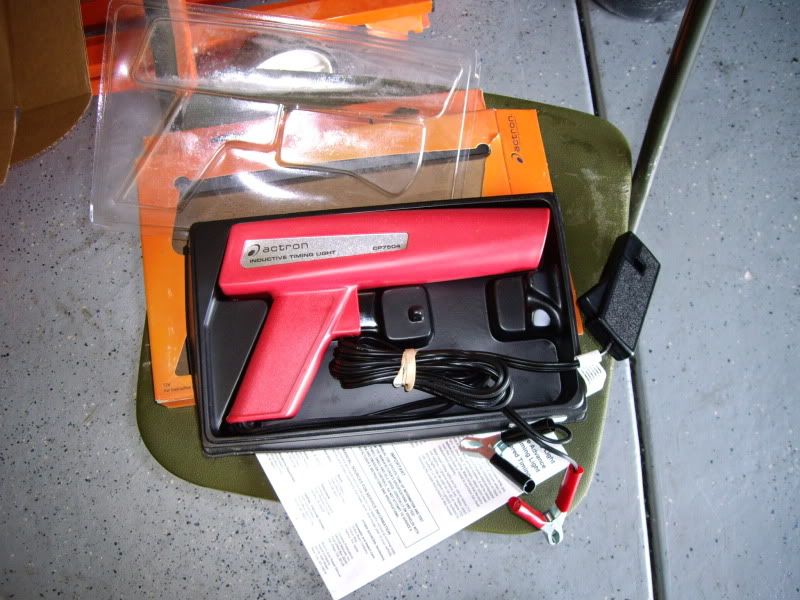 Remove the distributor cover from the plenum, it'll make it easier to turn the distributor if necessary. 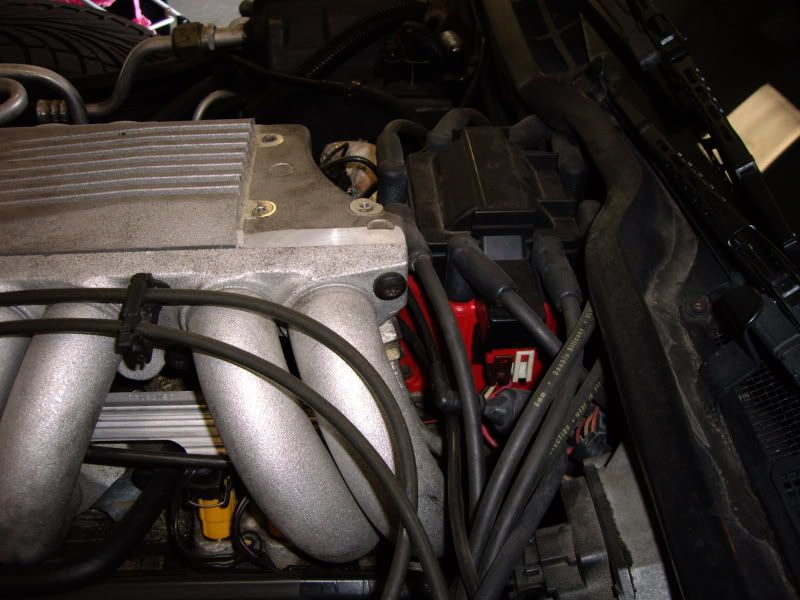 Find the EST wire next to the brake booster and disconnect it. 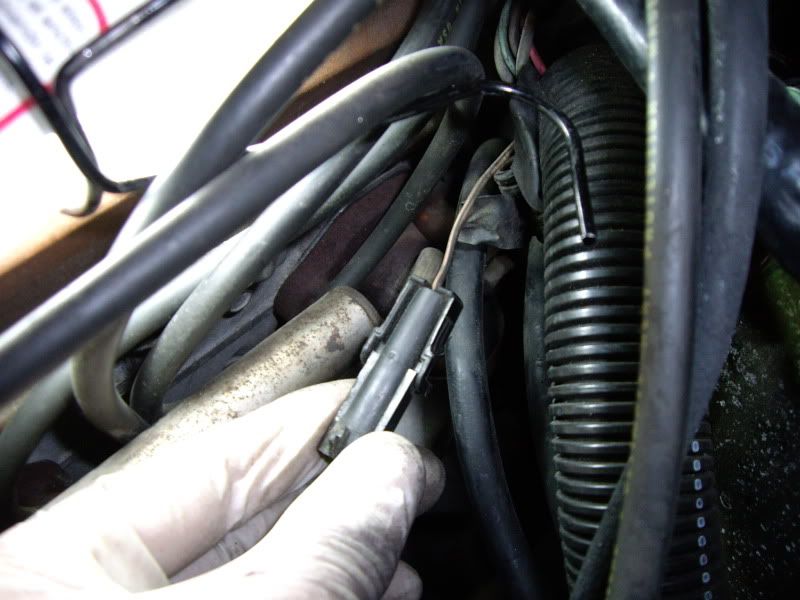 It's a little hard to see, but this is the timing mark on the front of the engine. Clean it off to be able to read it better. 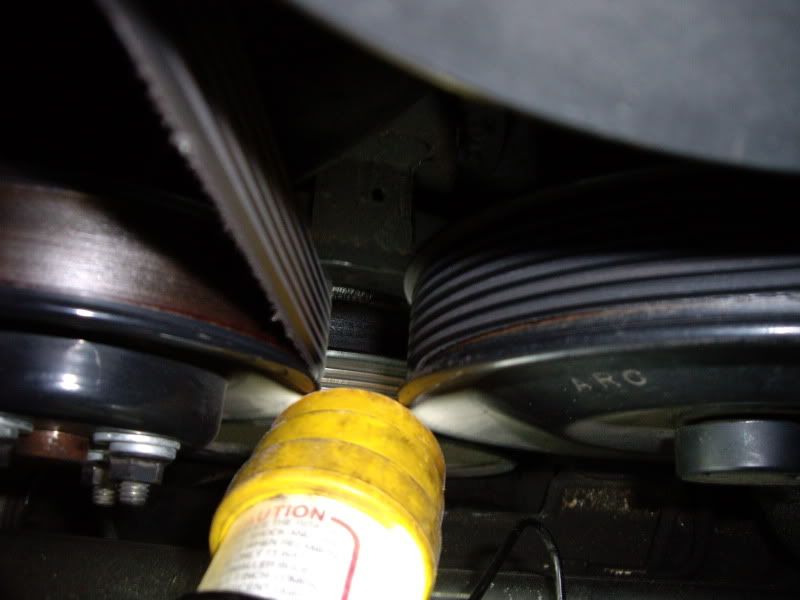 Hook up the timing light to the battery and clamp the pickup to the number one spark plug wire. For a 1989 automatic, the correct timing is 6 degrees before top dead center. First block the wheels. Then start the car and set the parking brake. Then put the car in drive. Car may have a little trouble idling, but you can blip the tb to keep it going. Aim the timing gun at the timing mark and see where the timing mark (slot) on the harmonic balancer shows up. If it is off, you will have to adjust the distributor by hand. I first checked my timing, found it was off, then shut off the car. I loosened the distributor clamp down bolt (with special bent distributor wrench) and restarted the car. I then turned the distributor and checked the timing. I shut down the car, tightened the distributor, and then double checked everything once more. Don't forget to reconnect the EST wire when done. Overall, my timing had been set at zero. Yup. "0". I reset it to 6* BTDC. After that I disconnected the battery and turned on the headlight switch to reset the computer. Not sure if this is necessary, but I thought it was a good idea. I then restarted the car and let it idle until it reached operating temps. Then came the test drive and I'm very happy with the results. Hopefully this helps anyone who has to do this repair or maintenance. Matthew |
||
Posted on: 2009/5/15 13:02
|
|||
|
_________________
2002 EBM convertible, Magnusson supercharger, cam, headers, etc. 1989 Corvette...RIP |
|||
 Transfer Transfer
|
|||
| Epimax | Re: Harmonic Balancer Swap and Setting Timing (Pics) | ||
|
Elite Guru
 
|
Thanks for yet another excellent tech tip!
 |
||
Posted on: 2009/5/15 15:12
|
|||
 Transfer Transfer
|
|||
| pappyfreebird | Re: Harmonic Balancer Swap and Setting Timing (Pics) | ||
|
Senior Guru
 
|
any chance such great werk pix n teachins kin be added ta the library?,,sure hopin in nevar hafta use em,,but still..thanks mattmayun fer takin extree time ta do that
|
||
Posted on: 2009/5/15 17:20
|
|||
 Transfer Transfer
|
|||
| Matatk | Re: Harmonic Balancer Swap and Setting Timing (Pics) | ||
|
Webmaster
 
|
Yeah, Pappy, I'll have to write something up and put it in the library.
Thanks for the comments. Matthew |
||
Posted on: 2009/5/16 11:30
|
|||
|
_________________
2002 EBM convertible, Magnusson supercharger, cam, headers, etc. 1989 Corvette...RIP |
|||
 Transfer Transfer
|
|||
| Durango_Boy | Re: Harmonic Balancer Swap and Setting Timing (Pics) | ||
|
Elite Guru
 
|
You did great work Matt for your first balancer install. One question, did you install the balancer until it was hard over on the crank shoulder or did you simply stop when it lined up?
The reason I ask is because the balancer goes on all the way until it stops at the crank shoulder. You might have hit it and lined it up simultaneously but when installing them make sure they are all the way on. Again, great work and fantastic documentation. |
||
Posted on: 2009/5/16 14:10
|
|||
 Transfer Transfer
|
|||
| Matatk | Re: Harmonic Balancer Swap and Setting Timing (Pics) | ||
|
Webmaster
 
|
I turned the bolt until the crank spun with it, so I'm pretty sure it was on all the way. That, in addition to the lining up with the timing mark and the pulleys being lined up properly indicated to me it was on all the way.
Matthew |
||
Posted on: 2009/5/16 15:25
|
|||
|
_________________
2002 EBM convertible, Magnusson supercharger, cam, headers, etc. 1989 Corvette...RIP |
|||
 Transfer Transfer
|
|||
| 86PACER | Re: Harmonic Balancer Swap and Setting Timing (Pics) | ||
|
Guru Newb
 
|
Wanted to add some info here.
For reference, the installer is Part# 27144 I rented it from Atuzone along with the puller. Your local store didn't have it? I think Advanced also has the same tool rental program. |
||
Posted on: 2009/11/26 11:45
|
|||
 Transfer Transfer
|
|||
| Matatk | Re: Harmonic Balancer Swap and Setting Timing (Pics) | ||
|
Webmaster
 
|
Quote:
I don't think the store I went to had it. Thanks for the part # ! Matthew |
||
Posted on: 2009/11/26 14:32
|
|||
|
_________________
2002 EBM convertible, Magnusson supercharger, cam, headers, etc. 1989 Corvette...RIP |
|||
 Transfer Transfer
|
|||
You can view topic.
You cannot start a new topic.
You cannot reply to posts.
You cannot edit your posts.
You cannot delete your posts.
You cannot add new polls.
You cannot vote in polls.
You cannot attach files to posts.
You cannot post without approval.
|
|


