


|
|
Register To Post |

| PeteK | 700R4-4L60 Build Up Part 2 | ||
|
Moderator
 
|
At the end of my first thread, I had a cleaned and prepared bare, painted case, waiting for the build up to start.
In this thread, I will do a step by step build up of the "output side" of the trans. This is the back half of the unit. I have about 10 hours of build time invested to get to this point, and about 18 hours total for teardown, cleaning, inspection, and build time. *Remember, I am about 1/2 way done. ** I am also keeping track of parts cost, and will share it at the end. My photo's will not reflect the inspection process. Basically, each and every component needs to be checked for: Wear Cracks Burrs Straightness etc. Anything worn or bent is scrapped and replaced with quality used, or new. I change every bushing, in every trans. There are 12 of them. *Most are upgraded. I also change every thrust bushing, every torrington bearing, rubber seal, paper gasket, teflon seal, metal clad seal, and filters. I do quite a few oiling mods that I will not show in the pics. Every builder must have some trade secrets. I snapped plenty of pics, but have not yet downloaded them. As I travel this week, I hope to update the thread steadily. Stay tuned, and thanks for looking. |
||
Posted on: 2009/9/1 0:51
|
|||
|
_________________
"It was really on a pass until it came apart." "Yeah. They always are." |
|||
 Transfer Transfer
|
 
|
||

| Matatk | Re: 700R4-4L60 Build Up Part 2 | ||
|
Webmaster
 
|
Looking forward to it Pete. Would you say this is average time invested, or what? I hear of guys rebuilding a trans in an afternoon. Is that BS or just not as "good" of a job?
Matthew |
||
Posted on: 2009/9/1 13:45
|
|||
|
_________________
2002 EBM convertible, Magnusson supercharger, cam, headers, etc. 1989 Corvette...RIP |
|||
|
Transfer
|
|
||
| PeteK | Re: 700R4-4L60 Build Up Part 2 | ||
|
Moderator
|
I am only referencing the time to show how long it takes to do one right. After 400 plus units (probably over 500), I doubt I can do them much faster, and still keep the same quality.
It makes me laugh when I see one on e-bay advertised as "500 Hp capable" free shipping and torque converter- $595 delivered. |
||
Posted on: 2009/9/2 0:42
|
|||
|
_________________
"It was really on a pass until it came apart." "Yeah. They always are." |
|||
|
Transfer
|
|
||
| Matatk | Re: 700R4-4L60 Build Up Part 2 | ||
|
Webmaster
|
Quote:
Come on, Pete, any trans can handle 500 HP. Once. Matthew |
||
Posted on: 2009/9/2 2:36
|
|||
|
_________________
2002 EBM convertible, Magnusson supercharger, cam, headers, etc. 1989 Corvette...RIP |
|||
|
Transfer
|
|
||
| PeteK | Re: 700R4-4L60 Build Up Part 2 | ||
|
Moderator
|
When I left off in part 1, we had a clean, bare, ready to build case:
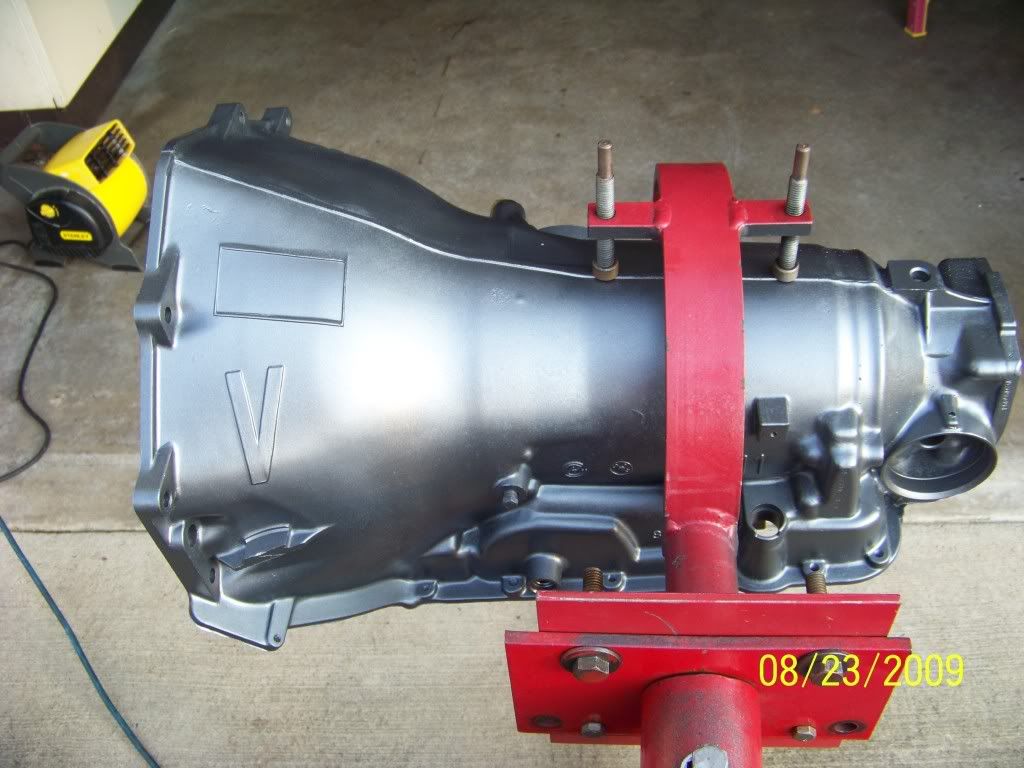 The parts below are installed first:  Case bushing is installed with locktite, to the correct depth: 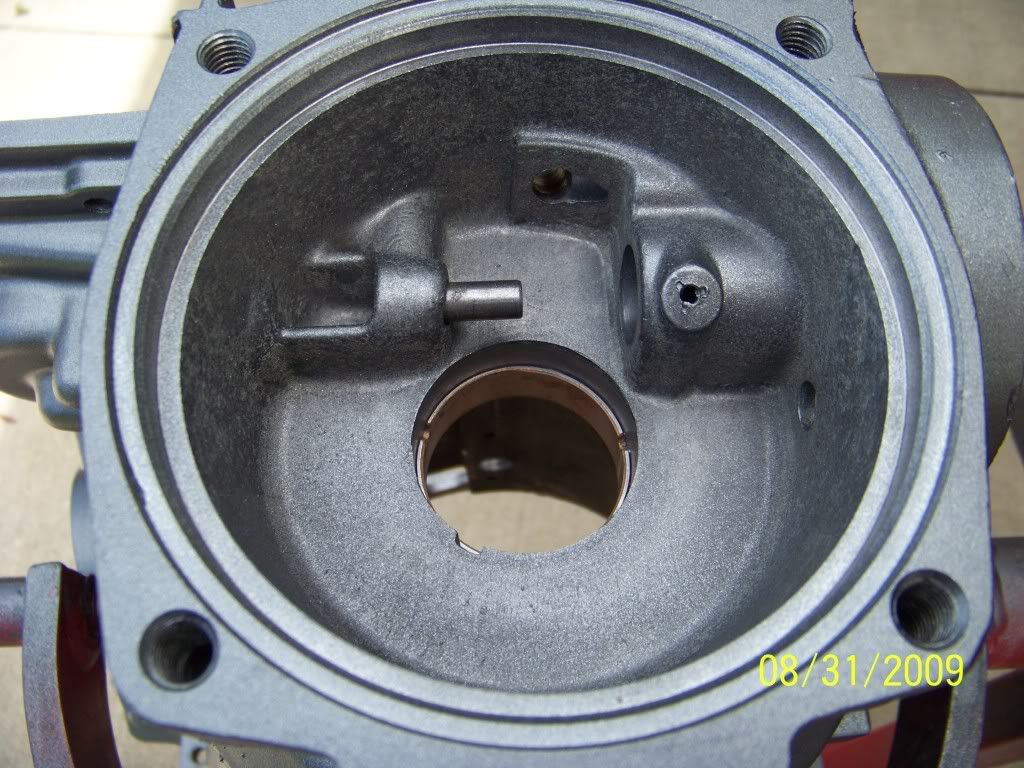 Reverse checkball capsule installed: 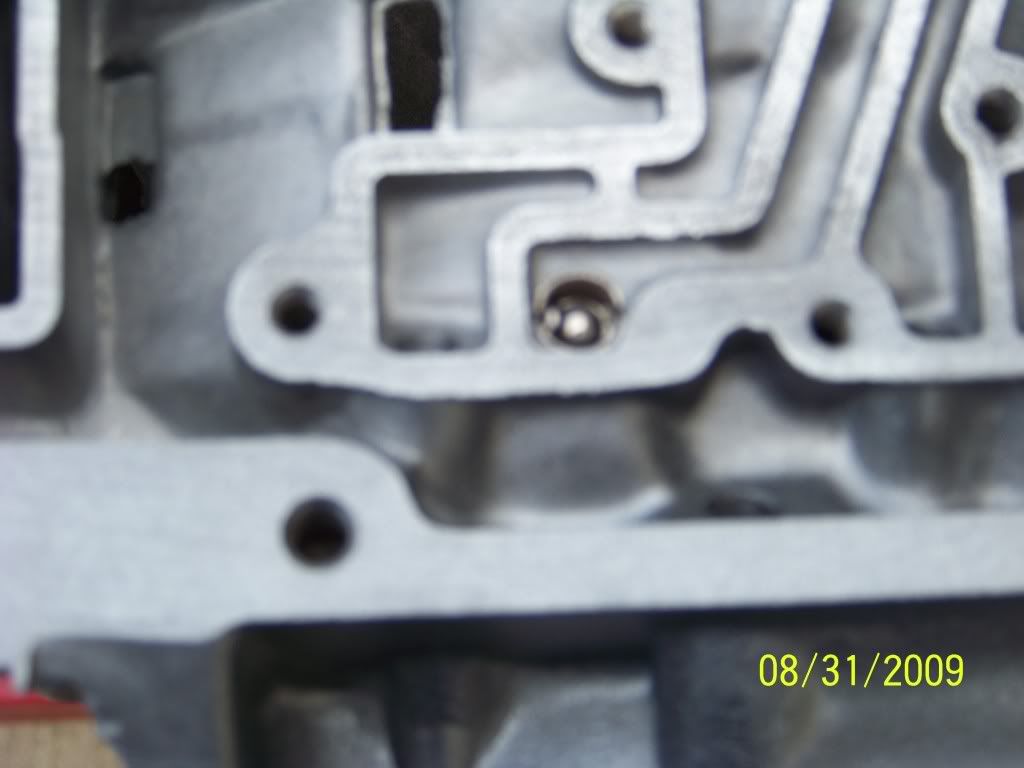 The new servo checkball capsule is installed carefully using a 2 1/2 inch long bolt, 3/8 inch diameter. Although the shop manual states it should be installed at 1 5/8, it is actually a pinch deeper: 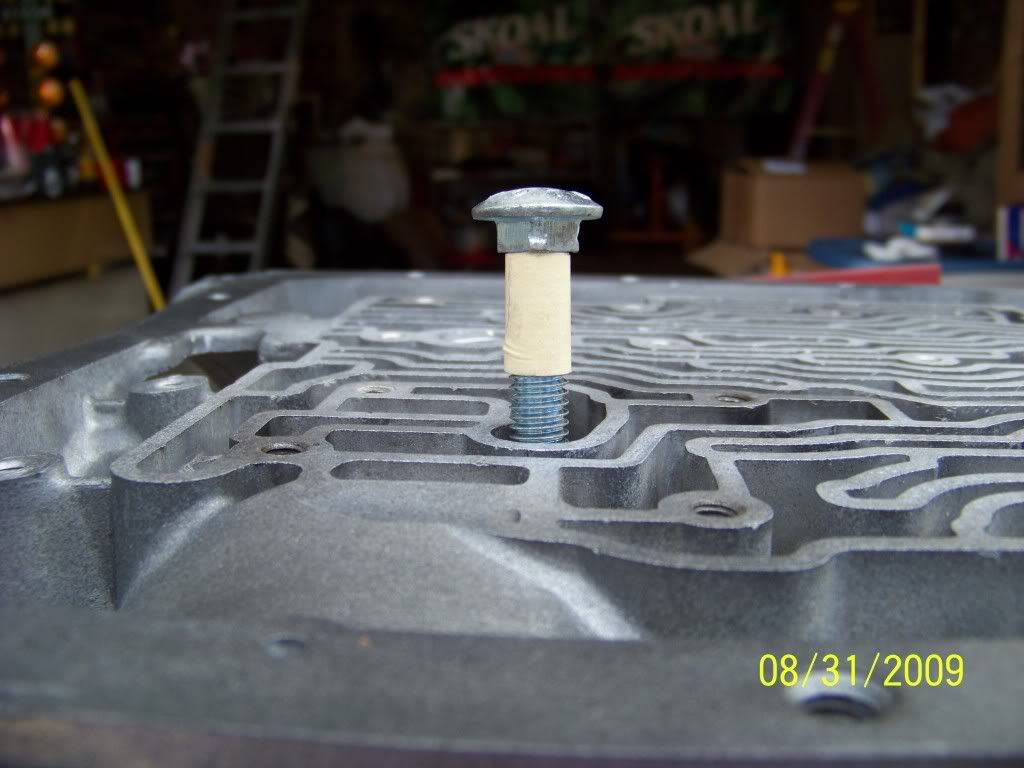 The oil channels must be centered in the opening: 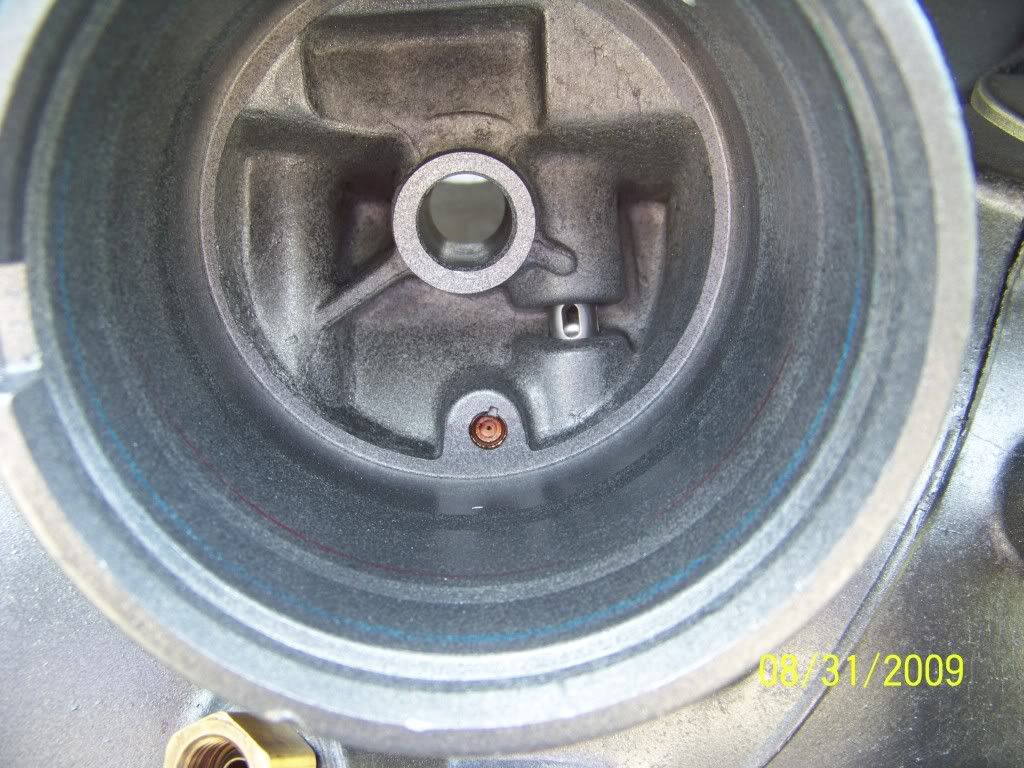 Next up is the repair sleeve for the 3-4 accumulator: 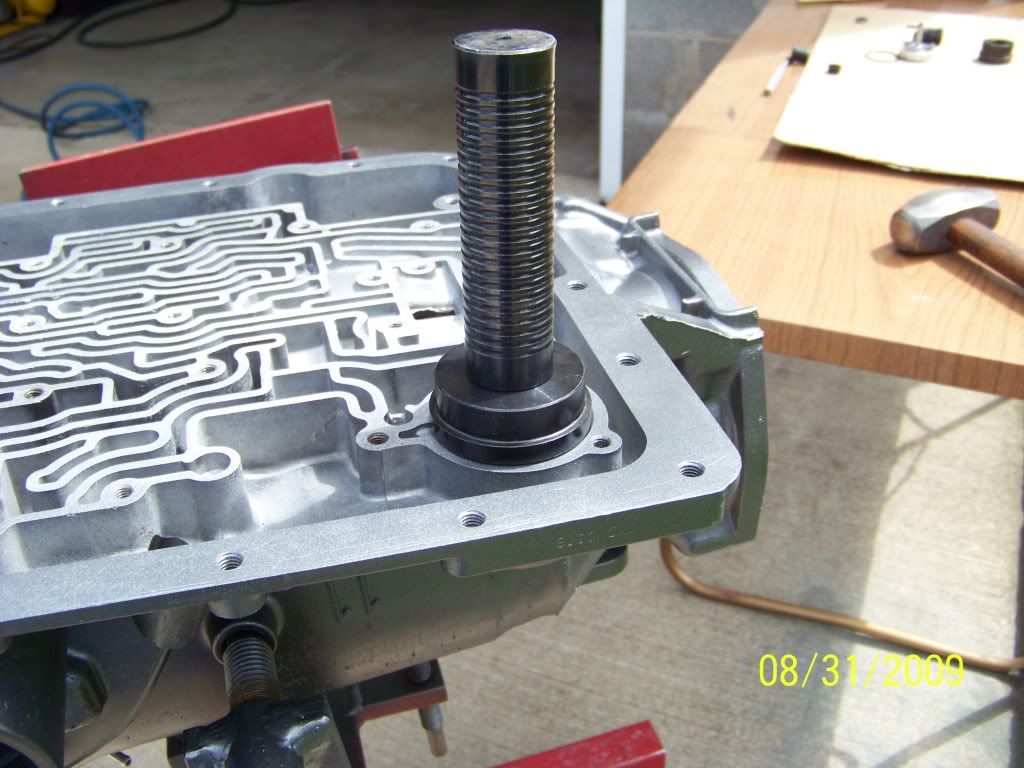 Finshed sleeve with custom piston and seal mocked up: 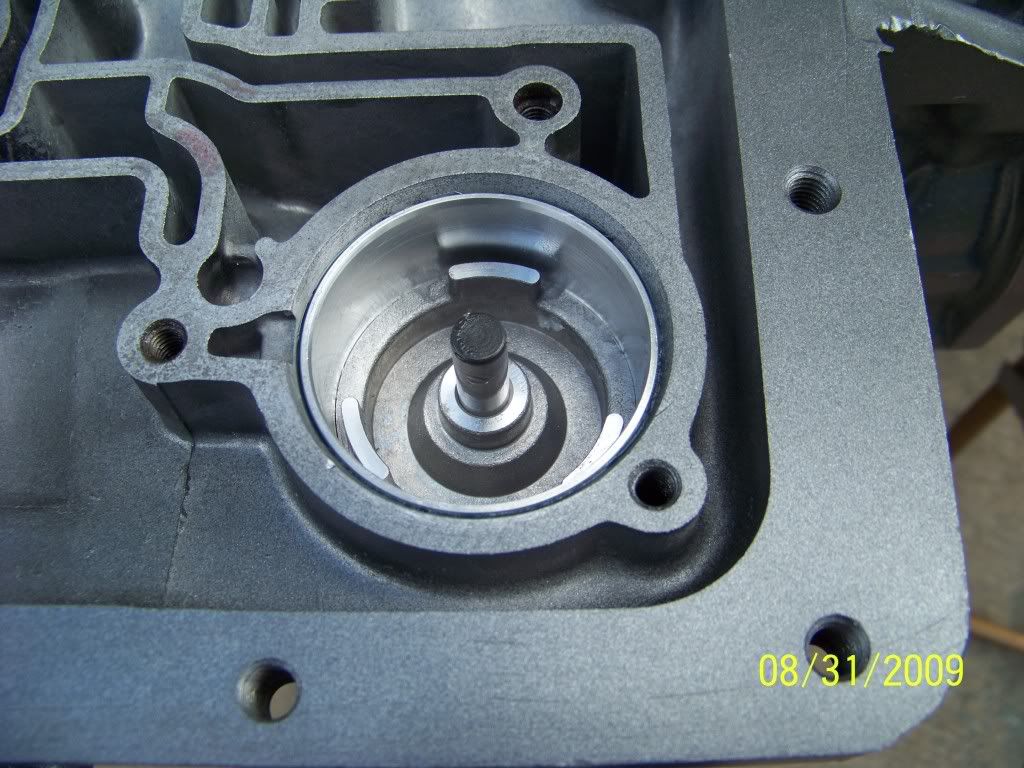 Next up, is the park shaft seal. It is tapped in carefully with a 9/16 deep socket, and a small hammer: 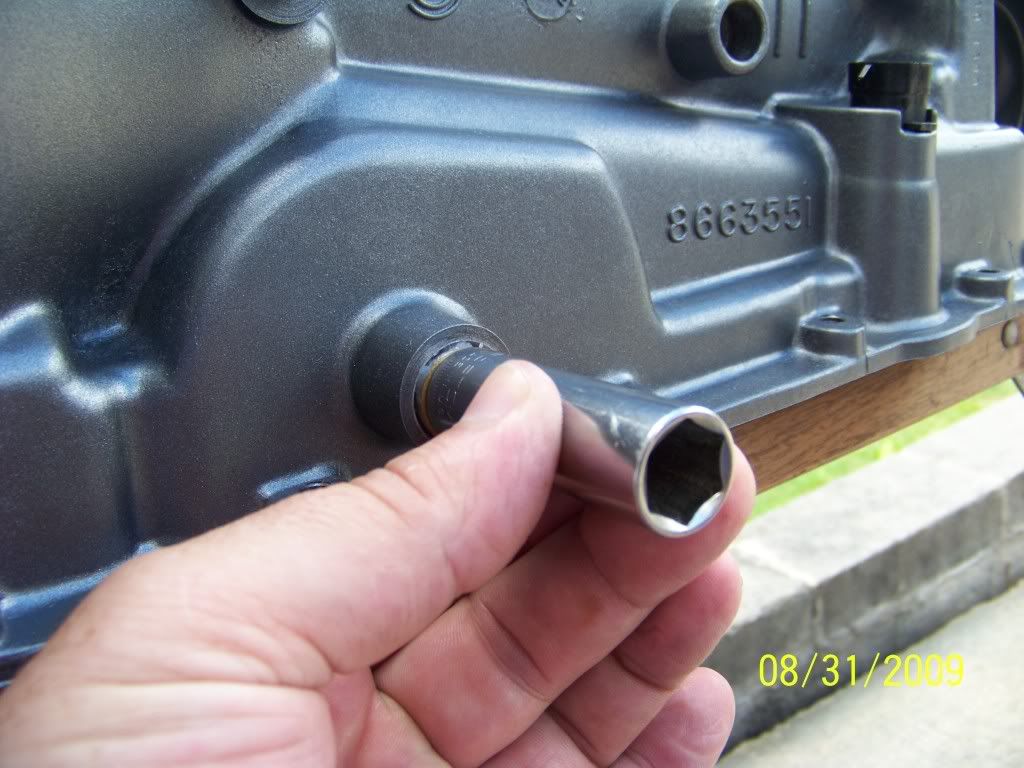 Seal installed to the correct depth: 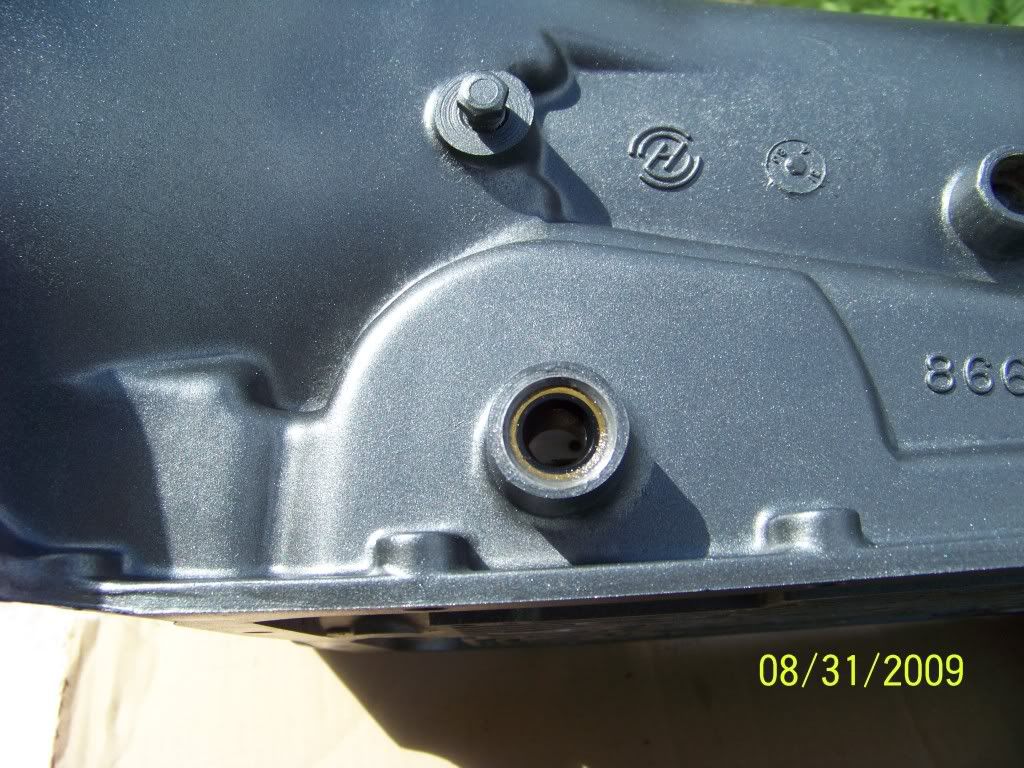 At this point the case is fitted with the smaller stuff needed prior to getting serious with the internals. |
||
Posted on: 2009/9/3 2:00
Edited by PeteK on 2012/2/16 17:03:06 |
|||
|
_________________
"It was really on a pass until it came apart." "Yeah. They always are." |
|||
|
Transfer
|
|
||
| PeteK | Re: 700R4-4L60 Build Up Part 2 | ||
|
Moderator
|
Lo/Reverse piston is fitted with new seals (3 of them) and carefully tapped into position:
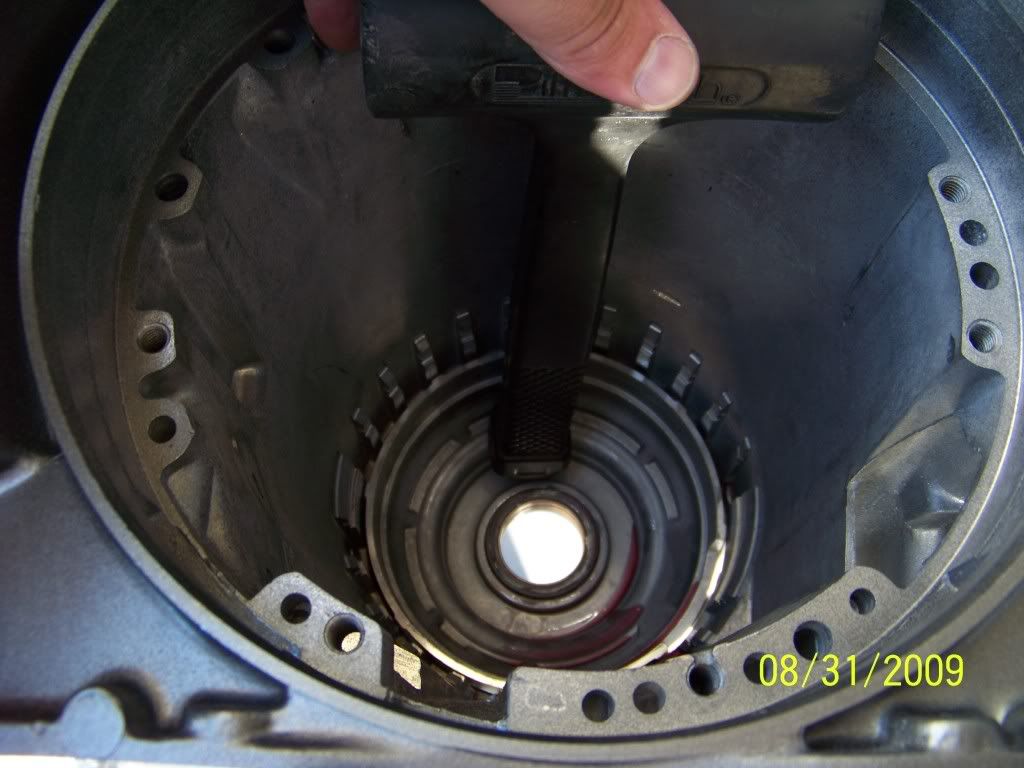 Spring retainer and clip secure it in it's bore. Now we work on the lo-roller clutch, and lo-reverse clutch pack. Clearance cannot be checked, so it is mocked up on the bench, and the stack up height is measured. Of course, new frictions and steels are used, along with a new, upgraded lo/roller clutch (sometimes called a sprag). Sprags and lo/rollers allow something to spin freely in 1 direction, then bind in the opposite direction. 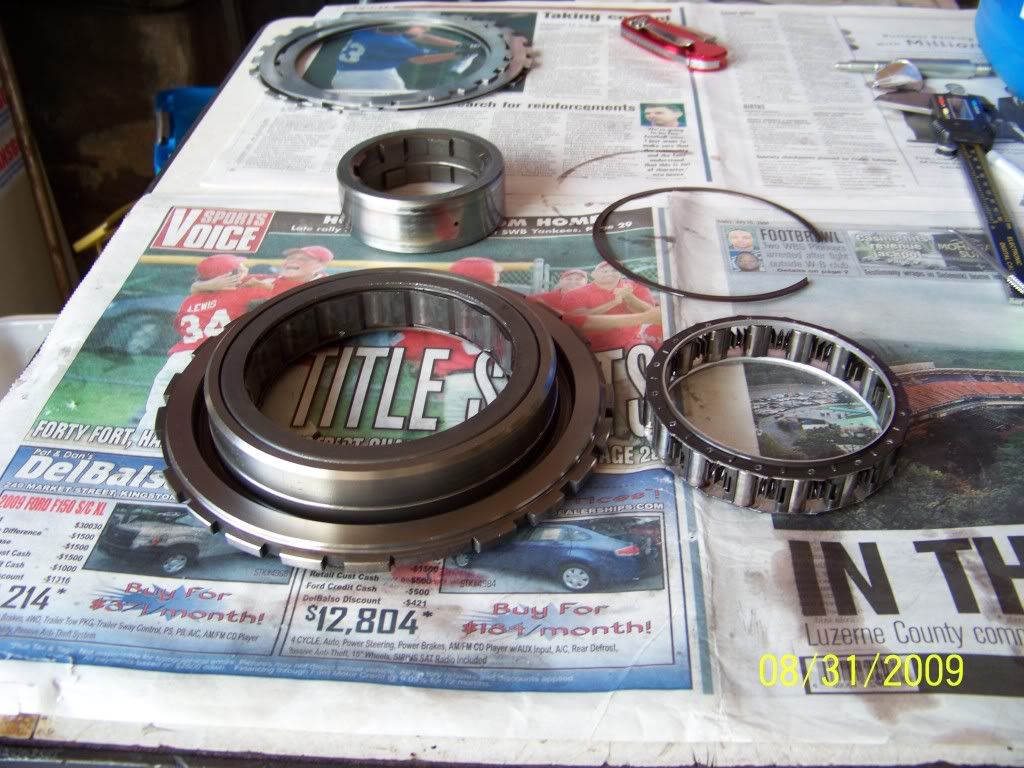 The pic below shows the 2 types of GM rear planetary gearset. Stock 4 pinion, and stock 5 pinion. 5 pinions were used in 2001 and newer 4l60e units, and retrofit all 700's as well. In my opinion, it is not nescessary. I have stock 4 pinion units living well in mid 10 second cars with no issues. *Be aware that aftermarket 5 pinion gearsets are weaker than a stock 4 pinion GM gearset, and are not recommended for any build up. 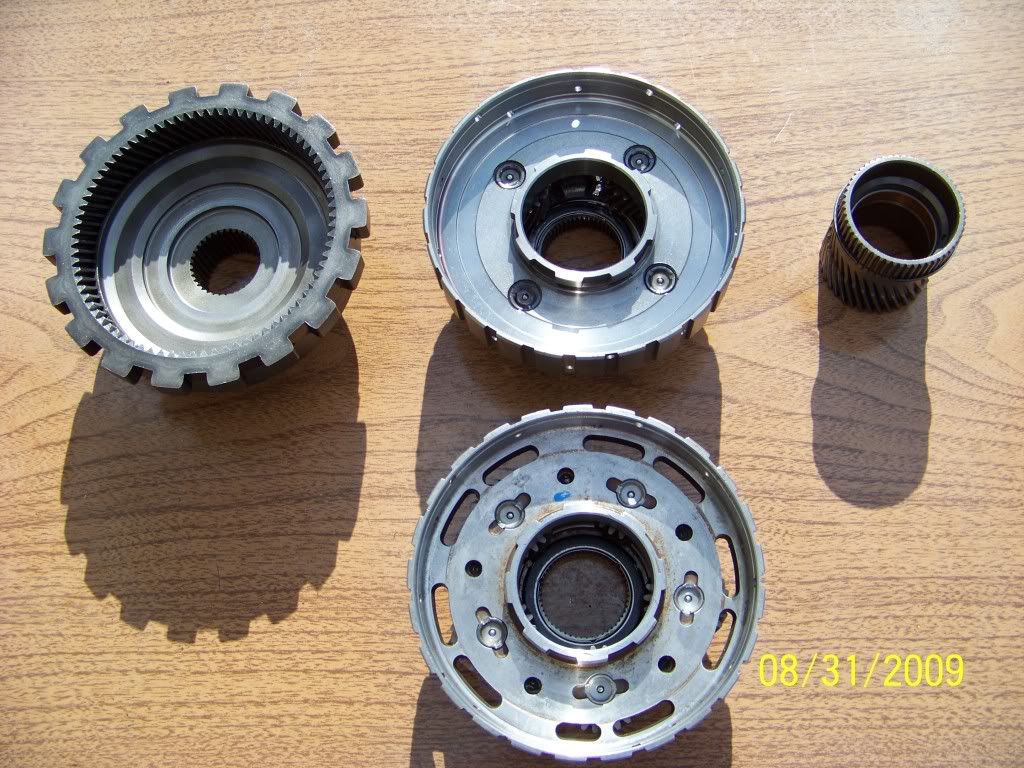 |
||
Posted on: 2009/9/3 2:11
Edited by PeteK on 2012/2/16 17:04:20 |
|||
|
_________________
"It was really on a pass until it came apart." "Yeah. They always are." |
|||
|
Transfer
|
|
||
| PeteK | Re: 700R4-4L60 Build Up Part 2 | ||
|
Moderator
|
Now that the previous parts are installed, and retained with the c-clip,we can continue on:
The pic below shows the beast reaction shell(left) vs the stock, used reaction shell (right) 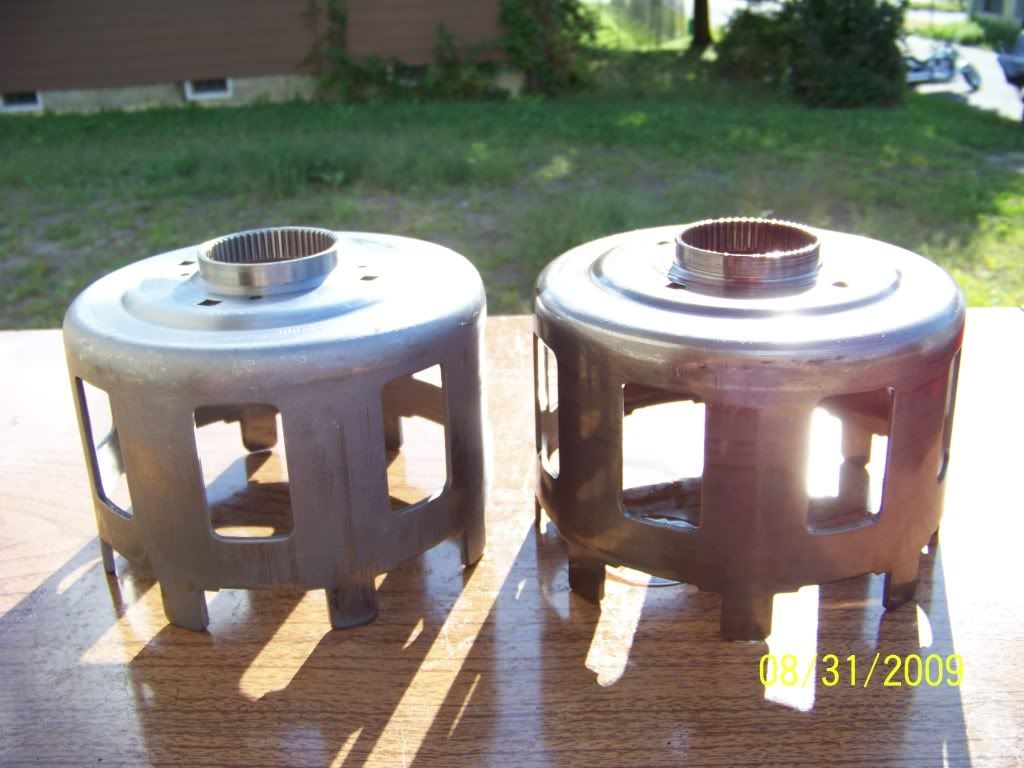 Beast is much thicker near the neck of the splined shaft: 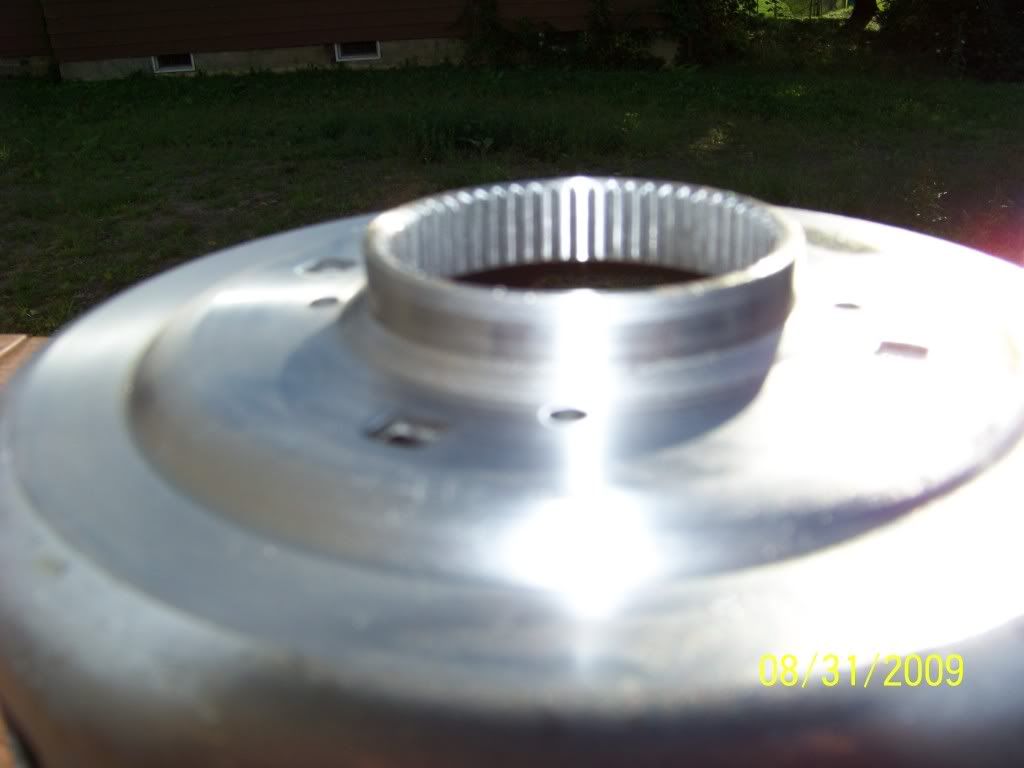 Thin stocker: 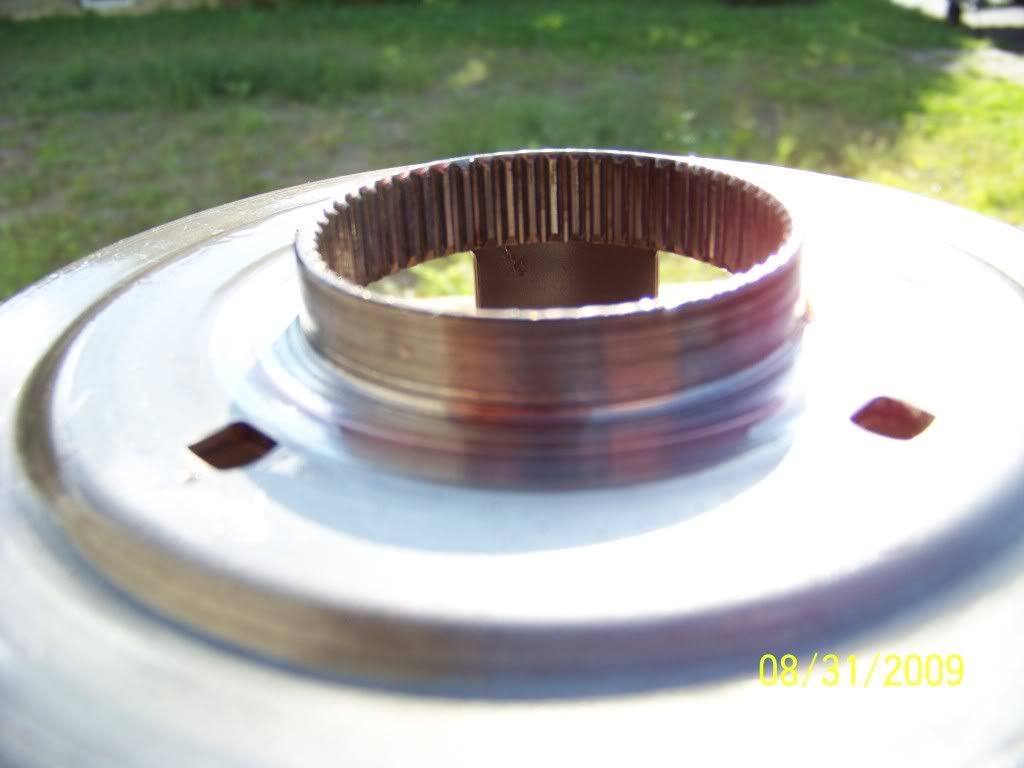 After these, and the reaction shaft are installed, the new front plantetaries (new ratio) are installed. These are custom 6 pinion units. Look closely for the yellow "c" clip. It is what retains the output shaft: 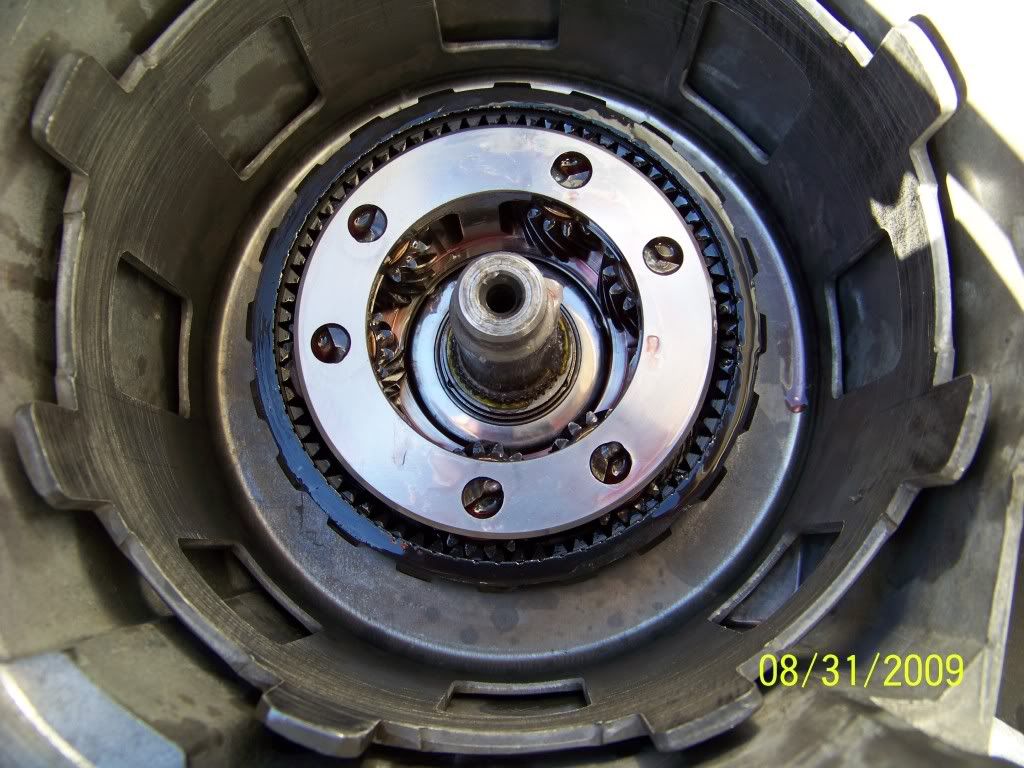 |
||
Posted on: 2009/9/3 2:19
Edited by PeteK on 2012/2/16 17:05:30 |
|||
|
_________________
"It was really on a pass until it came apart." "Yeah. They always are." |
|||
|
Transfer
|
|
||
| PeteK | Re: 700R4-4L60 Build Up Part 2 | ||
|
Moderator
|
Now to button up the "back half" build.
The governor is disassembled, cleaned and reassembled using a brand new gear and pin: 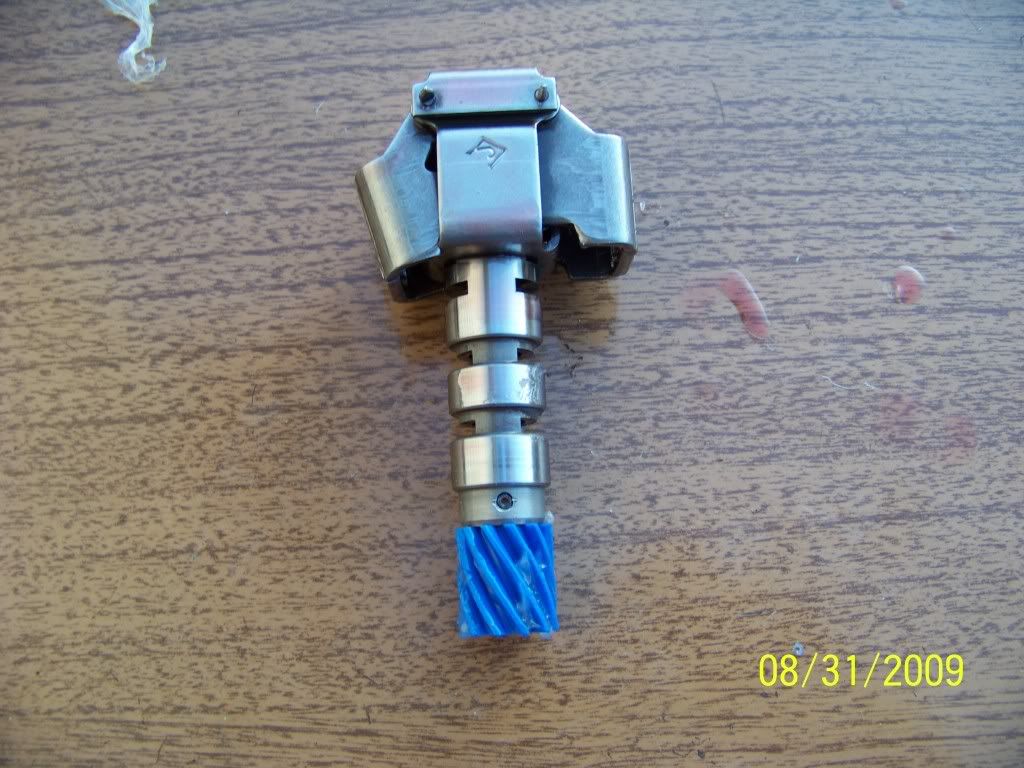 New o-ring is installed on the cover, and it is tapped into place by the flanged edge only: 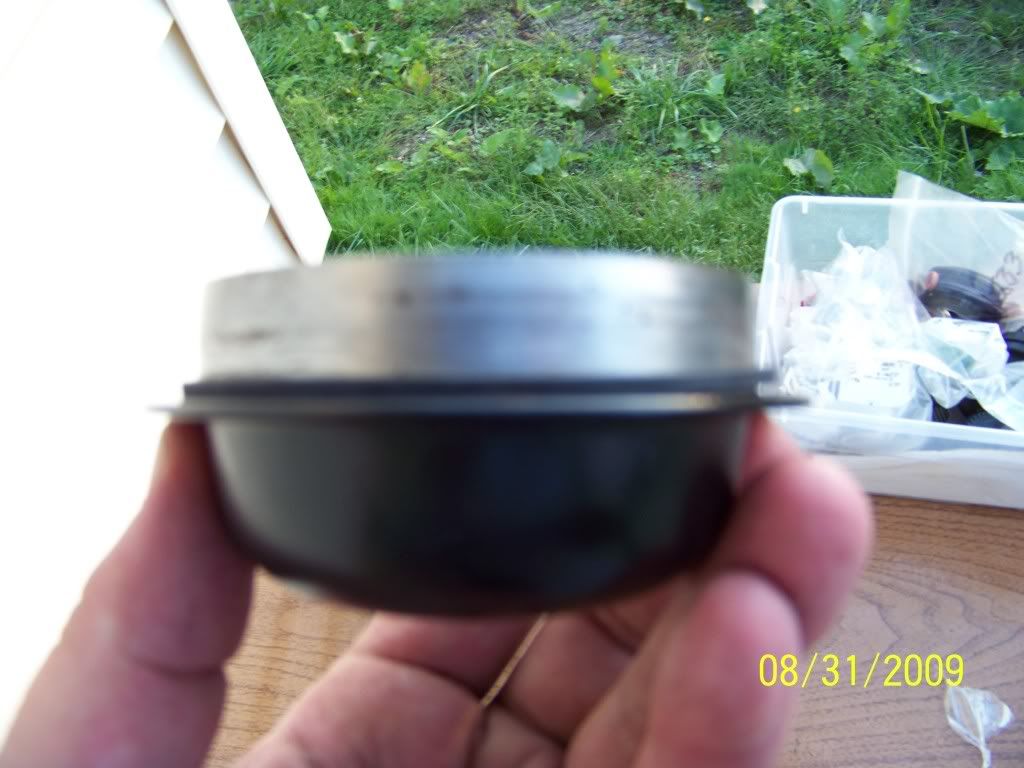 End play is set to approx .125" by dimpling the very center of the cap. Once set, a retaing clip from a turbo 350 is installed for extra security: 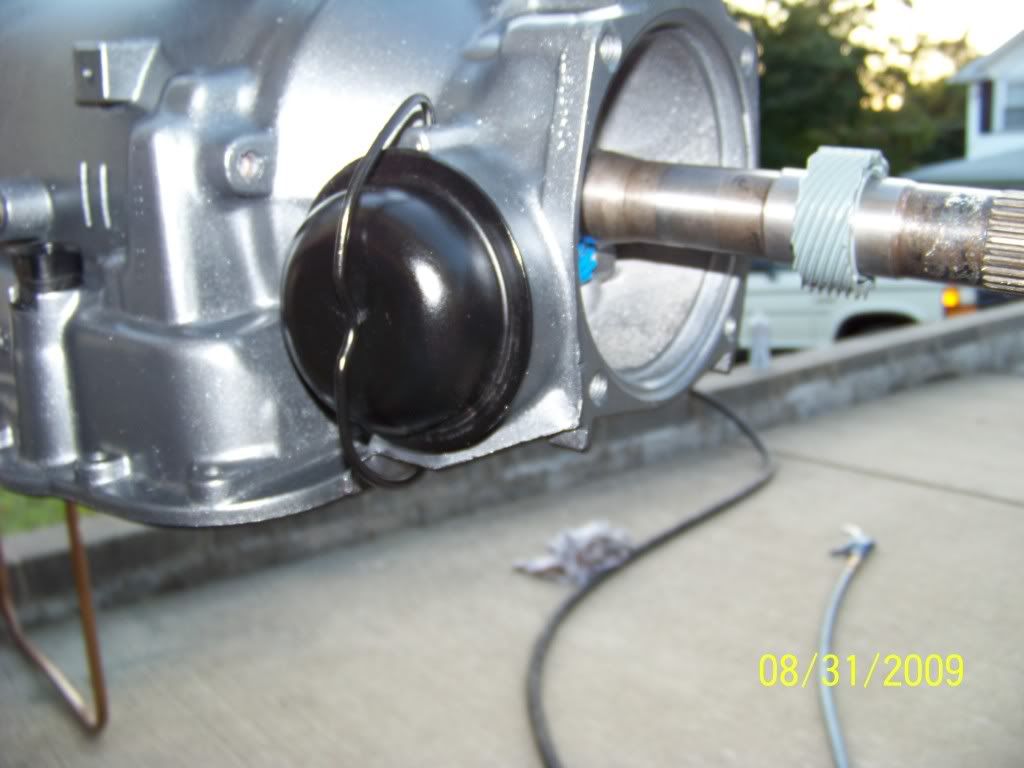 Speedo drive gear is installed: 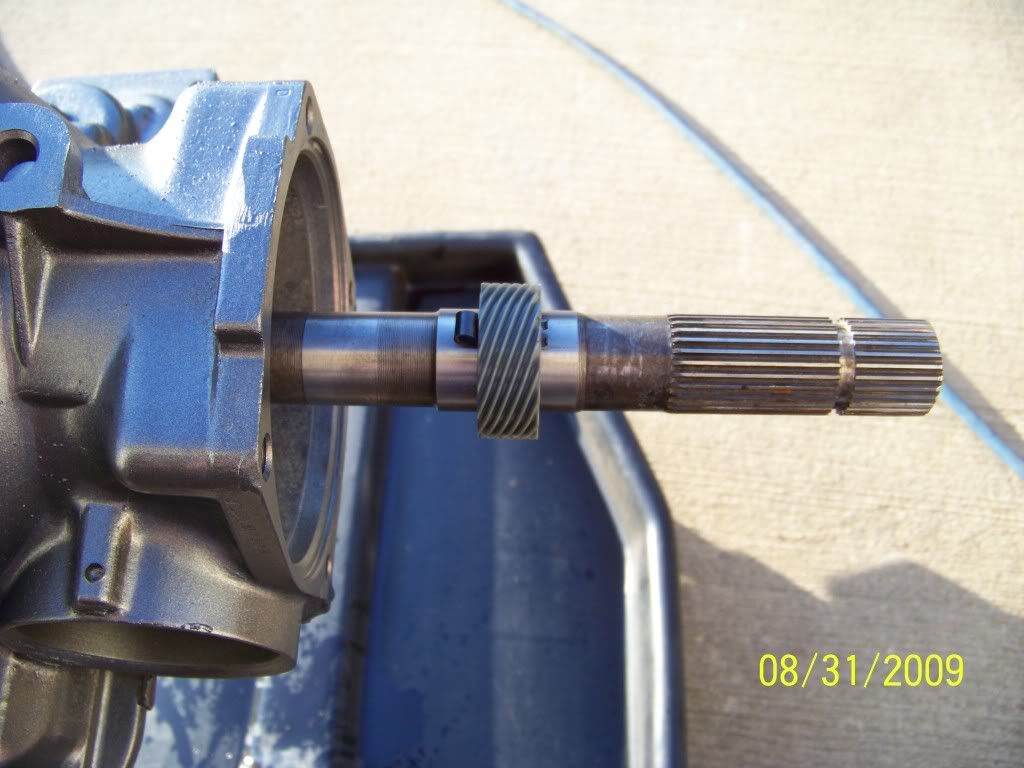 Photo below shows the teflon coated tailhousing bushing, being installed into the tailhousing: 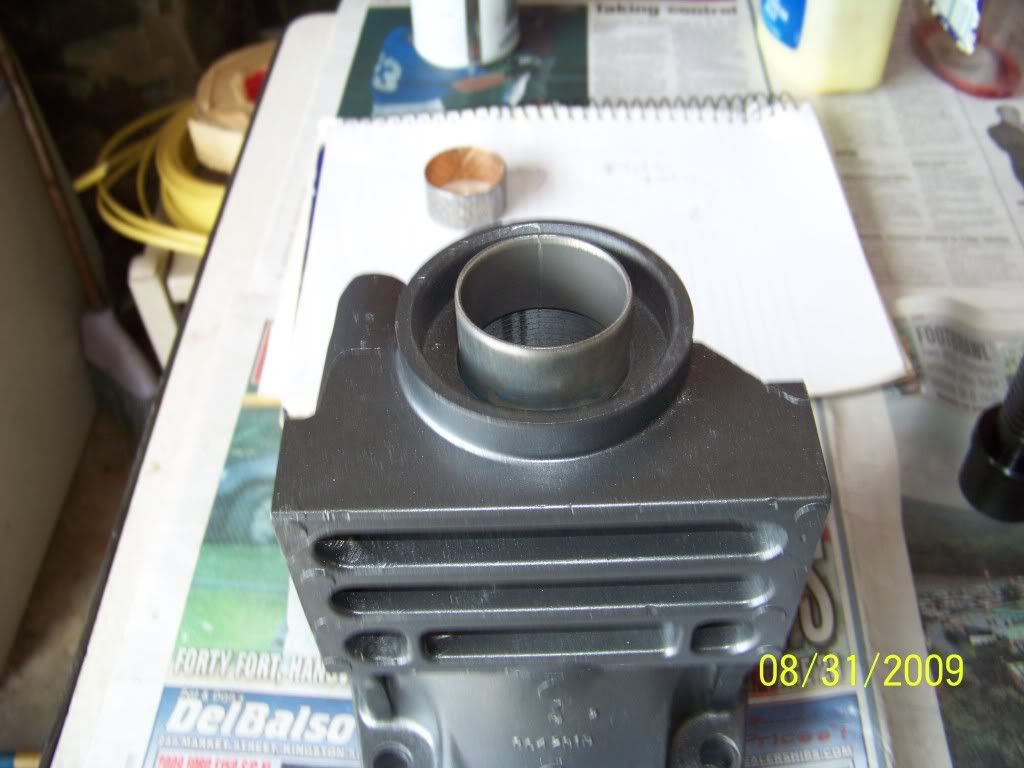  Next is the output shaft seal. A block of wood works well with a few well placed hammer taps: 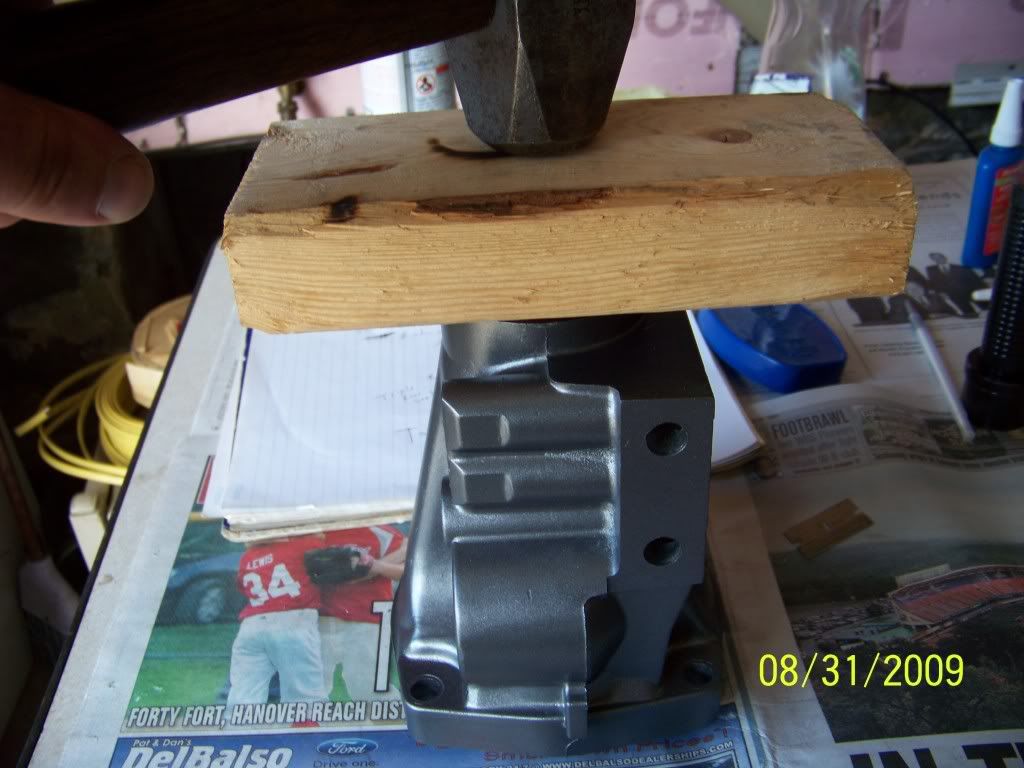 Then the tailhousing is bolted to the trans case with the 4 bolts, torqued to 24 ft lbs: 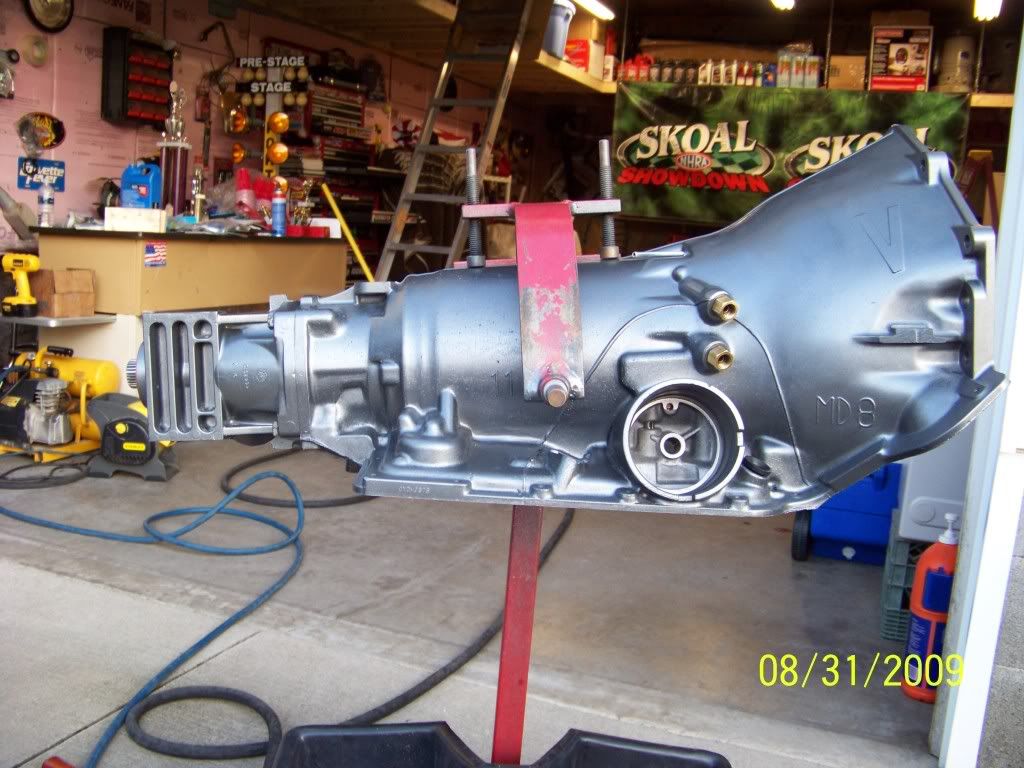 Remember, trans is about 1/2 way done, at this point. |
||
Posted on: 2009/9/3 2:40
Edited by PeteK on 2012/2/16 17:07:20 |
|||
|
_________________
"It was really on a pass until it came apart." "Yeah. They always are." |
|||
|
Transfer
|
|
||
| JDSWHITE93 | Re: 700R4-4L60 Build Up Part 2 | ||
|
Senior Guru
 
|
You do NICE work... Wish more poeple took pride in what they do.
|
||
Posted on: 2009/9/3 14:26
|
|||
|
_________________
The few, the proud, the crazy, the LT1 owners association :thumbright: |
|||
|
Transfer
|
|
||
| PeteK | Re: 700R4-4L60 Build Up Part 2 | ||
|
Moderator
|
Quote:
Thanks JD. When I am done, they really are remanufactured, rather than rebuilt. Every piece I use must be new, equal to new, or restored to new. It is critical to do all bushings to maintain oil pressure and volume throughout the box. As you get closer to the center of the trans, they wear less. If the bore guage indicates less than .001 of new, I will make an exception and reuse it. Unlike an engine, the trans bushings are not manufactured to the same tight standards. Occasionally, a new bushing will come in slightly looser than a used bushing. Anyhow, blueprinting is key. |
||
Posted on: 2009/9/3 15:09
|
|||
|
_________________
"It was really on a pass until it came apart." "Yeah. They always are." |
|||
|
Transfer
|
|
||
| JDSWHITE93 | Re: 700R4-4L60 Build Up Part 2 | ||
|
Senior Guru
|
When I need a trans I know exactly who I'll call no doubt about it.I would feel completely comfortable ordering a trans handing him my wallet and telling him to take out what it's worth. There aren't many people you could do that with and not get REAMED an extra hole LOL
|
||
Posted on: 2009/9/3 20:30
|
|||
|
_________________
The few, the proud, the crazy, the LT1 owners association :thumbright: |
|||
|
Transfer
|
|
||
| pianoguy | Re: 700R4-4L60 Build Up Part 2 | ||
|
Guru Emeritus
 
|
Quote:
Amen! Makes me wish I had an automatic ;-) |
||
Posted on: 2009/9/3 21:03
|
|||
|
_________________
1996 LT4 �Before you criticize someone, you should walk a mile in their shoes. That way when you criticize them, you are a mile away from them and you have their shoes.�- Jack Handey |
|||
|
Transfer
|
|
||
| bogus | Re: 700R4-4L60 Build Up Part 2 | ||
|
Grand Imperial Pooh-Bah
 
|
This is why we all must pray to the great god of 700R4s... PeteK is the man.
 |
||
Posted on: 2009/9/4 17:47
|
|||
|
_________________
The single biggest problem with communication is the illusion that it has taken place. - George Bernard Shaw Education is the best tool to overcome irrational fear. - me |
|||
|
Transfer
|
|
||
| Aboatguy | Re: 700R4-4L60 Build Up Part 2 | ||
|
Senior Guru
|
Great thread.....
Can a 700r4/4l60/4l60e be rebuilt properly without a bunch of special tools? ....or here's a better question what tools/equipment/manuals are required for a decent backyard mechanic to properly build his/her own 4L60e....? Mike |
||
Posted on: 2009/9/4 18:47
|
|||
|
Transfer
|
|
||
| PeteK | Re: 700R4-4L60 Build Up Part 2 | ||
|
Moderator
|
Quote:
Mike, A set of bushing drivers and spring compressors will be tough to replicate. I guess it is possible though. |
||
Posted on: 2009/9/5 4:04
|
|||
|
_________________
"It was really on a pass until it came apart." "Yeah. They always are." |
|||
|
Transfer
|
|
||
| PeteK | Re: 700R4-4L60 Build Up Part 2 | ||
|
Moderator
|
Quote:
If a putz like me can do it, anyone can. You will need: ATSG Manual, or the Helms Manual 2 Spring compressors @$35 each Bushing driver set- $250 Teflon seal expander and resizer $120 Lip seal tool-$5 Lip seal protectors- $60 Quality lock ring pliers-$40 The above prices are for new. E-bay can be a great place to buy them much cheaper(used). The rest would be normal hand tools. |
||
Posted on: 2009/9/5 4:24
|
|||
|
_________________
"It was really on a pass until it came apart." "Yeah. They always are." |
|||
|
Transfer
|
|
||
| tjpreul | Re: 700R4-4L60 Build Up Part 2 | ||
|
Elite Guru
 
|
They showed a 700r4 rebuild on extreme 4x4. I would get something out of order. They replaced the case with one marked with a "K". This meant it was thicker, since it was out of a truck.
|
||
Posted on: 2009/9/5 14:29
|
|||
|
_________________
Vegas wasn't built on winners. '92 auto, MSD, Banski, Taylor wires, SS lines, C5 rims, 3.07 gears, white gauges, seats from a '96. Motor: Forged rotating assy, Probe pistons, CC valvetrain, AFR heads, Procharger P1SC |
|||
|
Transfer
|
|
||
| bogus | Re: 700R4-4L60 Build Up Part 2 | ||
|
Grand Imperial Pooh-Bah
|
you know, with all the failures I hear of with the 700R4, case deformation isn't one of them.
|
||
Posted on: 2009/9/5 14:42
|
|||
|
_________________
The single biggest problem with communication is the illusion that it has taken place. - George Bernard Shaw Education is the best tool to overcome irrational fear. - me |
|||
|
Transfer
|
|
||
| PeteK | Re: 700R4-4L60 Build Up Part 2 | ||
|
Moderator
|
The problem with the K case is that they often have the internal case splines knocked out of them from off roading or snow plowing Finding a good one is extremely difficult.
|
||
Posted on: 2009/9/5 16:16
|
|||
|
_________________
"It was really on a pass until it came apart." "Yeah. They always are." |
|||
|
Transfer
|
|
||
| iCorvette | Re: 700R4-4L60 Build Up Part 2 | ||
|
Senior Guru
 
|
Quote:
really a unique person in this world, where slop shops is the norm i wish i had an auto as well..... |
||
Posted on: 2009/9/5 16:33
|
|||
|
_________________

|
|||
|
Transfer
|
|
||
| PeteK | Re: 700R4-4L60 Build Up Part 2 | ||
|
Moderator
|
Remember that I could not do this and make a living. 99.9% of the world shops price. The hours I invest would price me out of the market at a fair labor rate. To be price competitive, I would have to work for $6-$7 per hour.
|
||
Posted on: 2009/9/5 16:51
|
|||
|
_________________
"It was really on a pass until it came apart." "Yeah. They always are." |
|||
|
Transfer
|
|
||
| iCorvette | Re: 700R4-4L60 Build Up Part 2 | ||
|
Senior Guru
|
so what a masterpiece like that would be a fair price?
some people will "invest" in some know quality v. taking a gamble on the unknown.and these are the enthusiasts you could "work" with, all the other price shoppers can go on ebay and "get what they pay for" |
||
Posted on: 2009/9/5 17:10
|
|||
|
_________________
|
|||
|
Transfer
|
|
||
| PeteK | Re: 700R4-4L60 Build Up Part 2 | ||
|
Moderator
|
I will tally it up at the end, and put a number on it. The price of this exact trans will be $1200.00 higher than typical due to the experimental gearset.
|
||
Posted on: 2009/9/5 17:14
|
|||
|
_________________
"It was really on a pass until it came apart." "Yeah. They always are." |
|||
|
Transfer
|
|
||
| iCorvette | Re: 700R4-4L60 Build Up Part 2 | ||
|
Senior Guru
|
Quote:
no less arduous than properly blueprinting anything worthwhile.... |
||
Posted on: 2009/9/5 17:29
|
|||
|
_________________
|
|||
|
Transfer
|
|
||
| PeteK | Re: 700R4-4L60 Build Up Part 2 | ||
|
Moderator
|
I put another 5 hours into the build today. I built the forward drum, and reverse input drum. I will load up the pics, and recap in a new thread.
|
||
Posted on: 2009/9/6 0:42
|
|||
|
_________________
"It was really on a pass until it came apart." "Yeah. They always are." |
|||
|
Transfer
|
|
||
| T-mo | Re: 700R4-4L60 Build Up Part 2 | ||
|
Guru Newb
 |
Hey Pete getting ready to do my transmission rebuild and was wondering if you could clarify or go into more detail on some things. I have a few questions through out your build up threads so instead of PM'ing you I am going to post them incase others have similar questions...
Quote: The new servo checkball capsule is installed carefully using a 2 1/2 inch long bolt, 3/8 inch diameter. Although the shop manual states it should be installed at 1 5/8, it is actually a pinch deeper: What is the actual installed depth? ATSG says 1 5/8" as well. Quote: [IMG]http://i161.photobucket.com/albums/t221/vrodpete/100_4966_00.jpg[/IMG] How is this end play measured/checked? |
||
Posted on: 2011/4/11 2:58
|
|||
|
Transfer
|
|
||
| PeteK | Re: 700R4-4L60 Build Up Part 2 | ||
|
Moderator
|
Quote:
You need to do a visual with the output housing removed. I have a steel washer that is 1/8 inch thick. I hold it near the gear, and eyeball it while pushing the gear in and out. Sounds crude, and it is, but works quick and easy, and gets me within a few thou. It is not a critical measurement. |
||
Posted on: 2011/4/11 11:37
|
|||
|
_________________
"It was really on a pass until it came apart." "Yeah. They always are." |
|||
|
Transfer
|
|
||
| T-mo | Re: 700R4-4L60 Build Up Part 2 | ||
|
Guru Newb
|
Quote:
One thing I have noticed in the ATSG manual is a lack of specs for some of things you have mentioned above. I use to work in the helicopter indistry and what I mean by this is there is not a lot of given measurments for when something is servicable (range and/or recommended/target measurment) or when it should be discarded/shimmed/etc. I've noticed you have supplied some (eg; total servo cover movement, range: .080"-.100", target: .090"). Where can I find specs for bushings, bores, shaft diameters, etc? This is done on engines but is it necessary for transmissions aswell, am I getting too carried away? I've also noticed with clutch stack ups (for example) there is a range given .040"-.063", do you try to go on the tight side, loose side, right in the middle or if it's in the range it's "good enough". Thanks for answering my questions Pete! |
||
Posted on: 2011/4/25 21:13
|
|||
|
Transfer
|
|
||
| biggrizzly | Re: 700R4-4L60 Build Up Part 2 | ||
|
2011 Memorial Day Car Show Winner!

|
Makes me proud to own one of these masterpieces! I can even say that I have stood right there before the altar!
Nice write up Pete! Keep up the great work |
||
Posted on: 2011/4/25 23:26
|
|||
|
_________________
Don Haller Corvette Club of America 94Coupe, 383Stroka, PeteK Trans, 3000stall, 3.54rear, Konis and bigger sways. |
|||
|
Transfer
|
|
||
| PeteK | Re: 700R4-4L60 Build Up Part 2 | ||
|
Moderator
|
Quote:
You bring up an excellent bunch of questions. I am not aware of the specs being published anywhere. I have kept recored of every build, and every part I can think of, but have never seen ID's and OD's spec'd. Clearances depend on my personal preferrence. Race vs street. How much time/runs between refresh. NOS, Supercharger, etc or N/A. Shift quality vs application. Vague answers on my part, I know, but I shoot from the hip on every one. |
||
Posted on: 2011/4/26 0:03
|
|||
|
_________________
"It was really on a pass until it came apart." "Yeah. They always are." |
|||
|
Transfer
|
|
||
| j3studio | Re: 700R4-4L60 Build Up Part 2 | ||
|
Elite Guru
|
Very interesting and informative thread.
How far are you currently backed up? Can't say I'm in the market right now, but it would be valuable to know what kind of wait I'd be looking at. If you are no longer taking work, that's fine, too ... |
||
Posted on: 2011/4/26 12:01
|
|||
|
_________________
Grace, 2003 50th Anniversary Convertible |
|||
|
Transfer
|
|
||
You can view topic.
You cannot start a new topic.
You cannot reply to posts.
You cannot edit your posts.
You cannot delete your posts.
You cannot add new polls.
You cannot vote in polls.
You cannot attach files to posts.
You cannot post without approval.
|
|