


|
|
Register To Post |

| CSS996 | Headliner Install 1993 Corvette | ||
|
Mega Guru
 
|
Greetings Gurus!
When I purchased my car on July 15, 2007, the headliner seemed fine. But a few weeks later, it started touching my head. Being 6'4" tall on a "small hair day", a sagging headliner was rather bothersome. So, one day, in a fit of realous jage I tore the material out with me bear hands! The result looked like a black dress from a moth-eaten closet. Pretty trashy. Passengers would emerge from my Ruby with little black flecks of foam on their heads... So, here I am, nearly a year later, doing a headliner install. I am not much of a wrench, but thanks to forum member, "tobijohn" who supplied me with some free headliner material, and a day to myself, I took the plunge this afternoon. I placed a blanket on the dining room table, and set the roof on it, paint down. After consulting the FSM, and realizing there were really no instructions, I saw that no real dis assembly of the roof would make the chore any easier. So I started by carefully getting my fingers under the corners of the soft headliner foam, and lifting very slowly. A note here... I believe the soft padded part of the headliner is made of fiberglass, because my hands are really bothering me. So I recommend gloves for this task. After getting the corners on one side pulled off the top, I "borrowed" a spatula from my wife's arsenal, and used that to carefully scrape the center of the fiberglass pad out of the roof panel.  I worked my way from edges to center, being as careful as I could. There was some crumpling of the headliner pad, which was bothersome, but unless you go painfully slow, and maybe even then, you will have some crumpling. Here is a shot of the pad, removed from the top. 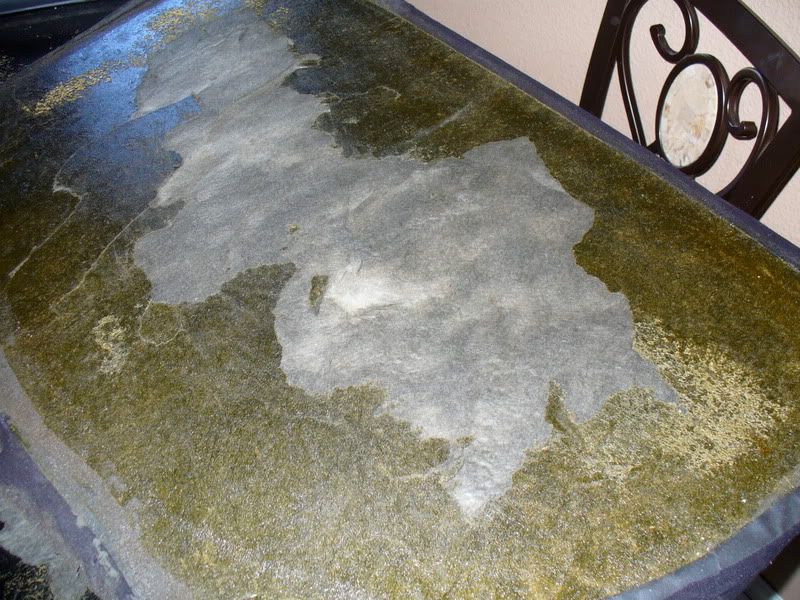 Here is what was left inside the top. 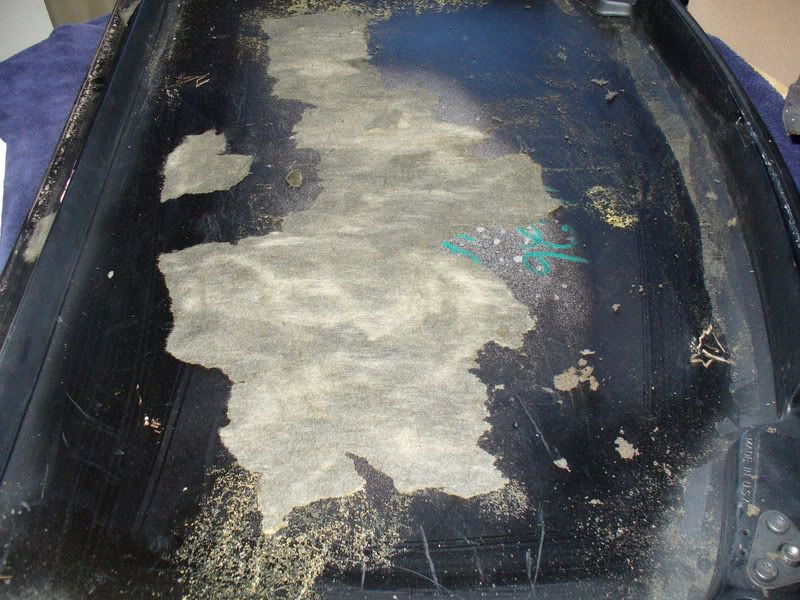 There was a bit of the pad left, stuck to the roof, but not much. I worked a bit at removing as much of the material as I could, to ensure a secure bond, once the pad was re-adhesivized (just made that up)! I grabbed the best tool I could find. A BBQ grill brush.  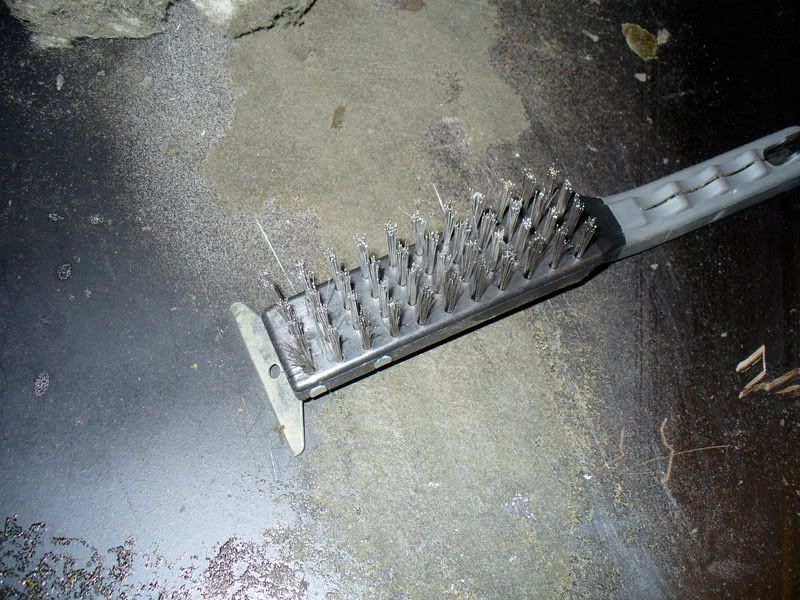 I used mostly the blade part to scrape away the material, but did also use the metal bristles to try and brush some of the material away. After I felt like I got about as much of the stuck-on material outta there as I could, I used a vacuum to suck out the small loose particles. 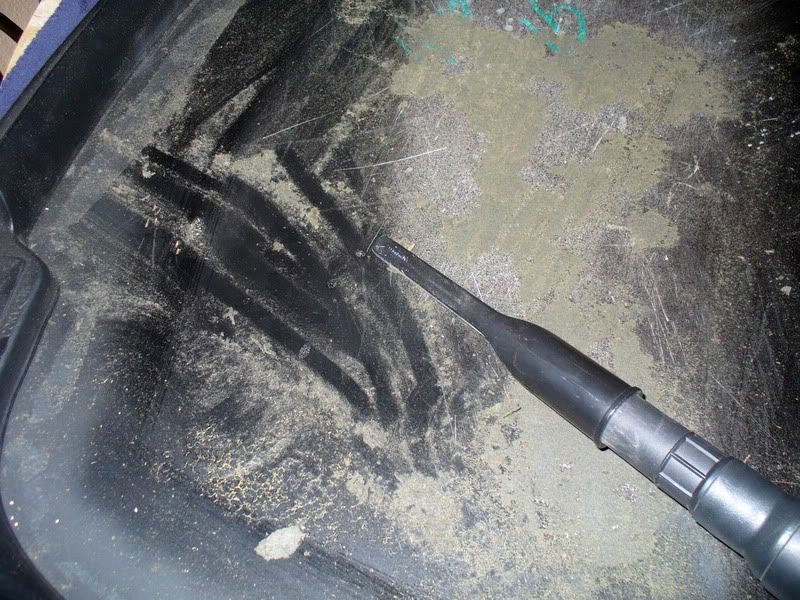 After the vaccum, I took a wet paper towel to the inside of the roof. I would actually recommend a cloth, because the material that was left actually tore apart the paper towel, so I ended up having to clean out bits of paper towel.... 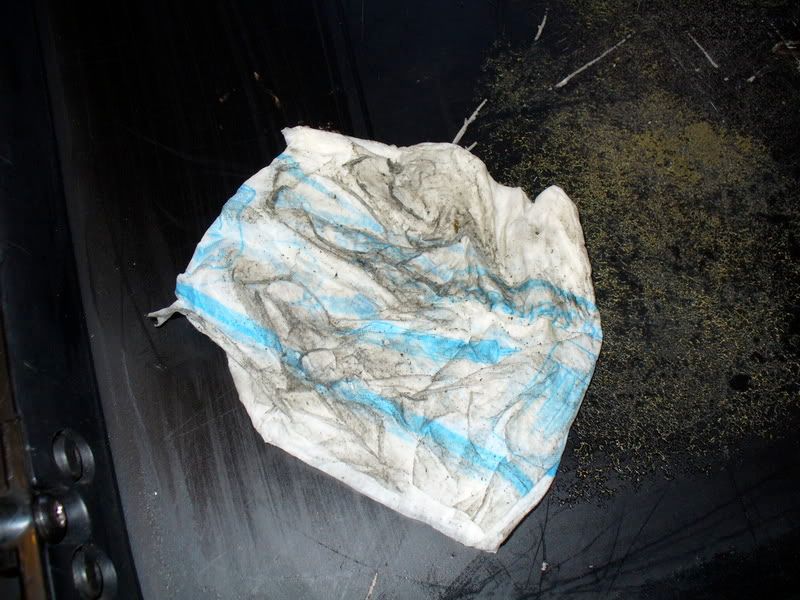 I had the inside of the roof about as clean as I was gonna get it without solvents that I don't own, so I moved on to the headliner pad. There was a LOT of partially disintegrated foam and glue stuck to the pad where the headliner material had been glued on. I had read somewhere about using a nylon bristle brush to get the boogers off of there, but I just started gently rubbing my fingers back and forth across the surface of the top, and the crap pretty much balled up and came off. 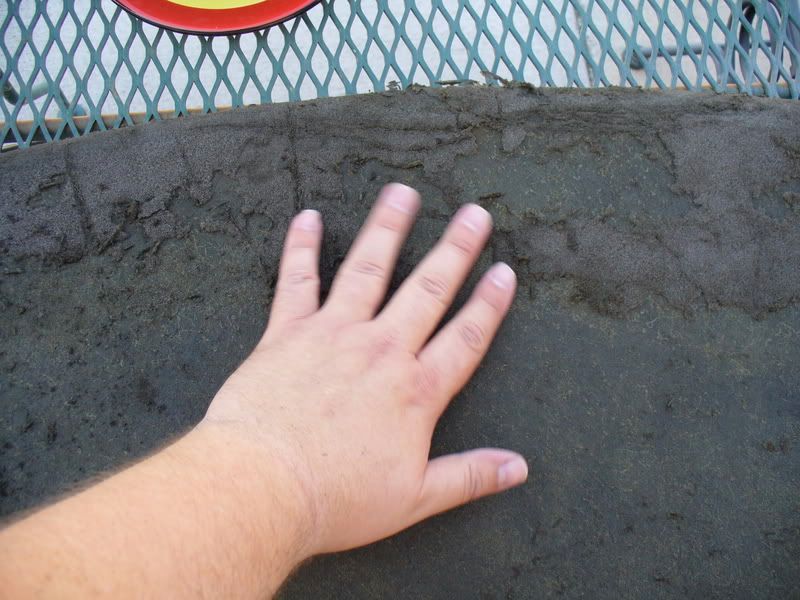 NOTE: Be sure to get all of the raised pieces off the surface of the headliner pad where you will be gluing the headliner material. I missed a few places, and I do see them under the new headliner. I am a little disappointed in myself for not realizing the adhesive and thin headliner material was so unforgiving. CRAP! Anyway, on with the show. When I was happy with the surface of the pad, I brought out the headliner material. When tobijohn sent me the material, he mentioned that there was some cat hair on there, and while it was not as bad as I expected, I did toss the material in the dryer under low heat, and let the lint trap have its way with it. That said, having a dalmatian and a cat in the house, as soon as I pulled the material out of the dryer, and laid it up against my chest to fold it, it was covered in pet hair worse than before! (I mention this for a reason, so bear with me...) Ok, so I cut the headliner in a large rectangle, a few inches larger than the size of the pad, then laid the material face down on a patio table. No wind today, fortunately. Then I trimmed the material a little closer to the size and shape of the pad. 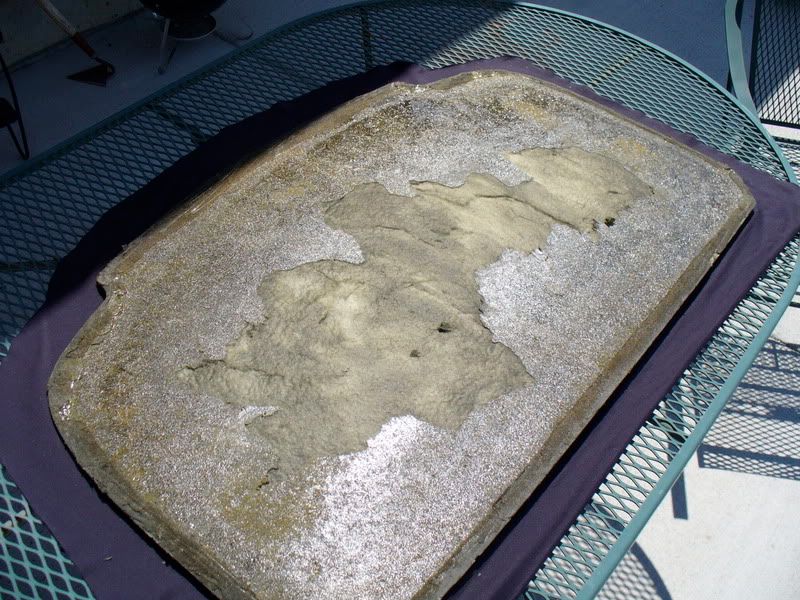 I took the pad, and set it aside, and put a few items down around the edges of the headliner so it would not blow away in case some wind came along. Using spray adhesive that is suitable for automotive headliner installation (read the can, some are NOT recommended for headliner applications)I sprayed the back of the headliner material with a liberal amount of spray adhesive. Then I grabbed the pad, set it on another work area, and sprayed the surface where the headliner would stick to the pad. So, both surfaces were sprayed with adhesive. I set the pad sticky side down, onto the sticky headliner material, and folded up the edges, making sure to avoid wrinkles as much as possible. On the good side, of course. The part that gets folded around looks pretty bad, but I believe this is fine. 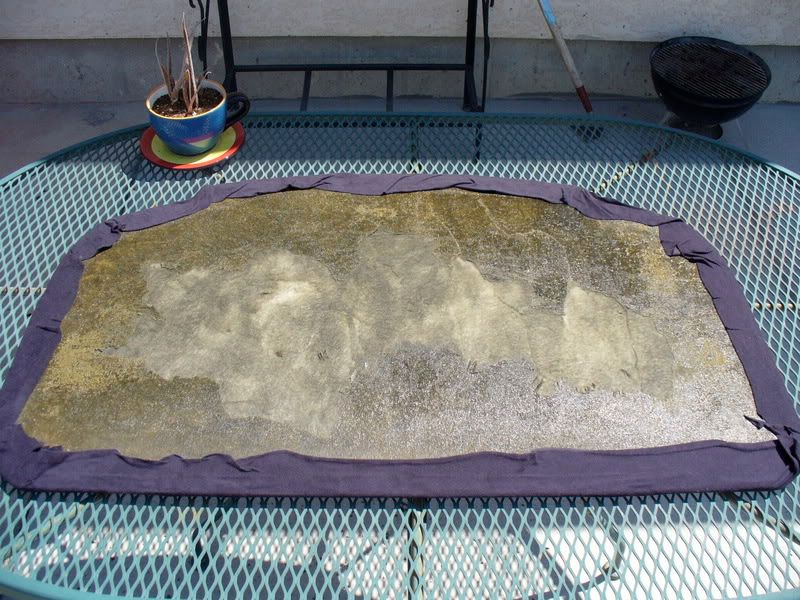 Then I turned the pad over, to take a look at how badly I had screwed up the visible side. Not too bad, except for the aforementioned small pieces of glue/foam/boogers that I didn't think I needed to remove. 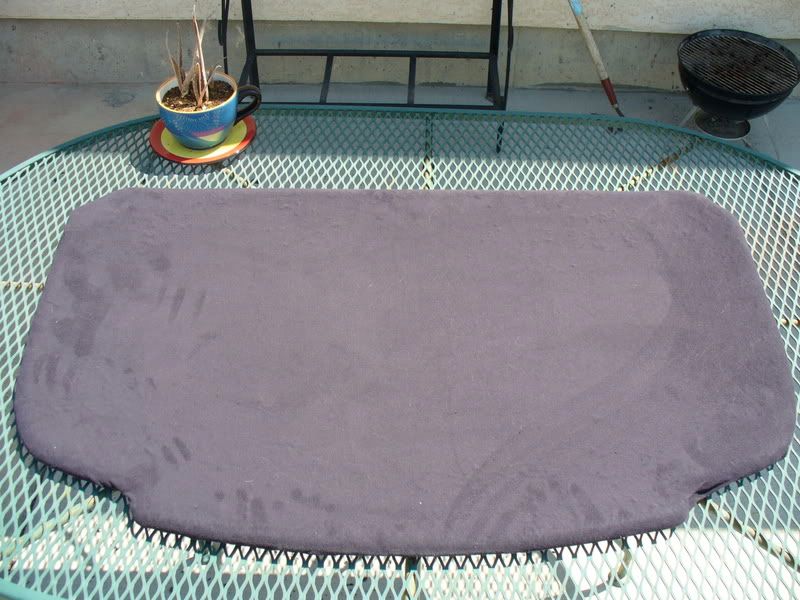 Then I brought the re-covered pad and the can of adhesive into the house (Not recommended, but the wife and kids were away...) And sprayed the inside of the roof panel that was still laying on the dining room table. After seeing the cloud of adhesive that was landing on the new chairs, I decided to take the re-covered pad and the adhesive spray back outside to spray the ugly side of that, prior to final installation.  So, it was all put back together, and I noticed all the dog hair. I figured I would take care of that right-quick with the lint roller. IMPORTANT SAFETY TIP: NEVER DO THIS! Lint rollers may be strong enough to pull the freshly adhesivized headliner right off your pad, and create small wrinkles! Ask me how I know this... I caught it before I made too much of a mess, fortunately. But it was a bad move, for sure. So, the top is back in the car, and actually looks pretty good. I am just a little disappointed that it is not perfect. But it is SOOOO much better than what was in there before. I'm glad I tackled it, and I hope the next person that attempts this can learn from my experience, as well as my mistakes and get it just right! Peace OUT, Gurus! |
||
Posted on: 2008/7/10 1:57
|
|||
|
_________________
Currently "Between Vettes". 
|
|||
 Transfer Transfer
|
 
|
||

| CSS996 | Re: Headliner Install 1993 Corvette | ||
|
Mega Guru
|
Not sure WTF happend to my photo links.... I just put the photos in there. Never moved 'em!
I will try again! EDIT: Tried again with the same result. That sucks! Sorry, no way to enlarge the photos right now, I guess.  |
||
Posted on: 2008/7/10 2:00
|
|||
|
_________________
Currently "Between Vettes".
|
|||
|
Transfer
|
|
||
| TommyT-Bone | Re: Headliner Install 1993 Corvette | ||
|
Chair-man of the bored
 
|
1st time is just practice. You'll forget about the wrinkles by next week. You'll never see them again unless your lying with your back across the seats. Maybe you will see them again.
|
||
Posted on: 2008/7/10 2:03
|
|||
|
Transfer
|
|
||
| jimmers | Re: Headliner Install 1993 Corvette | ||
|
Senior Guru
 
|
Thanks for taking the time to post this. My headliner needs to be replaced badly! I just can't seem to get around to doing it.
|
||
Posted on: 2008/7/10 2:04
|
|||
|
Transfer
|
|
||
| CSS996 | Re: Headliner Install 1993 Corvette | ||
|
Mega Guru
|
If you have all the materials handy, it takes two, maybe three hours, if you stop to enjoy a beverage...
If I did another one, I could probably do it in an hour. |
||
Posted on: 2008/7/10 2:07
|
|||
|
_________________
Currently "Between Vettes".
|
|||
|
Transfer
|
|
||
| biggrizzly | Re: Headliner Install 1993 Corvette | ||
|
2011 Memorial Day Car Show Winner!

|
Good write up and enjoyed your humor!
I love great stories... I know your wife is checking the glue out on her armchairs now!! LOL I know mine would be... |
||
Posted on: 2008/7/10 2:25
|
|||
|
_________________
Don Haller Corvette Club of America 94Coupe, 383Stroka, PeteK Trans, 3000stall, 3.54rear, Konis and bigger sways. |
|||
|
Transfer
|
|
||
| CSS996 | Re: Headliner Install 1993 Corvette | ||
|
Mega Guru
|
Thanks. Yeah, I'm always a comedian. To a fault, I guess.
If anyone can add to this, or make other suggestions, it will help the next guy out, so my feelings won't be hurt if you see where I made a grave mistake that can make things better. My wife wasn't here. She didn't see it.... Never happened. |
||
Posted on: 2008/7/10 2:28
|
|||
|
_________________
Currently "Between Vettes".
|
|||
|
Transfer
|
|
||
| pianoguy | Re: Headliner Install 1993 Corvette | ||
|
Guru Emeritus
 
|
Great write-up, Chris! I haven't had this problem yet, but I'm sure I will someday.
|
||
Posted on: 2008/7/10 2:56
|
|||
|
_________________
1996 LT4 �Before you criticize someone, you should walk a mile in their shoes. That way when you criticize them, you are a mile away from them and you have their shoes.�- Jack Handey |
|||
|
Transfer
|
|
||
| 81c3 | Re: Headliner Install 1993 Corvette | ||
|
Senior Guru
|
Looks great Chris. I want to use vinyl or another "pleather" type material when we do mine.
|
||
Posted on: 2008/7/10 3:55
|
|||
|
Transfer
|
|
||
| CSS996 | Re: Headliner Install 1993 Corvette | ||
|
Mega Guru
|
I had originally wanted to find ruby leather or vinyl, but the black cloth is good and groovy. I'm excited to see what material you find to do yours in.
|
||
Posted on: 2008/7/10 4:08
|
|||
|
_________________
Currently "Between Vettes".
|
|||
|
Transfer
|
|
||
| Greg | Re: Headliner Install 1993 Corvette | ||
|
Guru Newb
 |
I replaced my headliner about a year ago. The only things that I did differently were. Get some help when placing glued material on the backing. You can strech the material and eliminate wrinkles. The other thing was I repaired the backing with sheets of epoxy and resin, then installed velcro strips to hold it in place. One year later good as new.
|
||
Posted on: 2008/7/10 4:51
|
|||
|
Transfer
|
|
||
| CentralCoaster | Re: Headliner Install 1993 Corvette | ||
|
Senior Guru
 
|
Hmm. Not to rain on your parade but I carefully pulled the stock fabric off, found some good spray on adhesive, put the new fabric in place, trimmed it with about 1" to spare around the edges, then tucked it in with an old credit card. Didn't remove the foam piece at all.
I tried some nashua spray the first time, only lasted a year. The 2nd time I found some good stuff from 3M. |
||
Posted on: 2008/7/10 7:12
|
|||
|
_________________
1985 Z51, ZF6 |
|||
|
Transfer
|
|
||
| CSS996 | Re: Headliner Install 1993 Corvette | ||
|
Mega Guru
|
Good points, guys. CC, It SEEMED to me like not removing the pad was a half-assed way to do it, but that was just my impression. It sure would eliminate a lot of work.
The velcro is an awesome idea! |
||
Posted on: 2008/7/10 11:27
|
|||
|
_________________
Currently "Between Vettes".
|
|||
|
Transfer
|
|
||
| runner140 | Re: Headliner Install 1993 Corvette | ||
|
Master Guru
 
|
Guess I did a rush job (about an hour). Cut the liner on three sides. Sprayed 3M adhesive on the pad. Re-attached the liner, tucked the excess under the shell/pad.
I think I spent more time cleaning up than the actual process. |
||
Posted on: 2008/7/10 11:48
|
|||
|
_________________
96, white and a ton of miles. Somewhat stock. |
|||
|
Transfer
|
|
||
| Matatk | Re: Headliner Install 1993 Corvette | ||
|
Webmaster
 
|
Quote:
Don't worry, Chris has an old pleather leisure suit you can use - he no longer wears fuschia. Matthew |
||
Posted on: 2008/7/10 13:13
|
|||
|
_________________
2002 EBM convertible, Magnusson supercharger, cam, headers, etc. 1989 Corvette...RIP |
|||
|
Transfer
|
|
||
| CSS996 | Re: Headliner Install 1993 Corvette | ||
|
Mega Guru
|
Focus, Matthew... This here is a technical thread.
 :binky: :binky: |
||
Posted on: 2008/7/10 13:22
|
|||
|
_________________
Currently "Between Vettes".
|
|||
|
Transfer
|
|
||
| Matatk | Re: Headliner Install 1993 Corvette | ||
|
Webmaster
|
Quote:
Can't.....resist....temptation...... Matthew |
||
Posted on: 2008/7/10 13:23
|
|||
|
_________________
2002 EBM convertible, Magnusson supercharger, cam, headers, etc. 1989 Corvette...RIP |
|||
|
Transfer
|
|
||
| CSS996 | Re: Headliner Install 1993 Corvette | ||
|
Mega Guru
|
Well, I am starting to feel a bit like a dufus (MATTHEW!!! SIT!!!) for doing all this work, when there was an easier way. But since I don't know too much about fixing cars, I figured this was something I could dive into, and feel good about.
So, maybe the easier way is better. I'm just glad my car doesn't look like crap up there anymore.  Now, if my PKE would just program....  I just got word yesterday that a pretty large freelance check was headed my way next week. Here's hoping! Time for: New front air dam Suspension bushings vacuum hoses plugs and wires opti hatch weatherstrip CORSA and Headers? Hopefully I will be able to afford all of it. |
||
Posted on: 2008/7/10 13:35
|
|||
|
_________________
Currently "Between Vettes".
|
|||
|
Transfer
|
|
||
| NEVRL8T | Re: Headliner Install 1993 Corvette | ||
|
Guru
 |
Quote:
I did mine the same was as you early last year. Looks great! |
||
Posted on: 2008/7/10 14:24
|
|||
|
Transfer
|
|
||
| red_johnny | Re: Headliner Install 1993 Corvette | ||
|
On Sabbatical

|
Great write up, I enjoyed all the little mis-adventures you had.
 |
||
Posted on: 2008/7/10 14:43
|
|||
|
Transfer
|
|
||
| JonnyAngle | Re: Headliner Install 1993 Corvette | ||
|
Senior Guru

|
I actually have NO headliner. I yanked out the foam part and cleaned the area where the headliner/ foam would go. It's not for everyone, but there's more headroom!
|
||
Posted on: 2008/7/10 15:51
|
|||
|
_________________
When I die, I want to go peacefully like my Grandfather did, in his sleep -- not screaming, like the passengers in his car. 
|
|||
|
Transfer
|
|
||
| CSS996 | Re: Headliner Install 1993 Corvette | ||
|
Mega Guru
|
I actually considered that, as tall as I am. Someday I will get a bronze top (as listed in my RPO sticker) and will probably use that top most of the time.
|
||
Posted on: 2008/7/10 15:58
|
|||
|
_________________
Currently "Between Vettes".
|
|||
|
Transfer
|
|
||
You can view topic.
You cannot start a new topic.
You cannot reply to posts.
You cannot edit your posts.
You cannot delete your posts.
You cannot add new polls.
You cannot vote in polls.
You cannot attach files to posts.
You cannot post without approval.
|
|