|
|
Register To Post |
| Matatk | 1989 L98 Engine rebuild - Part 1: removal | ||
|
Webmaster
 
|
Welcome CGs!
You better grab a drink and a snack because this is gonna be long. I couldn't find any good threads on engine removal, so I will make this pretty involved. Remember removal of the L98 is similar to the LT1 but there are differences. This will also apply to an auto trans, the zf and 4+3 have differences as well. I have already removed the AIR system and have the TB bypass, so those may be points you need to consider in your own work. The FSM manual is not very good for engine removal. I actually used the Haynes manual along with some common sense. This is my first engine pull, and it took me around 12 hours start to finish to get it out of the car. Another hour or two once it was on the stand to finish tearing it down. I was not very efficient in the way I did things. Some pictures may seem out of order because of this. I should have started in one spot, finished it, then went to the next spot. But I jumped around based on what I felt like doing. I think things should go in the basic order of start at the top, get down to the manifold, then remove all the accessory brackets (p/s & a/c I just moved to the side). I left the wp and harmonic balancer on, but removed the pullies. I also drained the fluids while I was doing the top end work. Don't forget to disconnect the battery. Raise the car and remove the tires to get in easier. Support with jack stands: 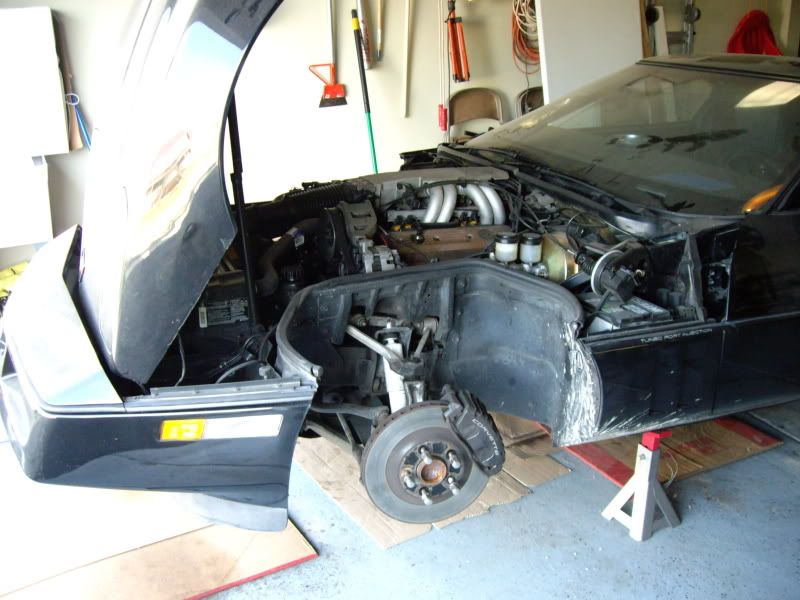 Remove the air duct, electrical connections, throttle body: 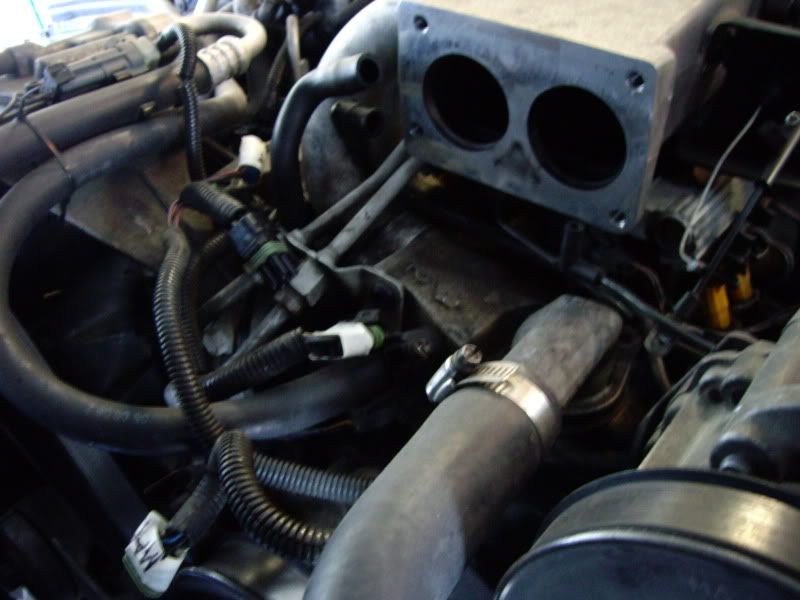 Begin removing the plenum (T40 bits) and associated vacuum hoses. Be careful pulling up the plenum as there is a wire connection underneath. I also remove the distributor at this point. I began labeling everything I took apart: 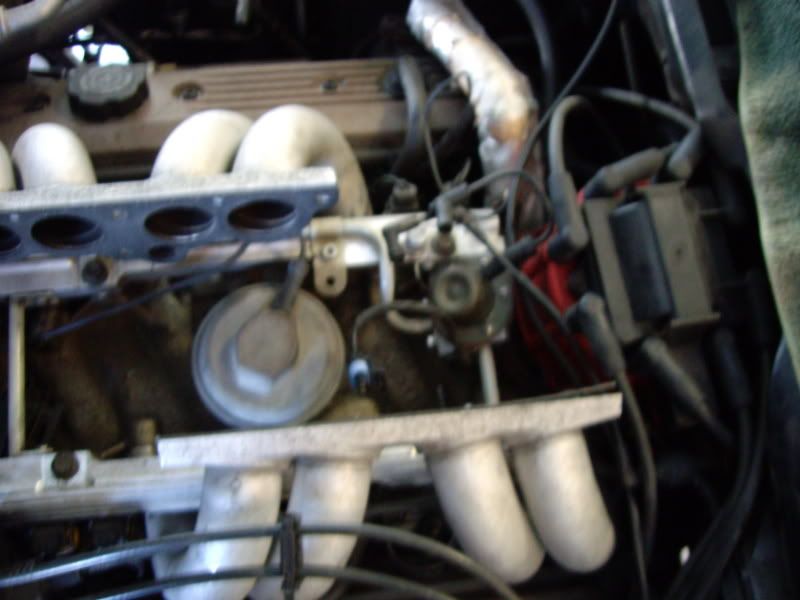 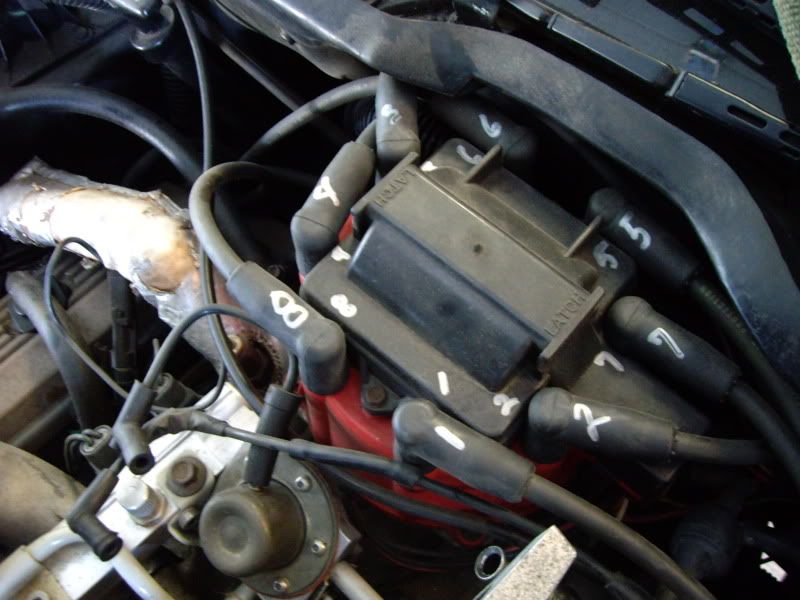 Go ahead and remove the runners while you're in there and the fuel rails. Be careful with the fuel rails because you'll spill it all over if you didn't run the car with the fp fuse removed first: 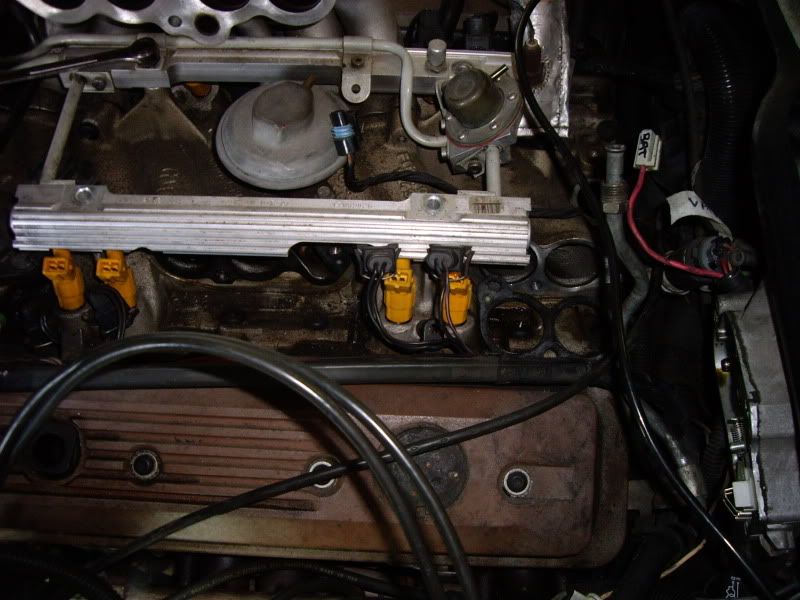 In keeping with the "top of the engine" theme I removed the plastic cover for the windshield wiper to prevent breakage: 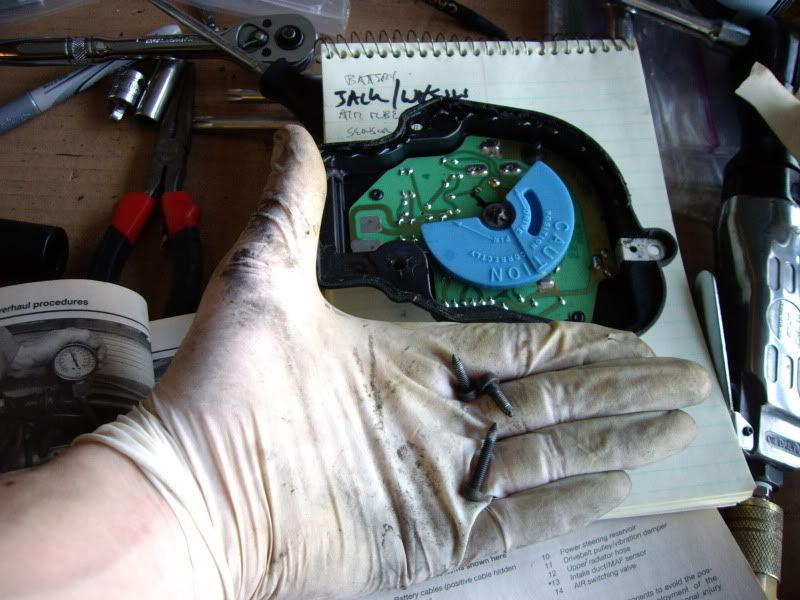 I also removed lines and sensors from the manifold. This is a coolant crossover tube, AFAIK: 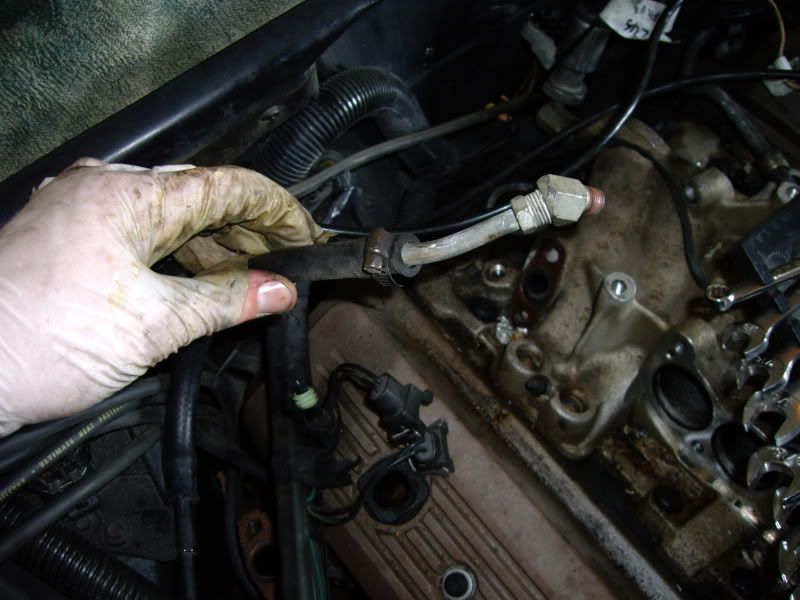 And this is a sensor that I have no idea what it is (someone help me out here): 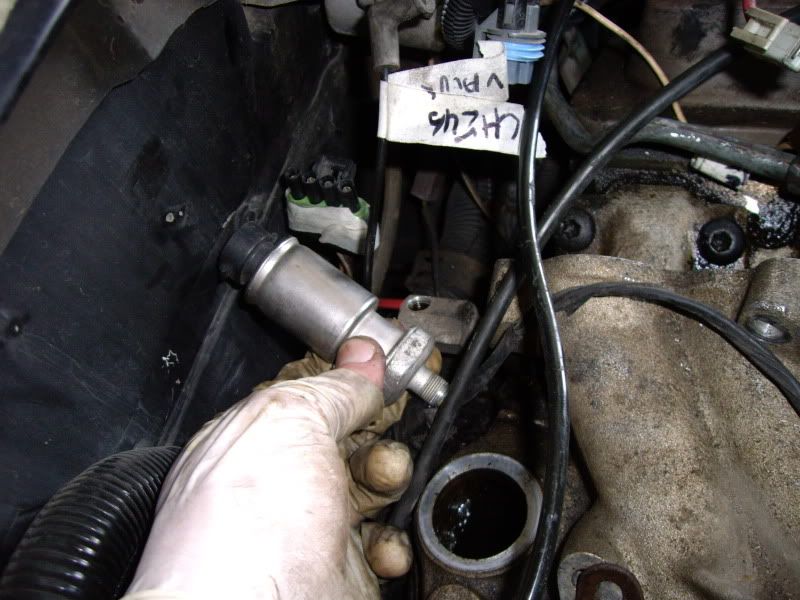 Next you should move to removing the air pump and alternator: 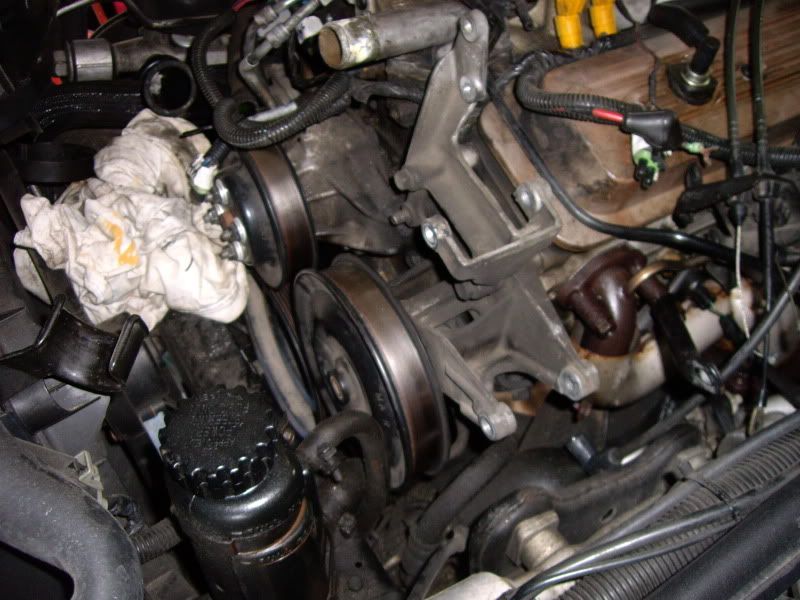 I broke the alternator wire ring, add it to the list: 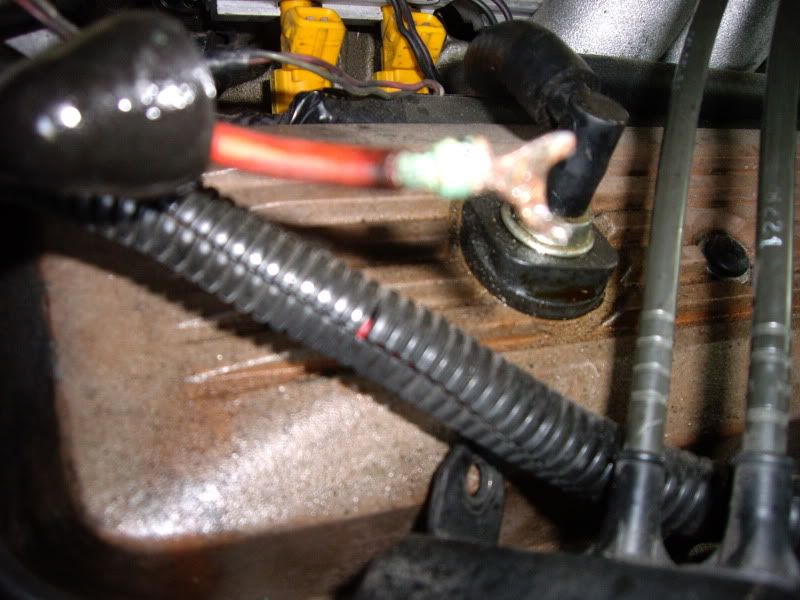 Here you can see the front accessories removed. A/C and P/S pump are pushed off the the sides. The P/S pump is a PIA because of the way the rear support bar is mounted. One bolt behind another. Patience and an open ended wrench is necessary, unless you remove the stud from exhaust manifold: 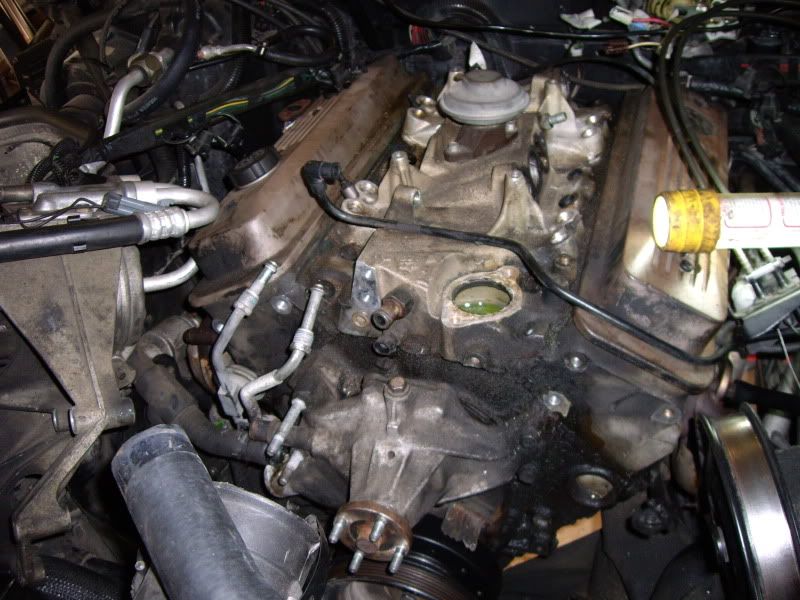 Top end is pretty much done at this point. I removed the vacuum lines and labeled them. Wires are pushed out of the way a bit. Next move to the bottom of the car. You should have already applied liberal coats of PB blaster to the exhaust manifold/y-pipe studs. If not, good luck. I did and they still didn't cooperate. The nuts should be 9/16, but 20 years of rust made them swell. Out of 6 studs, 3 broke, 2 nuts came off, and 1 stud came out. Total time was in excess of 45 minutes for those 6! I unfortunately didn't get many underside shots, laying on my back wasn't too comfortable. Under the car, disconnect the O2 sensor wire, knock sensor (p/s block), coolant temp sensor (p/s on head plus a little bracket underneath), oil temp sensor (above filter), grounds (two spots - one above filter, one behind). 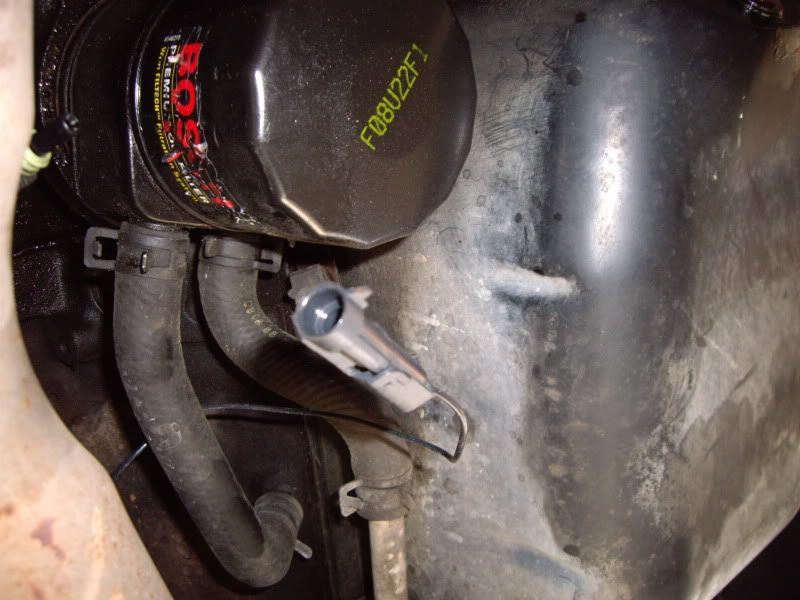 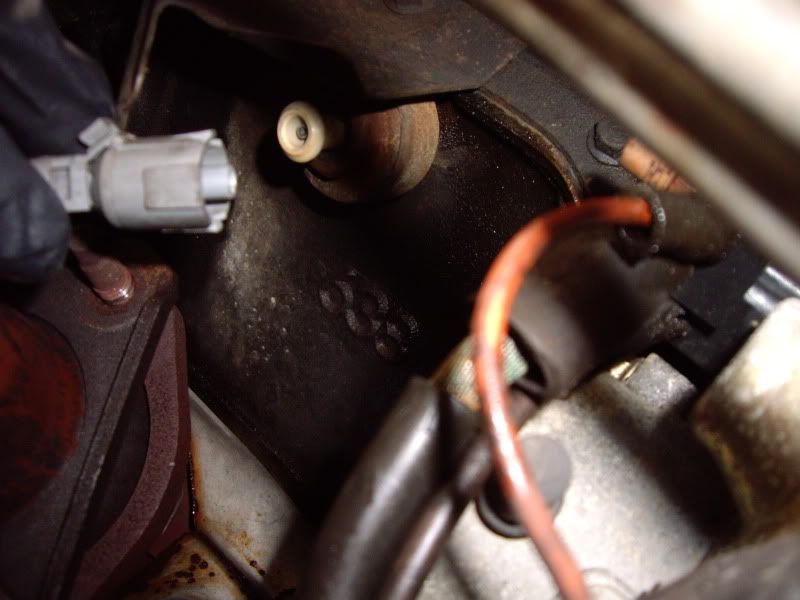 (engine ground on bellhousing): 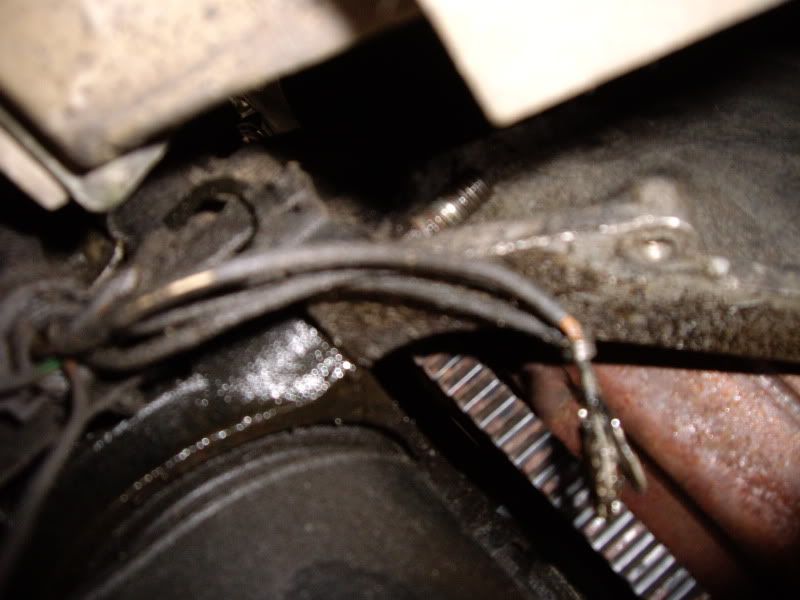 Your choice to disconnect the starter or remove it, I just disconnected it. There might be a trans cooler line bracket in the way, too. Remove the flywheel inspection cover, 4 bolts. 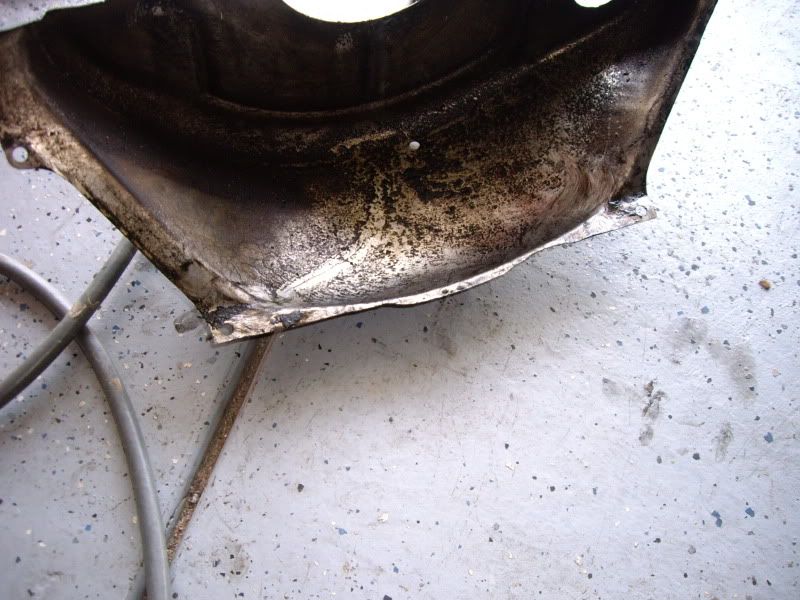 Once off, remove the 3 torque converter to flywheel bolts. I used a 15 mm socket. This is a PIA since you have to turn the flywheel to do it. Looks like mine got a little chewed up from a bad starter before: 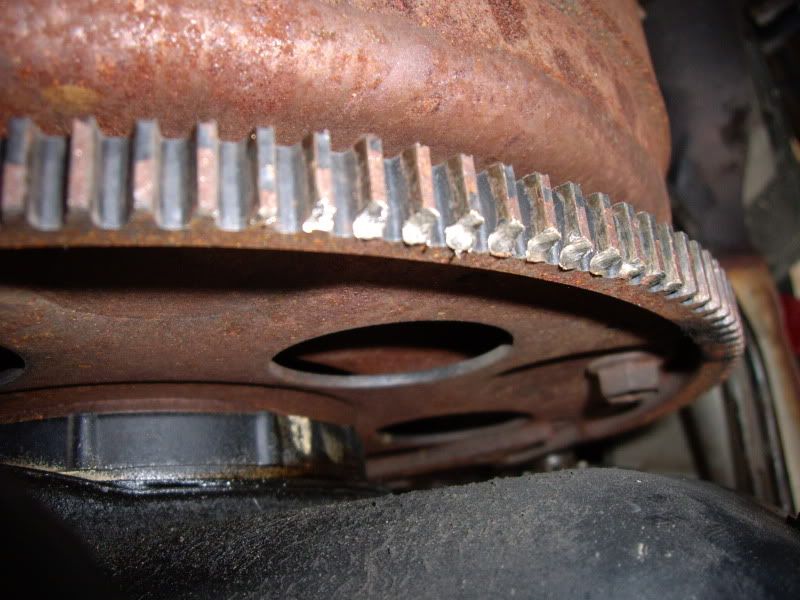 At this point, you should have attached your engine to the hoist for support. I then removed the front y-pipe from the cat to make it easier to maneuver. Once that was out of the way, I supported the transmission. The bellhousing has 6 bolts (9/16th/14mm). They are a royal PIA!!!! The total time I spent removing them I estimate at 2 hours. Here is what you need to get them from underneath: 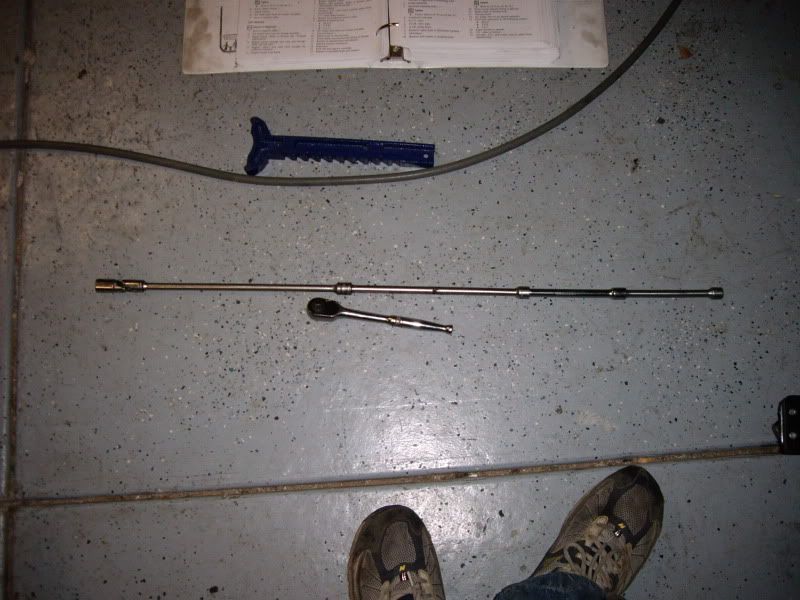 When I put them back in, I'm buying the 9/16th socket that has the swivel built in. Should make it much easier. You should also have the trans supported at this point. Next remove the engine through bolts. These run front to back and have a nut on the rear portion. It's a two person job pretty much. I had help from a buddy. Once the through bolts are out, remove the three bolts that hold the engine mounts. They look impossible, but it's doable. You have to get two from one side, one from the other. It helps to raise the motor slightly to maneuver in there. No really good shot, but here's an idea: 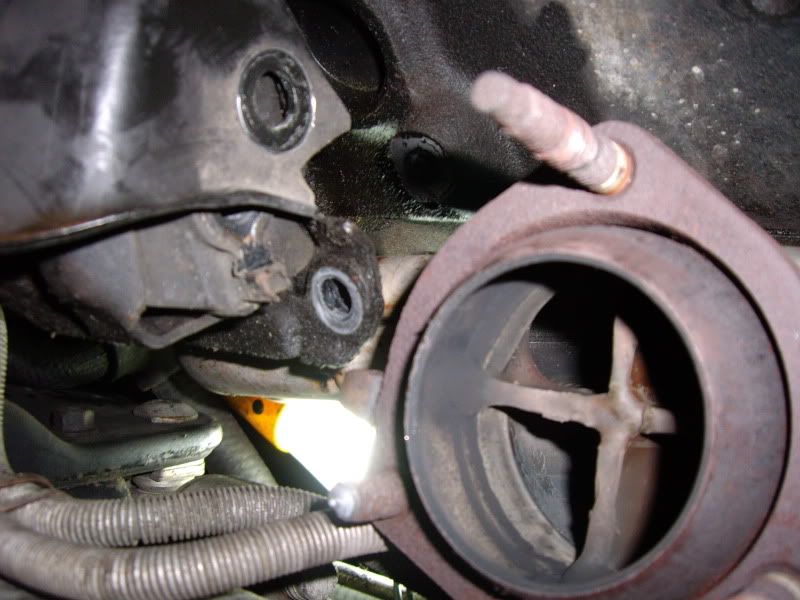 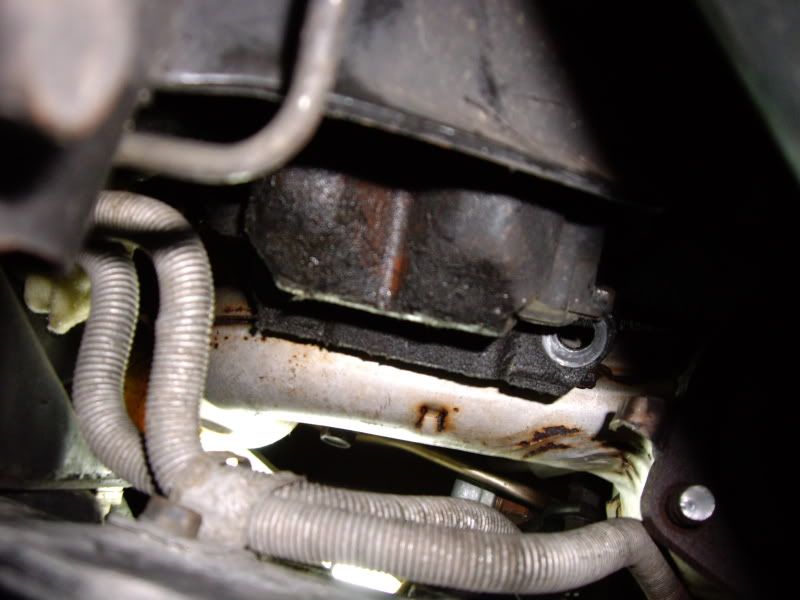 Once the motor mounts are out, you can pull up and nudge the motor forward to get it off the bellhousing dowels. Then slowly begin cranking up. While cranking up check for missed wires and be careful not to let the engine swing into the firewall/windshield wiper motor/windshield, etc. When pulling up I did notice one or two wires I missed disconnecting. There are about a million! 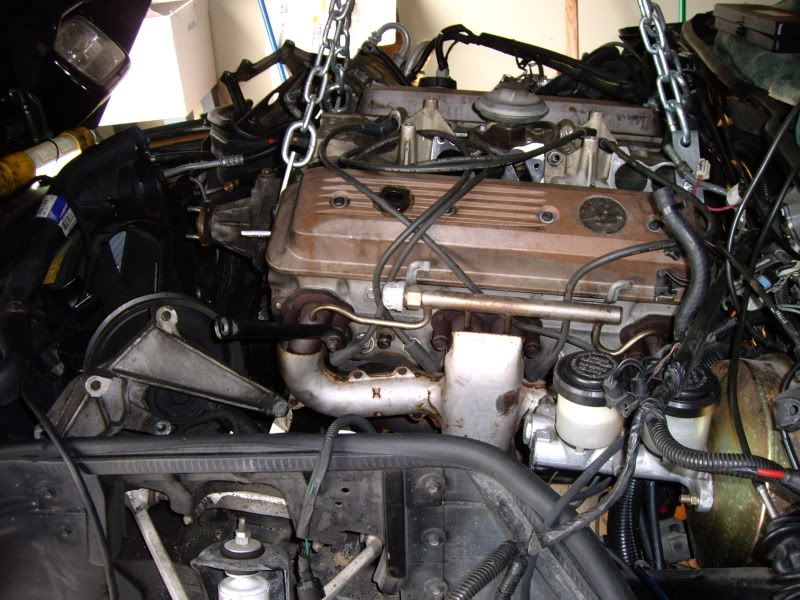 Look at that handsome man! 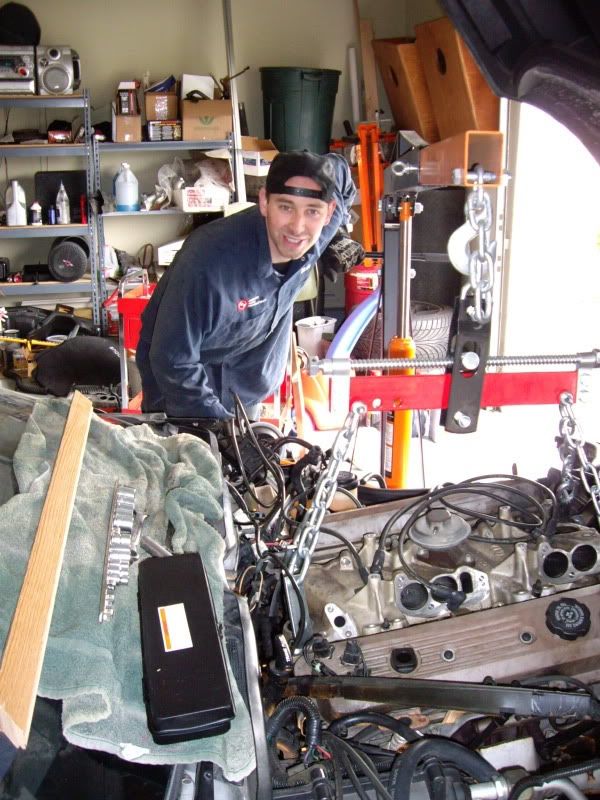 Success!!!! 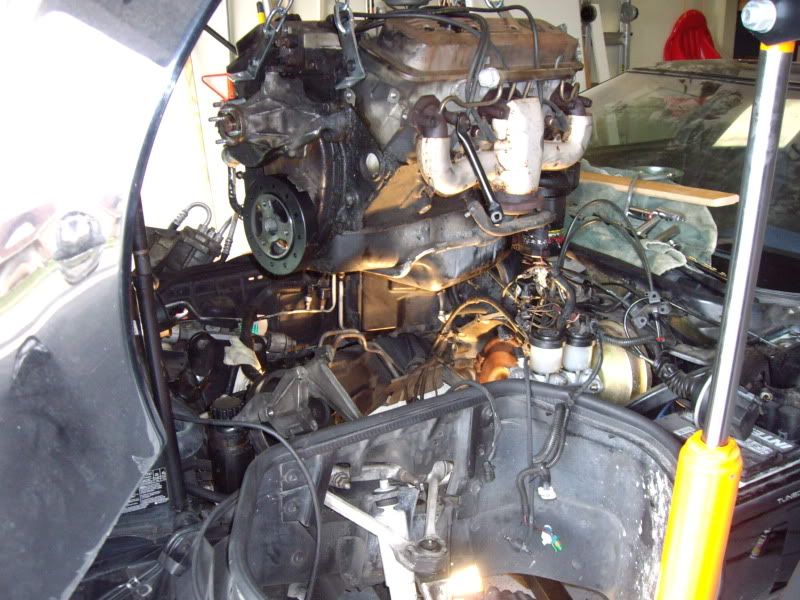 Time to get it on the stand: 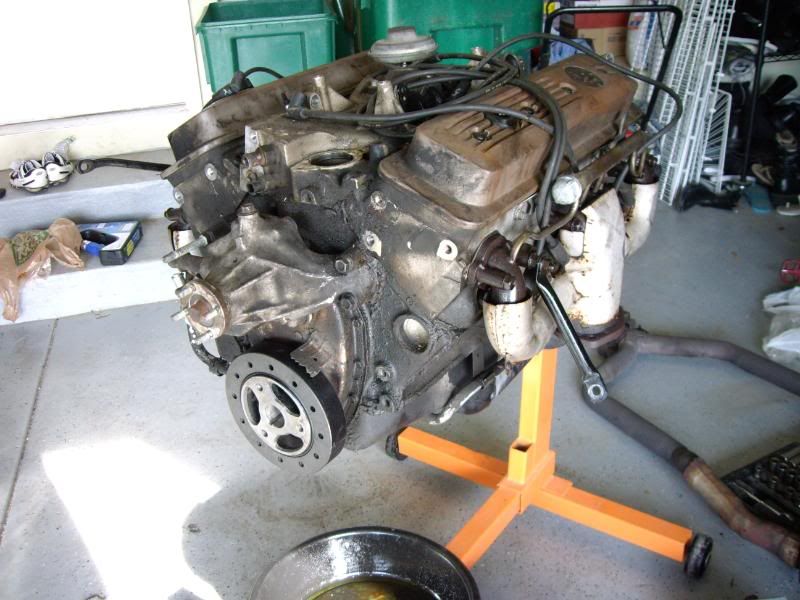 I then began the rest of the teardown. Top of the cylinders look pretty clean: 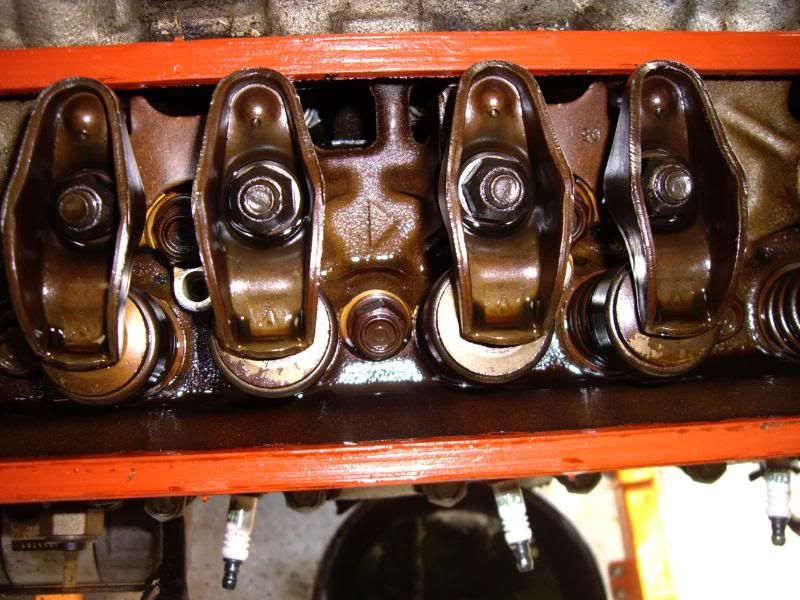 Took the WP off. This is just a reference shot for me to help remember which bolt goes where: 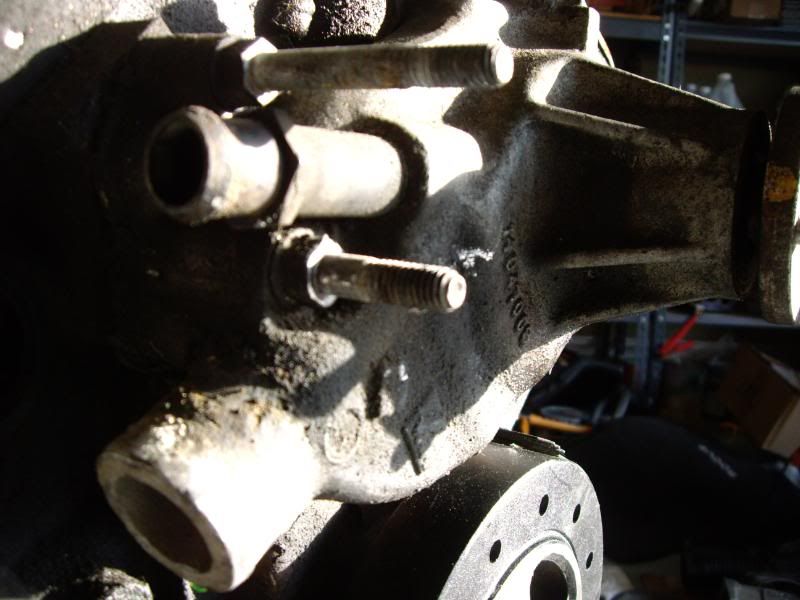 Intake is off. It's been done before as I found felpro gaskets underneath: 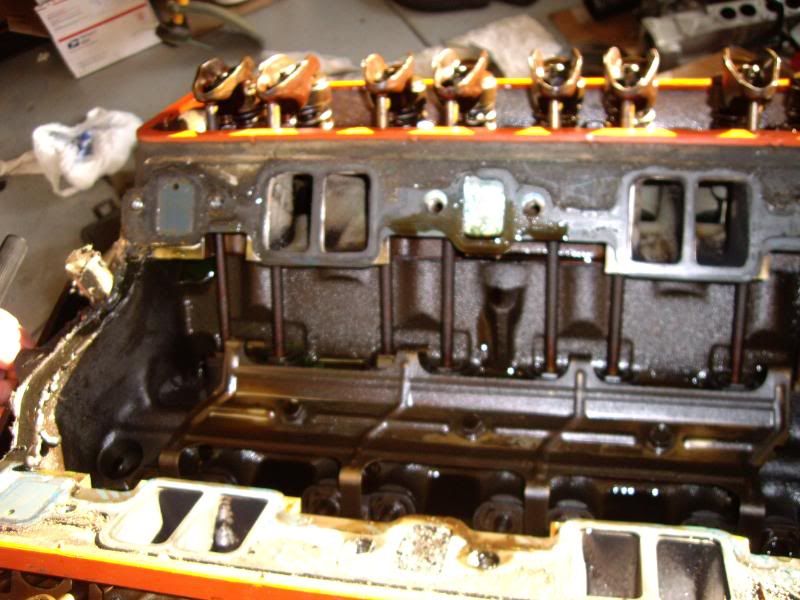 Driver's side head off - doesn't look too bad, but gasket showed a lot of signs of corrosion: 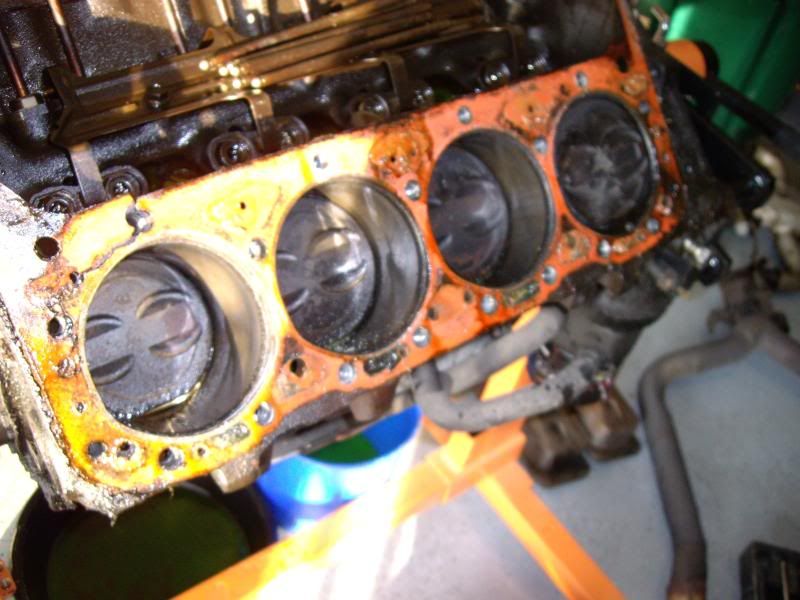 Took the passenger side off. At first all this coolant scared me! But it appears to have been residual from the manifold. No way it would even start with all that! Plus the combustion chambers are not steam cleaned: 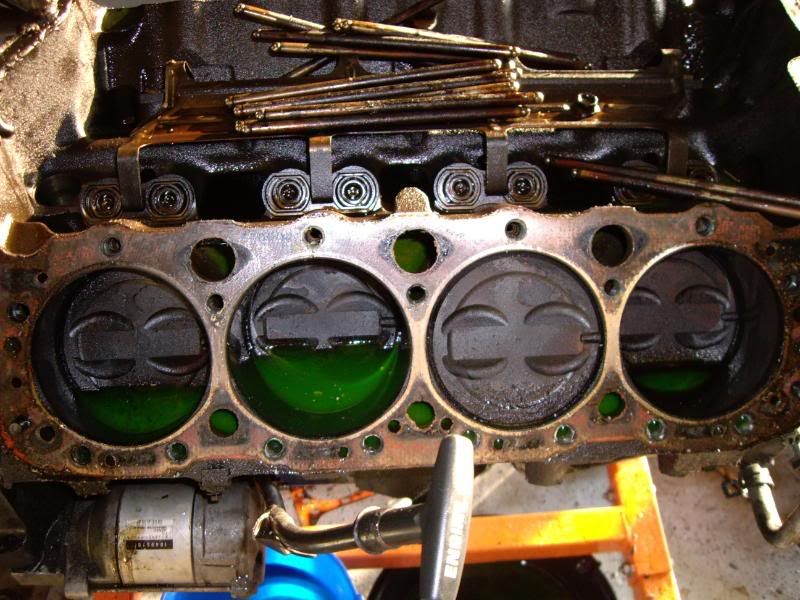 Head shot - can't remember which side?!?: 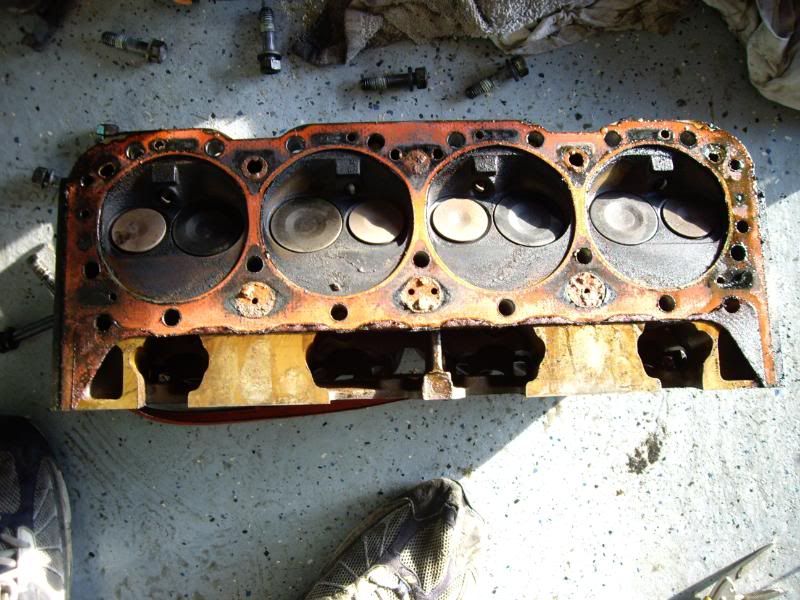 This is driver's side rear: 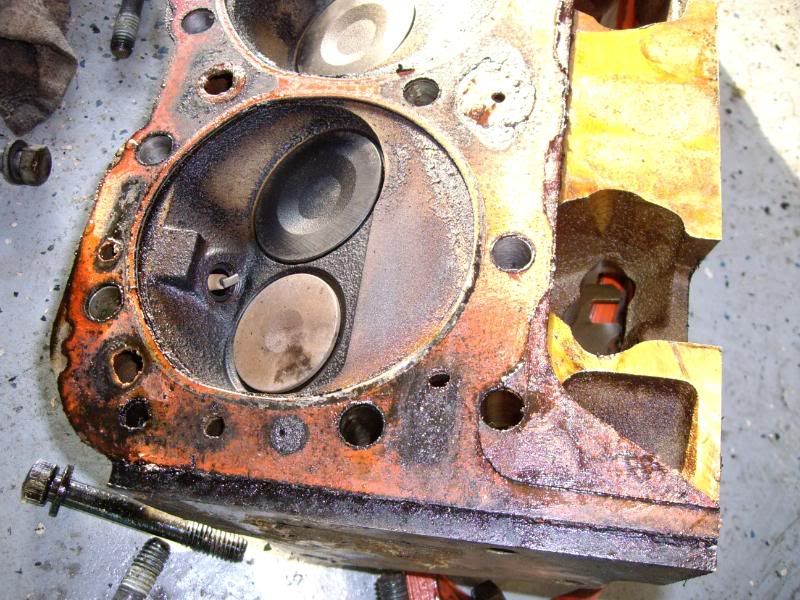 More corrosion examples: 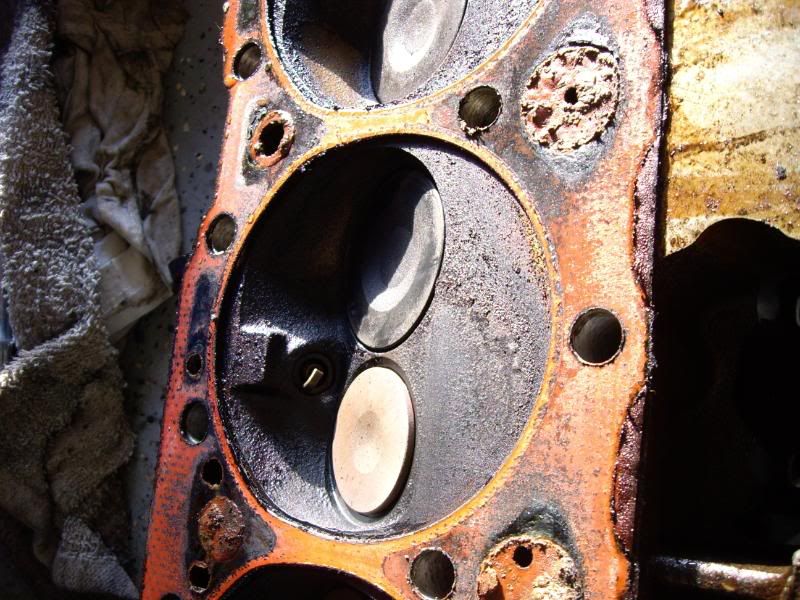 And this bad boy is stripped! 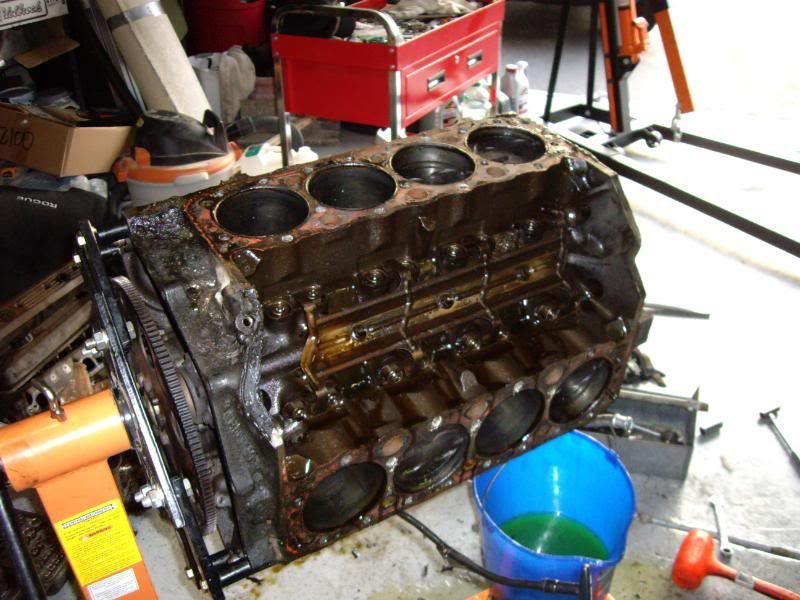 That's it for now. Total time I'm guessing 14 hours. I cussed a few times, but for the most part it went ok. Hardest part was a few stuck bolts and access to a few others. Just a lot of stuff to remove. Seriously. I hope this helps anyone else in the future who is looking to do the same. Matthew |
||
Posted on: 2010/4/3 2:58
|
|||
|
_________________
2002 EBM convertible, Magnusson supercharger, cam, headers, etc. 1989 Corvette...RIP |
|||
 Transfer Transfer
|
|||
| bogus | Re: 1989 L98 Engine rebuild - Part 1: removal | ||
|
Grand Imperial Pooh-Bah
 |
Great job, Mstthew!
You did good! It has taken practice, but I can yank a C4 engine in about 2 hrs... A few pointers... You are dead right that a swivel socket will help. I have the entire universal kits, in both metric and standards. Also, air tools really help! |
||
Posted on: 2010/4/3 4:23
|
|||
|
_________________
The single biggest problem with communication is the illusion that it has taken place. - George Bernard Shaw Education is the best tool to overcome irrational fear. - me |
|||
 Transfer Transfer
|
|||
| VetteMed | Re: 1989 L98 Engine rebuild - Part 1: removal | ||
|
Guru Newb
 
|
That mystery sensor you wondered about is an oil pressure sensor or switch (I can't remember which).
|
||
Posted on: 2010/4/3 4:29
|
|||
 Transfer Transfer
|
|||
| CentralCoaster | Re: 1989 L98 Engine rebuild - Part 1: removal | ||
|
Senior Guru
 |
Quote:
 Come on over then! I'll provide the tools and spectate. Come on over then! I'll provide the tools and spectate. |
||
Posted on: 2010/4/3 7:10
|
|||
|
_________________
1985 Z51, ZF6 |
|||
 Transfer Transfer
|
|||
| CentralCoaster | Re: 1989 L98 Engine rebuild - Part 1: removal | ||
|
Senior Guru
 |
Quote:
Actually it does both. Feeds the cluster, and secondary power source for the fuel pump. Don't break it, it's expensive. |
||
Posted on: 2010/4/3 7:10
|
|||
|
_________________
1985 Z51, ZF6 |
|||
 Transfer Transfer
|
|||
| sliding | Re: 1989 L98 Engine rebuild - Part 1: removal | ||
|
Senior Guru
 
|
Good work and nice writeup.
Are you going do do stock rebuild or do you plan to do some modifications to the engine? |
||
Posted on: 2010/4/3 9:28
|
|||
|
_________________
'90 L98 auto with a lot of mods |
|||
 Transfer Transfer
|
|||
| Matatk | Re: 1989 L98 Engine rebuild - Part 1: removal | ||
|
Webmaster
 
|
Andy - I've heard of guys removing the LT1 a lot faster than the L98. I don't know why. I did have air tools. An impact gun and an air ratchet help a lot. With the air ratchet, it's a good idea to break any stuck bolts loose first with a breaker bar, then use the air ratchet for the tedious stuff.
Thanks for clearing up what that sensor is, guys. Sliding - at this point it's a little up in the air. I have a set of edelbrock heads, lightly ported, an edelbrock high flow base/SLPs/stock plenum all gasket matched and cleaned up, and a cam sitting on the shelf that will go on. For the bottom end my ideal goal is a stroker, but will depend on cost differences. I have to get this over to the builder and see what he thinks. The cylinder walls didn't look too bad but I honestly didn't inspect them well. I did, however, feel a decent sized ridge at the top of cylinders so that will be addressed with the machine work. I didn't open up the oil pan and check the bearings or crank. Matthew |
||
Posted on: 2010/4/3 11:41
|
|||
|
_________________
2002 EBM convertible, Magnusson supercharger, cam, headers, etc. 1989 Corvette...RIP |
|||
 Transfer Transfer
|
|||
| pr0zac | Re: 1989 L98 Engine rebuild - Part 1: removal | ||
|
Elite Guru
 
|
Quote:
that's cause lt1's are awesome. just sayin.. |
||
Posted on: 2010/4/3 12:12
|
|||
 Transfer Transfer
|
|||
| TommyT-Bone | Re: 1989 L98 Engine rebuild - Part 1: removal | ||
|
Chair-man of the bored
 
|
I applaud all of you that have undertaken this task. Not only are you saving $$$ by doing the wreching yourself, you are gaining priceless knowledge on the mechanics involved in your hobby/project. Thanks for the pics and play by play. Had I not been lurking around the forums through the years I wouldn't have a clue when it comes to diagnostics, parts and operation.
I do not do a lot of work on my cars but I have the knowledge to at least know what it could be, what needs to be done and about how much it will cost. I may take a more active role in the future (maybe not) but the constant exposure to the technical aspects of Corvette ownership has always been a bonus. Bravo Matthew. Bravo ......  |
||
Posted on: 2010/4/3 12:15
|
|||
 Transfer Transfer
|
|||
| pianoguy | Re: 1989 L98 Engine rebuild - Part 1: removal | ||
|
Guru Emeritus
 
|
Well-done, Matt! I'm getting sympathy soreness just from looking at your pics ;-)
|
||
Posted on: 2010/4/3 13:10
|
|||
|
_________________
1996 LT4 �Before you criticize someone, you should walk a mile in their shoes. That way when you criticize them, you are a mile away from them and you have their shoes.�- Jack Handey |
|||
 Transfer Transfer
|
|||
| flyboy | Re: 1989 L98 Engine rebuild - Part 1: removal | ||
|
Elite Guru
 |
That is very impressive Matt. It can take me two hours just to get organized. I wonder if those are the same # head gaskets that were used on my '91? They were numbered GM 14088948 on one 'ear', Canada on the other and compressed thickness of .050". They appear similar. How many miles are on that motor?
|
||
Posted on: 2010/4/3 13:23
|
|||
|
_________________
'91coupe, LT4Hotcam, some other stuff. If it's too loud, you're too old. "He works on old cars, then junks 'em" |
|||
 Transfer Transfer
|
|||
| BillH | Re: 1989 L98 Engine rebuild - Part 1: removal | ||
|
The Stig Moderator
 |
Good job,M.
Now clean up the engine compartment to match the one DB's doing.  |
||
Posted on: 2010/4/3 13:57
|
|||
|
_________________
Every man dies but not every man lives. |
|||
 Transfer Transfer
|
|||
| BillH | Re: 1989 L98 Engine rebuild - Part 1: removal | ||
|
The Stig Moderator
 |
Quote:
Even less for a C2. 45 minutes for my Formula Ford.  |
||
Posted on: 2010/4/3 13:59
|
|||
|
_________________
Every man dies but not every man lives. |
|||
 Transfer Transfer
|
|||
| bogus | Re: 1989 L98 Engine rebuild - Part 1: removal | ||
|
Grand Imperial Pooh-Bah
 |
How about 15 minutes in an old Beetle!!!
|
||
Posted on: 2010/4/3 14:36
|
|||
|
_________________
The single biggest problem with communication is the illusion that it has taken place. - George Bernard Shaw Education is the best tool to overcome irrational fear. - me |
|||
 Transfer Transfer
|
|||
| sliding | Re: 1989 L98 Engine rebuild - Part 1: removal | ||
|
Senior Guru
 
|
Quote:
Sounds good! Either way you decide to go, keep us posted with as much pics as possible. I (and believe others too) allways enjoy threads like this. |
||
Posted on: 2010/4/3 14:37
|
|||
 Transfer Transfer
|
|||
| 383tpimachine | Re: 1989 L98 Engine rebuild - Part 1: removal | ||
|
Master Guru
 |
When I pulled mine we took off the hood. made it alot more light and room.
good writeup |
||
Posted on: 2010/4/3 14:52
|
|||
|
_________________
1985 Atomic Orange 400YSIT56-Racecar build 1970 El Camino-Awaiting LSX |
|||
 Transfer Transfer
|
|||
| Matatk | Re: 1989 L98 Engine rebuild - Part 1: removal | ||
|
Webmaster
 
|
Quote:
I'm guessing it has more to do with the fact there is no TPI. Your theory could be correct, but I doubt it  Car has 90k or 91k on it. I can't remember exactly. Joe - I'll have to look later, I didn't really scan it for a part #. As far as pulling the hood, no real reason to do it unless you're pulling the trans with the motor. There might be a little more light, but there is plenty of room to work around. Oh, I will be cleaning up the engine bay later. Thanks for the positive comments. Matthew |
||
Posted on: 2010/4/3 16:10
|
|||
|
_________________
2002 EBM convertible, Magnusson supercharger, cam, headers, etc. 1989 Corvette...RIP |
|||
 Transfer Transfer
|
|||
| 383tpimachine | Re: 1989 L98 Engine rebuild - Part 1: removal | ||
|
Master Guru
 |
Sorry I forgot to add I used an A frame with a hoist to pull my engine. Alot less chance to kill the windshield or anything else the way we had it set up.
Plus when we put the engine back in we painted the underside black. It likely wont be coming off when I pull the engine the next time |
||
Posted on: 2010/4/3 17:41
|
|||
|
_________________
1985 Atomic Orange 400YSIT56-Racecar build 1970 El Camino-Awaiting LSX |
|||
 Transfer Transfer
|
|||
| Ultraman | Re: 1989 L98 Engine rebuild - Part 1: removal | ||
|
2015 Memorial Day Car Show Winner!
 |
Nice Work Matt!
|
||
Posted on: 2010/4/3 18:23
|
|||
|
_________________
2010 Grand Sport Coupe Gone but not forgotten... Vote DeSantis in 2024.... Make the IRS go away... |
|||
 Transfer Transfer
|
|||
| Matatk | Re: 1989 L98 Engine rebuild - Part 1: removal | ||
|
Webmaster
 
|
Well I had zero inclination to go in the garage today, but I popped my head in for one minute. I couldn't find a part number on those head gaskets, might have been corroded.
I also checked the cylinder walls a little better. They were smooth with zero scoring and didn't appear to be glazed. Also, the ridge I thought I felt on the cylinder seems to have been some corrosion or junk built up on the lip. So it's visually in good shape, but wouldn't actually know without some type of mechanical indicator. On a side note, the builder I was gonna use is backed up with 6 other engines and can't do mine. I'm not happy. I have a couple more leads to track down. Matthew |
||
Posted on: 2010/4/4 0:37
|
|||
|
_________________
2002 EBM convertible, Magnusson supercharger, cam, headers, etc. 1989 Corvette...RIP |
|||
 Transfer Transfer
|
|||
| RickAnthony | Re: 1989 L98 Engine rebuild - Part 1: removal | ||
|
ASE Master Certified
 
|
Quote:
Awaiting to hear what happens next... Also as I said get a long extension and that 9/16 flex socket. Those top 2 bellhousing bolts are a pain... Especially doing this on the floor without a lift. -=Rick |
||
Posted on: 2010/4/4 4:24
|
|||
|
_________________
My Automotive Blog autoserviceupdated.blogspot.com CORVETTE SERVICE & REPAIR RickAnthonyMotorsports.NET |
|||
 Transfer Transfer
|
|||
| CentralCoaster | Re: 1989 L98 Engine rebuild - Part 1: removal | ||
|
Senior Guru
 |
Why are you pulling it exactly? Does it blow too much oil? Neverending leaks? Metal shavings in the oil pan? Or you're just bored and want a fresh engine?
|
||
Posted on: 2010/4/4 14:34
|
|||
|
_________________
1985 Z51, ZF6 |
|||
 Transfer Transfer
|
|||
| biggrizzly | Re: 1989 L98 Engine rebuild - Part 1: removal | ||
|
2011 Memorial Day Car Show Winner!
 
|
How many breaks did you take?
 Great engine porn! When I did mine, I was going to do the same, but it seemed like I never had my camera available for the important shots. I took lots of photos but none in any sequence. I give you credit for doing this job straight through. I took my good ole time, only spending an hour here and and an hour there. Then there was the wait for parts and money! keep up the progress reports. |
||
Posted on: 2010/4/4 14:52
|
|||
|
_________________
Don Haller Corvette Club of America 94Coupe, 383Stroka, PeteK Trans, 3000stall, 3.54rear, Konis and bigger sways. |
|||
 Transfer Transfer
|
|||
| bogus | Re: 1989 L98 Engine rebuild - Part 1: removal | ||
|
Grand Imperial Pooh-Bah
 |
Oh, you need one of these:
 http://www.harborfreight.com/cpi/ctaf ... item.taf?Itemnumber=94702 I have learned that you will want to fill it with this:  http://www.homedepot.com/h_d1/N-5yc1v ... eId=10051&catalogId=10053 You see, conventional Simple Green will attack certian metals. Think magnesium. I had a thread on this last summer, too. However, this version is the same as the aircraft version and won't harm the metals. |
||
Posted on: 2010/4/4 18:46
|
|||
|
_________________
The single biggest problem with communication is the illusion that it has taken place. - George Bernard Shaw Education is the best tool to overcome irrational fear. - me |
|||
 Transfer Transfer
|
|||
| Matatk | Re: 1989 L98 Engine rebuild - Part 1: removal | ||
|
Webmaster
 
|
Kevin - I had already wanted to rebuild it in conjunction with my top end rebuild. I am of the notion that you should refresh everything on a higher mileage car when you're doing that. Just my opinion. Of course it was covered in gunk from years of oil leaks. I was also concerned about some metal, possibly bearing, shavings in the oil change. I thought the head gasket might be weeping, but turned out to be ok.
Don - I took one break the first day to get some lunch and run to the store for my wife. Maybe an hour and a half or so. Worked from 8:30 til 9 pm the first day. Second day I only worked about 3 hours total, pulled it out and got in on the stand and stripped. Andy - I have an old utility sink that I plan on using as my parts washer. I do remember your magnesium issue with the simple green, so thanks for the suggestion on the other formulation. Oh, and regarding the swivel sockets - I checked out the craftsman ones, they were like $70 a set, the one 9/16th was $10 alone. A set of 8 or 9 HF Pittsburgh swivel sockets is $24.99. Guess I know which one I'll be getting. http://www.harborfreight.com/cpi/ctaf ... item.taf?Itemnumber=40985 Matthew |
||
Posted on: 2010/4/5 0:51
|
|||
|
_________________
2002 EBM convertible, Magnusson supercharger, cam, headers, etc. 1989 Corvette...RIP |
|||
 Transfer Transfer
|
|||
| RickAnthony | Re: 1989 L98 Engine rebuild - Part 1: removal | ||
|
ASE Master Certified
 
|
Quote:
Yea the utility sink would work for using simple green, but if you wanted to use more of a solvent, I'm not sure how the plastic would hold up long term ect. If I had the space I'd probably want a parts washer as well in the garage. But for now I don't really need it enough and I can always take stuff to work and do it of break.. Pulling this motor was def. a good learning experiance no doubt. You've had a good percentage of your car apart already. your quickly catching up to me, if not passed me up LoL... Can't wait till you do the trans that will be fun! It's not as bad as everyone makes it out to be once it's on the bench, just takes some technique like everything else... -=Rick |
||
Posted on: 2010/4/5 1:00
|
|||
|
_________________
My Automotive Blog autoserviceupdated.blogspot.com CORVETTE SERVICE & REPAIR RickAnthonyMotorsports.NET |
|||
 Transfer Transfer
|
|||
| BillH | Re: 1989 L98 Engine rebuild - Part 1: removal | ||
|
The Stig Moderator
 |
Quote:
That's the one I have only mine's 18 years old. The only problem I've had is the safety strut that holds the lid open broke 10 years ago. I really don't care, only an idiot would leave the top open when it's not in use. Hint, put an old speaker magnet right beside the pump inlet, it helps a bit. An electric solvent pump from HF has lasted 18 years,who'da thunk it? I've been wanting to try that SG but don't plan to use it in the tank, I have the good stuff in there. |
||
Posted on: 2010/4/5 1:20
|
|||
|
_________________
Every man dies but not every man lives. |
|||
 Transfer Transfer
|
|||
| Matatk | Re: 1989 L98 Engine rebuild - Part 1: removal | ||
|
Webmaster
 
|
Quote:
Yeah.....I had a dream the other night that you bought a used 700 trans for $100 that was blown up and brought it over to my house so we could build it. It's a sign! I've been kicking it around, depending on what the turn around time on the machine shop is. Matthew |
||
Posted on: 2010/4/5 1:25
|
|||
|
_________________
2002 EBM convertible, Magnusson supercharger, cam, headers, etc. 1989 Corvette...RIP |
|||
 Transfer Transfer
|
|||
| RickAnthony | Re: 1989 L98 Engine rebuild - Part 1: removal | ||
|
ASE Master Certified
 
|
Quote:
Dreaming about me again wtf? LoL.... Hell yea I'd say call vette2vette and lets get one and build it! If it's on the bench it doesnt take that long to build one, just get a big bench to lay everything out on! A GOOD set of snap ring pliers and a few other things... |
||
Posted on: 2010/4/5 23:57
|
|||
|
_________________
My Automotive Blog autoserviceupdated.blogspot.com CORVETTE SERVICE & REPAIR RickAnthonyMotorsports.NET |
|||
 Transfer Transfer
|
|||
| Matatk | Re: 1989 L98 Engine rebuild - Part 1: removal | ||
|
Webmaster
 
|
I actually found a guy that builds transmissions for work that will give me a killer price. I'm mulling it over.
Matthew |
||
Posted on: 2010/4/6 1:34
|
|||
|
_________________
2002 EBM convertible, Magnusson supercharger, cam, headers, etc. 1989 Corvette...RIP |
|||
 Transfer Transfer
|
|||
| RickAnthony | Re: 1989 L98 Engine rebuild - Part 1: removal | ||
|
ASE Master Certified
 
|
Quote:
What!?!? I thought you wanted the learning experiance? It's not that big of a deal, for the parts you could spend around $200 in parts maybe a little more depending on if you want to replace your drum ect. and anything that might be worn.. Plus wouldn't you like to take 300+ pics of the inside of your trans? BTW you could also install a higher stall/performance converter for around $250. Might not be a bad idea with the new cam ect. as your power band will be raised. Just depends on what you want the new power for... drag strip mostly & street or going road course.. a higher stall would probably fit you.. unless you plan on doing road course then it really hurts the driveability and trans. You may also want to install a trans cooler with or without doing any other trans work with all the heat going on in there.. I would reccomend a hayden stacked plate design cooler. For your use I would probably stick with a 2200-2400 stall speed.. I have a 2600 in mine, but it can be a bit much especially when I was running the 3.75 gears. Another thing about higher stall speed converters, is that like on our cars that feature a "lock-up" or torque converter clutch.. the fuel economy on the highway really isn't effected, though around town it will be.. -=Rick |
||
Posted on: 2010/4/6 4:19
|
|||
|
_________________
My Automotive Blog autoserviceupdated.blogspot.com CORVETTE SERVICE & REPAIR RickAnthonyMotorsports.NET |
|||
 Transfer Transfer
|
|||
| Matatk | Re: 1989 L98 Engine rebuild - Part 1: removal | ||
|
Webmaster
 
|
Well the motor is sitting in the back of my BIL's pickup truck waiting for delivery to the shop tomorrow.
Matthew |
||
Posted on: 2010/4/7 3:10
|
|||
|
_________________
2002 EBM convertible, Magnusson supercharger, cam, headers, etc. 1989 Corvette...RIP |
|||
 Transfer Transfer
|
|||
| Matatk | Re: 1989 L98 Engine rebuild - Part 1: removal | ||
|
Webmaster
 
|
I dropped off the block at the builder tonight. He's gonna get started in the morning. Excited!
Matthew |
||
Posted on: 2010/4/8 1:32
|
|||
|
_________________
2002 EBM convertible, Magnusson supercharger, cam, headers, etc. 1989 Corvette...RIP |
|||
 Transfer Transfer
|
|||
| flyboy | Re: 1989 L98 Engine rebuild - Part 1: removal | ||
|
Elite Guru
 |
Hopefully you'll see some results sooner rather than later.
|
||
Posted on: 2010/4/8 2:10
|
|||
|
_________________
'91coupe, LT4Hotcam, some other stuff. If it's too loud, you're too old. "He works on old cars, then junks 'em" |
|||
 Transfer Transfer
|
|||
| RickAnthony | Re: 1989 L98 Engine rebuild - Part 1: removal | ||
|
ASE Master Certified
 
|
Quote:
I'm hoping so too! we gotta get that beast going again soon, I'm anxious to try the drag strip again... -=Rick |
||
Posted on: 2010/4/8 4:21
|
|||
|
_________________
My Automotive Blog autoserviceupdated.blogspot.com CORVETTE SERVICE & REPAIR RickAnthonyMotorsports.NET |
|||
 Transfer Transfer
|
|||
You can view topic.
You cannot start a new topic.
You cannot reply to posts.
You cannot edit your posts.
You cannot delete your posts.
You cannot add new polls.
You cannot vote in polls.
You cannot attach files to posts.
You cannot post without approval.
|
|


